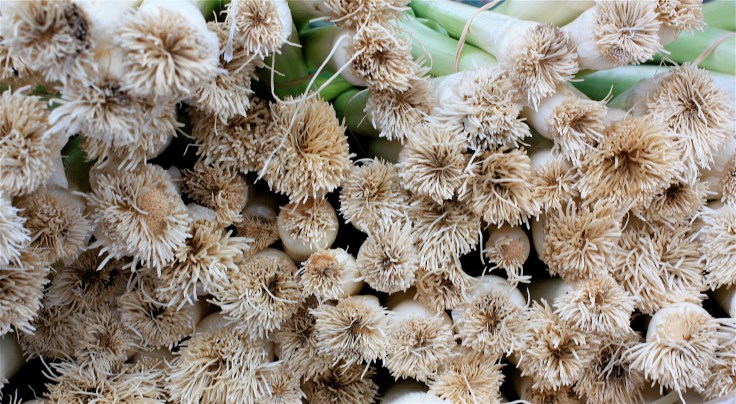
Sweeter and milder than onions, leeks make a lovely, creamy and delicious fall soup loaded with bucketful’s of fresh market garden vegetable healthy goodness like carrots, onion, potato and celery and a dollop of Naramata Bench wine for added flavour.
Some assembly required
8 medium leeks (3 pound), trimmed, leaving white and pale green parts only, and chopped
1 medium onion, chopped
1 large carrot, chopped
2 celery ribs, chopped
1 teaspoon salt
1/2 teaspoon black pepper
1/2 cup butter
1 small potato
1/2 cup dry white wine…I chose Tightrope Winery’s 2015 Pinot Gris (Why not use a nice wine as you only need a 1/2 cup and the Chef can appreciate it a wonderful glass or two while cooking.)
3 cups chicken or turkey stock …I used my homemade turkey stock frozen from my Thanksgiving turkey
3 cups water
1 bay leaf
1 1/2 cups fresh flat-leaf parsley leaves…still growing in my garden luckily
1/4 cup all-purpose flour
1/2 cup chilled heavy cream
Directions
Wash sliced leeks in a large bowl of cold water and lift out and drain well in a colander. Leeks collect a lot of dirt and sand generally so need a good wash. My market leeks were perfectly clean which was a bonus. Cook leeks, onion, carrot, celery, salt, and pepper in 4 tablespoons butter in a large heavy pot over moderate heat, stirring occasionally, until softened, about 8 minutes.
Peel potato and cut into 1/2-inch cubes, then add to onion mixture along with wine, stock, water and bay leaf. Bring to a boil, then reduce heat and simmer, partially covered, until vegetables are tender, about 15 minutes.
Stir in parsley and simmer soup, uncovered, 5 minutes. Discard bay leaf and keep soup at a low simmer.
Melt remaining 4 tablespoons butter in a 1-quart heavy saucepan over moderate heat, then add flour and cook roux, whisking, until golden, about 3 minutes. Remove from heat and add 2 cups simmering stock (from soup), whisking vigorously, then whisk mixture into remaining soup and return to a simmer, whisking.
Simmering soup before blended.
Blend soup in 4 batches in a blender until smooth. Reheat if necessary, then season with salt and pepper. Any leftover soup freezes well. (Don’t add the cream topping before freezing).
Beat cream in a bowl with an electric mixer until it almost forms soft peaks. Serve soup topped with cream. A dollop of sour cream would also work well.
Literally dozens of ginger cookie recipes carefully filed away are now in the recycling. I have found it. Best-ever ginger cookies that more than live up to their name.
It’s hard to pin down what makes this recipe so good. I think it’s the combination of the spices and of course, butter.
Ingredients
2 1/4 cups all-purpose flour
1 tsp baking soda
1 1/2 tsp good quality cinnamon
1 1/2 tsp ground ginger
1/2 tsp nutmeg
1/4 tsp allspice
1/2 tsp cloves
1/4 tsp black pepper
3/4 cup melted butter
1/3 cup brown sugar, packed
1/3 cup white sugar + 1/2 cup for rolling cookies
1 large egg yolk
1 tsp real vanilla extract
1/2 cup fancy molasses
Fit for a king
Preheat oven to 375F. Whisk the flour, baking soda and spices in a medium bowl and set aside. In a stand mixer with the paddle attachment, beat butter, brown sugar and 1/3 cup of white sugar together on high speed, until light and fluffy. Add the egg yolk and vanilla and continue mixing on a lower speed until blended. Add molasses and mix again for about 30 seconds. Scrape down the sides of the bowl and add the dry mixture, mixing on low speed until all the flour is incorporated. The dough will be soft and slightly sticky.
Roll dough into 1 tablespoon-sized balls and drop onto a plate containing 1/2 cup of white sugar. Roll cookies in sugar and press lightly to form a disk, making sure to coat both sides. Place on a parchment-lined baking sheet, spaced 1 inch apart. Bake one cookie sheet a time on the middle rack for 11 minutes. The cookies should come out of the oven with the traditional crackle appearance and looking slightly under-baked.
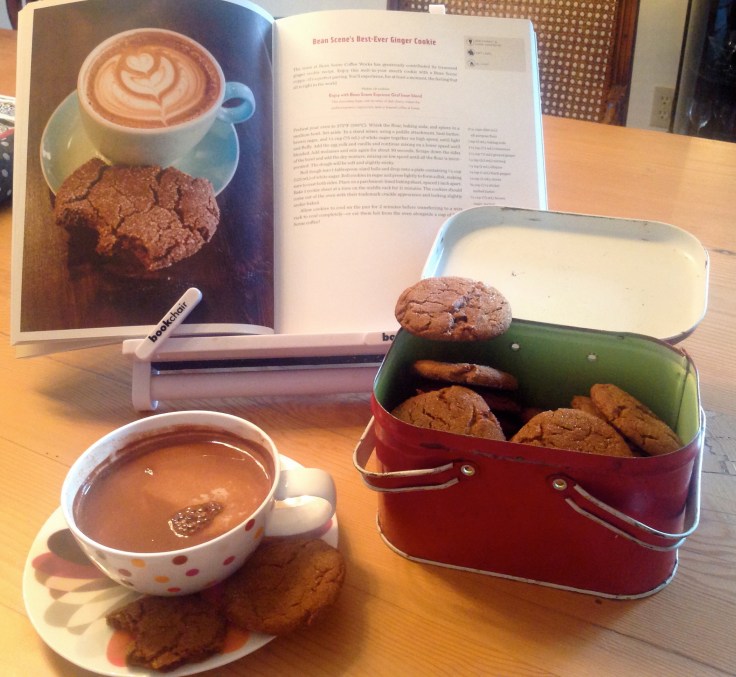
Best eaten warm with a lovely cup of coffee or hot chocolate.
I’m not kidding about these being the ginger cookies I’ve ever baked although I fully admit I’m prone to exaggeration. I love it when you can bake the best of the best of simple, traditional recipes… like the shortbread cookies I made yesterday which were elevated into another realm with the addition of fresh vanilla bean (French Laundry recipe).
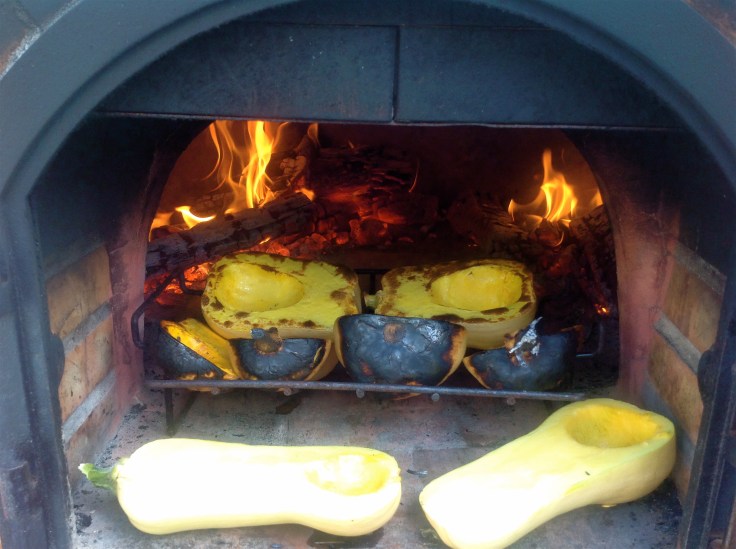
I used my wood-fired oven to roast the squash…a regular oven will do the trick too.
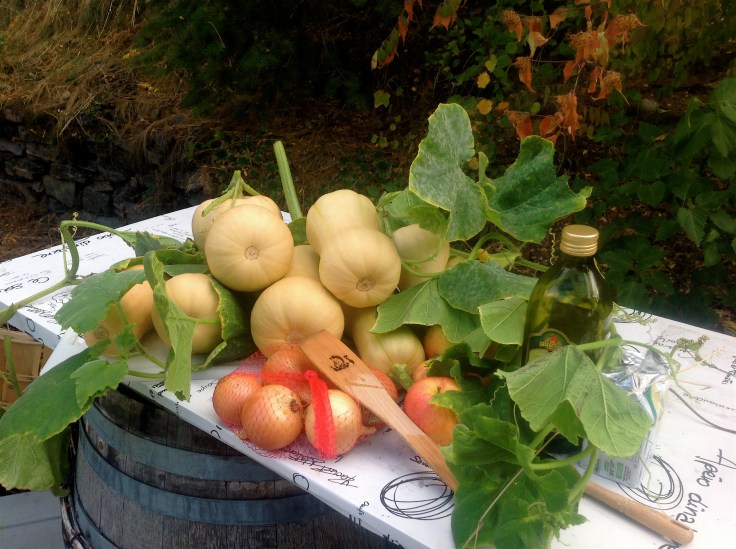
Only a few simple ingredients are needed for this recipe which can easily be scaled up if you plan to make a lot and freeze some.
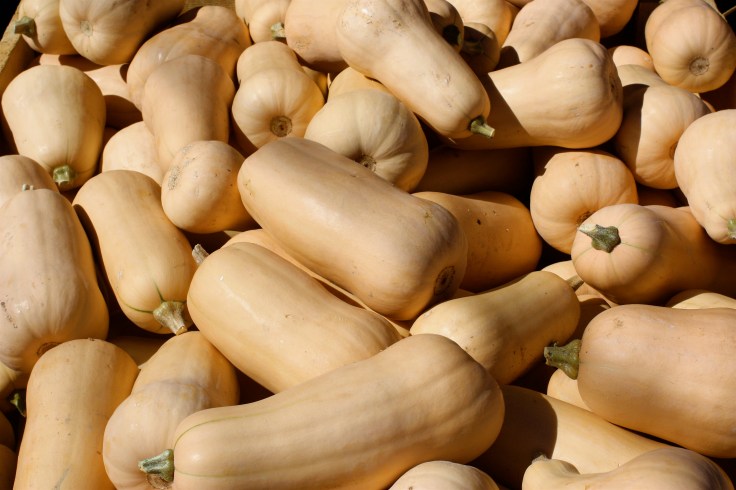
Butternut squash are inexpensive to buy and are a farmer’s market staple.I cook outside whenever possible. I get the whole idea of a summer kitchen. All the mess is easier to sweep off the deck.
Ingredients
4 cups roasted butternut squash (2 medium squash)
2 Tbsp olive oil
2 Tbsp butter
1/2 cup diced onion
1 apple and/or 1 pear
pinch cinnamon
1 to 2 teaspoons salt (to taste…important as some chicken stocks are very salty and you may want to only add 1 teaspoon of additional salt)
pinch of pepper
1/4 cup real maple syrup
3 cups chicken stock (substitute vegetable stock if you like)
1/4 cup cream or milk
1/4 cup sour cream (for garnish, optional)
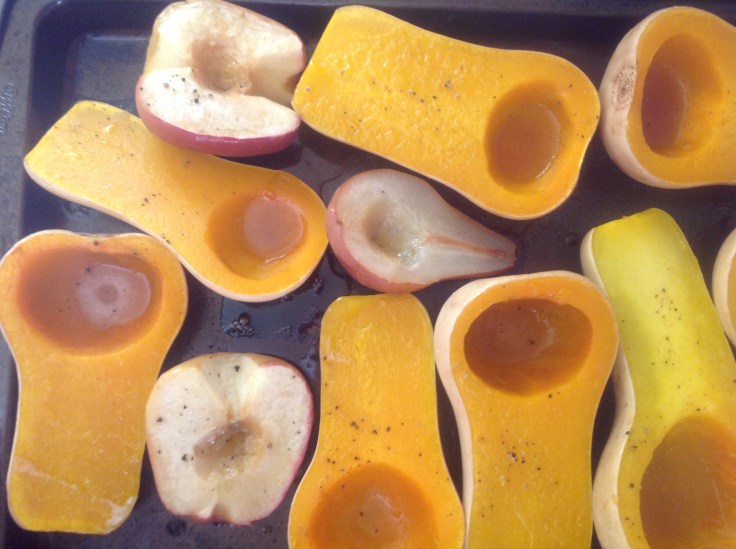
Here is a batch roasted in a conventional oven.
Instructions
Roast the squash, apple/and or pear: Preheat oven to 375° F. Cut squash and apple and/or pear in half lengthwise. Using a spoon, scoop out and discard the seeds and dark orange stringy flesh and the apple or pear core. Brush with a light coating of olive oil. Place squash and fruit cut side down on to a baking sheet. Roast in pre-heated oven for 55-60 minutes or until very soft when you press on the top of the squash.
Remove from oven and using a spatula, flip the squash halves and fruit halves over and allow to cool a few minutes. Using a spoon, scoop all the roasted squash flesh out and in to a bowl, being careful not to take any of the skin.
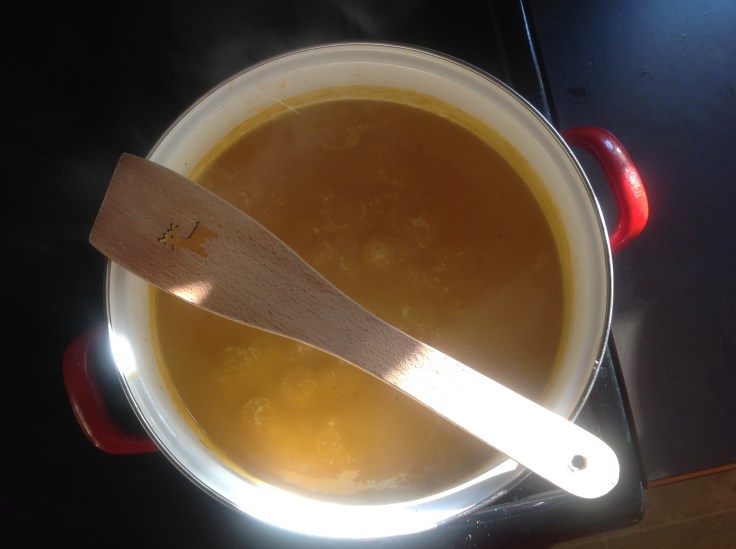
For the soup: In a large soup pot or Dutch oven, melt 2 Tbsp. butter over medium heat. Add diced onion and cook, stirring, until onion has softened and is translucent. Add the 4 cups of roasted squash and stir. Add the chicken stock (or vegetable stock) and stir to combine well. Bring to a light boil over medium heat, stirring occasionally, then reduce heat to medium-low and allow to simmer, uncovered, for 20-30 minutes to blend the flavours. Add in the maple syrup and cinnamon. Using an immersion blender or in small batches in a blender, puree the soup just enough to remove any big chunks. It doesn’t need to be perfectly smooth unless you like it that way.
Taste soup. Add salt as needed and some freshly ground pepper. You may wish to add a splash more maple syrup, again, if needed.
At this point I cool and freeze any soup I have made for later. (Do not add the cream or milk before freezing.) Before serving, heat up the soup again and add the cream or milk. Garnish with some chopped parsley or croutons and a tablespoon of sour cream. I like to add a side of homemade corn bread.
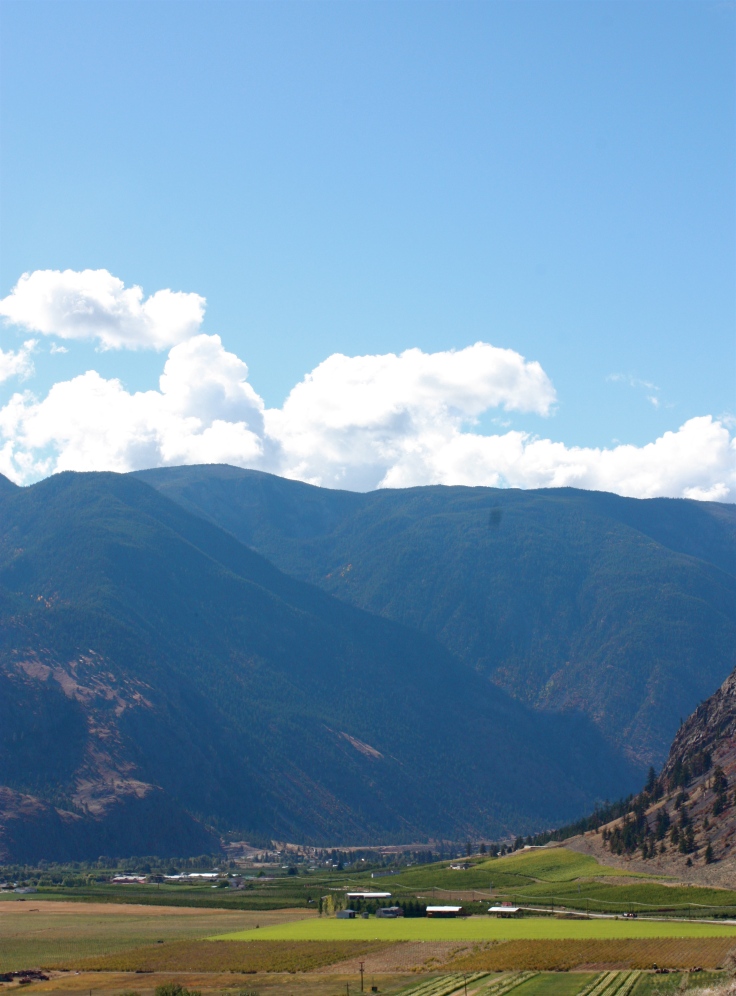
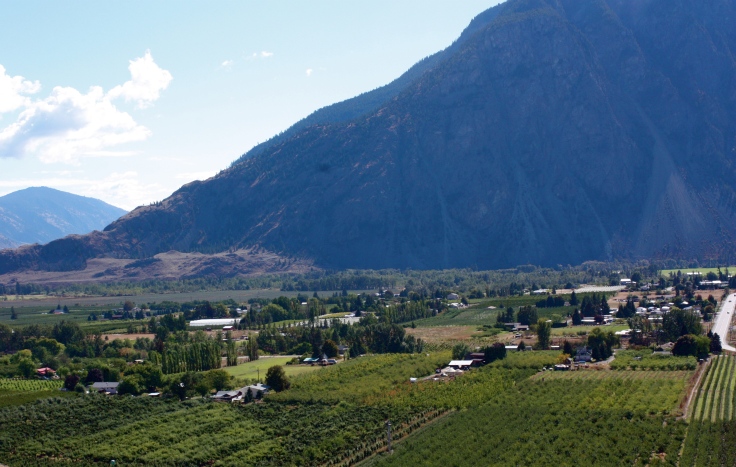
Keremeos in British Columbia’s fertile Similakameen Valley is bathed in sun and heat for 181 frost-free days resulting in the best tomatoes in the world and a price that will blow your socks off.
Top down to take advantage of the sun on the first day of fall, The Handyman and I head out from Naramata past Almost a Ranch, Foggy Mountain Ranch, Cedar Creek Ranch and the infamous Crazy Zach’s junk/antique on the way to the “Fruit Stand Capital of Canada” on our annual pilgrimage to bring home some summer to store for greyer days ahead.
I always feel a bit like Toad from the Wind in the Willows out for adventure on days like this…One of Zack’s treasures in a tomato red.
Harvest days.
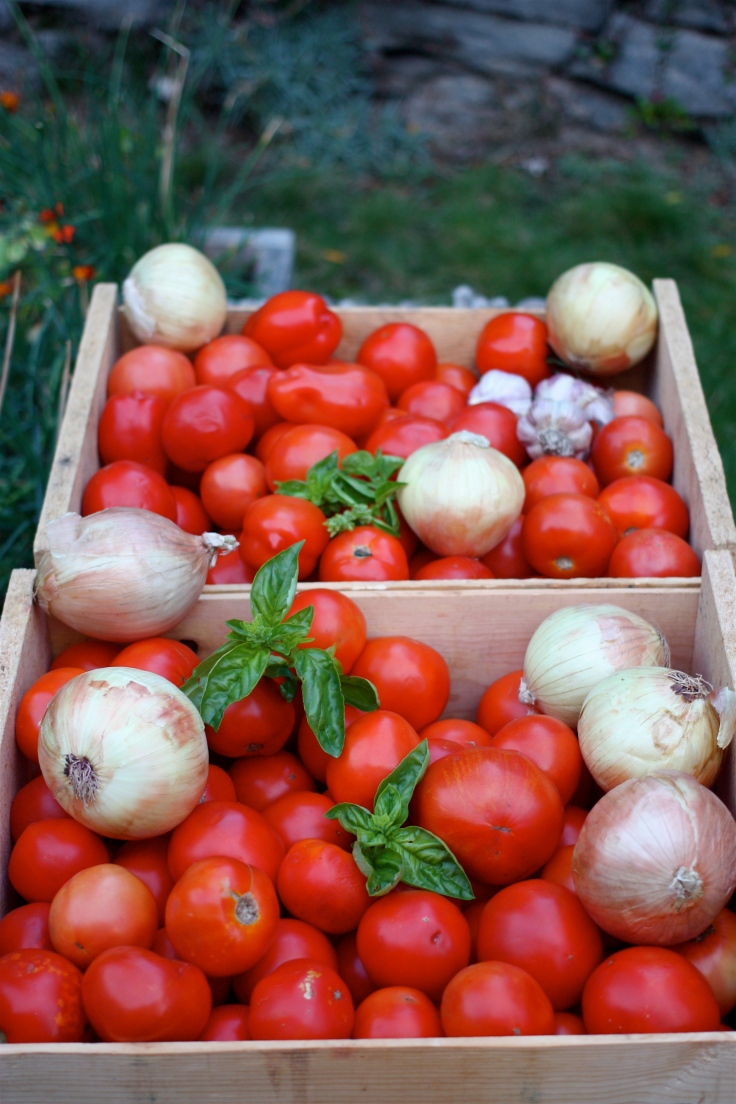
A still life in gourds.There is something about the light in the fall…These 40 lbs. of vine-rippened beauties cost a grand total of $9.98. Add in some Walla, Walla onions and red Russian garlic and your total is somewhere around $16 bucks.
Nonna’s secret tomato sauce recipe
(Disclaimer…I am not Italian and do not have a Nonna but if I did this would be her recipe…I have made this basic but lovely tomato sauce for years and it pays homage to Keremeos’ bounty. This makes a lot of sauce at one time and takes advantage of Farmer’s Market tomato prices.
20 lbs. of perfectly ripe tomatoes
3 or 4 large onions chopped
4 to 6 cloves of garlic chopped
1/2 cup of Similkameen honey
2 tablespoons dried oregano
2 tablespoons salt (or to taste)
2 tablespoons fresh thyme
1/4 cup of fresh basil
2 teaspoons pepper
splash of olive oil (if freezing your sauce, omit if canning)
If you are freezing your sauce you could also choose to add in peppers, mushrooms…Don’t add in if canning as the additional fresh vegetables will change the pH so it’s unsafe for water-bath canning…
You can either can or freeze this recipe. If canning, omit the olive oil (very important) and follow standard canning direction adding 2 tablespoons of lemon juice to each quart jar after filling. This ensures that the sauce will be safely acidic.
Soften onions and garlic in a splash of olive oil (if freezing sauce) or in a small amount of water in a heavy large pot. (I actually use two large pots, dividing the onions and garlic between them, as one won’t hold 20 pounds of tomatoes.) While the onions are softening, begin preparing your tomatoes.
Add tomatoes in batches to a pot of boiling water for about minute and transfer to a cold water bath (I use the sink). This will make peeling easy… the skin will just slip off. Take a paring knife and cut out the stem end and remove the peeling skin and discard. I then give each tomato a bit of squeeze to eliminate some of the juice so you will have a nice thick sauce. Add the peeled, squished tomatoes to the onions, bring to a boil and then simmer.
Once all your tomatoes have been added to the pot or pots, add in your seasoning reserving the fresh herbs until the sauce has finished cooking. Simmer on low for two to three hours until your sauce reaches your desired thickness. Be sure to taste and adjust your salt and pepper if necessary.
If you like a smooth, uniform sauce, add the cooled sauce to a blender for 30 seconds or so. Add about three cups to each freezer bag and place all the bags on a cookie sheet (to prevent leakage in your freezer) and freeze. Remove the cookie sheet after your sauce is frozen. If you prefer to can your sauce, load your jars, add the lemon juice and place in a canner and boil for 35 minutes. (Do some canning research if you haven’t canned before so you know how to sterilize your jars and so on…)
Tomato-coloured pot not necessary but awesome right?
This three-layer carrot cake has three cups of carrots and a cup of pineapple and the cream cheese frosting is livened up with lemon zest and fresh lemon juice.
Every birthday deserves a home-made layer cake. Making one for my daughter Lizzie gives me as much pleasure as it gives her, more really. Healthy lifestyles are super important to our family but come on… it’s a birthday and a once-a-year excuse to pull out all the stops.
Fresh garden carrots and pineapple make this cake deliciously moist.
Carrot cake ingredients
2 1/4 cups all-purpose flour
2 tsp baking powder
2 tsp baking soda
2 tsp cinnamon
3/4 tsp salt
3/4 cup grapeseed oil
1 1/4 cup granulated sugar
1/2 cup firmly packed brown sugar
4 large free run eggs
3 cups shredded carrots
1 cup crushed pineapple, drained
Pre-heat oven to 350F and grease and flour three 8-inch cake pans.
Sift together the flour, baking powder and salt and set aside. In the bowl of a stand mixer fitted with the paddle, beat together the oil and sugars for 2 minutes and turn the mixer to medium-low and add the eggs, one at a time. Add the flour mix in two batches and mix until just incorporated. Add carrots and pineapple and mix until just combined. Evenly divide the batter among the three pans and bake for 25 to 30 minutes, or until a toothpick inserted into the centre of the cakes come out clean. Cool and remove from the pans.
The addition of lemon adds a nice zest and pretty colour to the frosting.
Lemon cream cheese frosting
4 ounces softened cream cheese
1/2 cup butter at room temperature
3 1/2 to 4 cups sifted confectioners’ sugar
2 tsp finely grated lemon zest
2 tsp fresh lemon juice
1/2 tsp pure vanilla
In the bowl of a stand mixer with the paddle attachment, beat the cream cheese and butter on medium speed until smooth. Turn the mixer to low, gradually add the confectioners’ sugar, lemon zest, lemon juice and vanilla and mix until fluffy.
Vanilla Swiss Meringue Buttercream ingredients.
Buttercream
1/2 cup plus 2 tbsp large egg whites
1 1/4 cups granulated sugar
2 cups butter at room temperature, cubed
2 tsp pure vanilla extract
few drops of yellow food colouring
Place the egg whites and sugar in the bowl of a stand mixer and whisk together by hand to combine. Place the bowl on the top of the a saucepan filled with a few inches of water on medium-high heat to create a double boiler. Whisking intermittently, heat the eggs mixture until it registers 160F or is hot to the touch. Once hot, fit the bowl onto your mixer and whisk the egg white mixture about 8 to 10 minutes. The mixing bowl should be room temperature and the eggs should hold a medium-stiff peak when done. Swap out the whisk for a paddle attachment and add the butter a bit at a time with the mixer on low. Once all the butter is added, turn up the mixer and beat until smooth for about 3 to 5 minutes. Add a few drops of yellow food colouring to achieve a light lemon colour.
Some assembly required
Choose which will be your bottom layer and place it on a cake plate. Spread half the cream cheese frosting with an offset spatula. Top with another layer and spread the remaining frosting. Add the final layer and ice the top and sides of the cake with the vanilla buttercream. Make the spun-sugar decoration just before serving as it will only hold its shape for a short time.
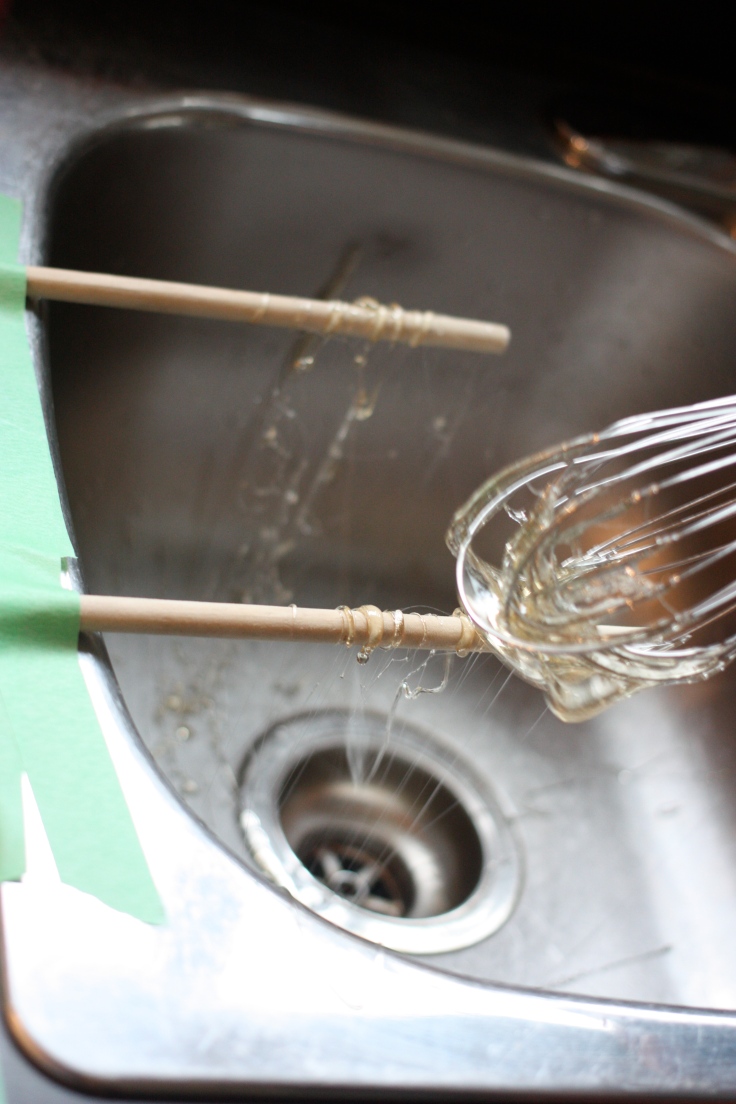
Secure two wooden spoon handles to your sink with tape.
Spun sugar
2 cups granulated sugar
1/2 cup light corn syrup
Secure two wooden spoon handles with tape over your sink. Add the sugar, corn syrup and 1/2 cup of water to a saucepan and heat on medium-high until the mixture reaches 300F, about 10 to 15 minutes. Meanwhile prepare an ice bath in a large metal bowl and set aside. As soon as the sugar reaches 300F remove from the heat and submerge the bottom of the pan in the ice bath. Let it stand about a minute and then dip a wire whisk into the sugar and wave it back and forth over the spoon handles. Working as you go, gather the strands and shape into a round shape with your hands about the size of your cake and add to the top of your cake.
Your spun sugar will dissolve if you refrigerate your cake…Lovely Lizzie Lemony Carrot Cake!
Give us our daily banana bread…but please add Quebec maple syrup.
Even non banana bread lovers will be won over with this Canadian version sweetened with maple syrup and topped with a maple, nut crumble. So good eh?
Don’t even consider using anything but real Quebec maple syrup.
Crumble
3/4 cup of nuts, lightly toasted and finely chopped. You can use walnuts, pecans or flaked or slivered almonds.
2 teaspoons of Quebec maple syrup
1/2 cup of brown sugar
1/4 cup all-purpose flour
1/4 tsp cinnamon
1/4 cup softened butter
Combine all ingredients except the butter in bowl. Add the butter and mix with your fingertips until the crumble is just moistened and set aside.
Bread
Preheat the oven to 350F and butter a six-cup (1.5 litre) 10 x 4-inch loaf pan and line it with a sheet of parchment paper, letting it hang over both the 10-inch sides.
1 1/4 cups very ripe bananas, mashed with a fork (about 3 bananas)
3/4 cup Quebec maple syrup (Aunt Jemima’s? Forgetaboutit)
1/2 cup butter, melted and cooled
2 eggs
2 cups all-purpose flour
1 tsp baking soda
1/4 tsp salt
Whisk together the bananas, maple syrup, butter and eggs and set aside. In a large bowl, combine the flour, baking soda and salt. With a wooden spoon or spatula, stir in the banana mixture until the batter is just moistened.
Spread the batter in the prepared pan. Sprinkle on the maple crumble. Bake for about 1 hour and 15 minutes or until a skewer inserted in the middle of the loaf comes out clean. Cool completely on a wire rack before lifting from the pan by the parchment paper.
Juicy blackberries from our berry farm, red wine and chocolate give this cake a rich flavour punch.
The blackberries are the last of our berry crops and one of the most beautiful. Their size and juiciness is a marvel enjoyed by us and our bear visitors so picking as soon as they are ripe is important. This very Naramata cake recipe combines our berries with red wine and was a perfect late summer cake for my good pal Janet’s birthday.
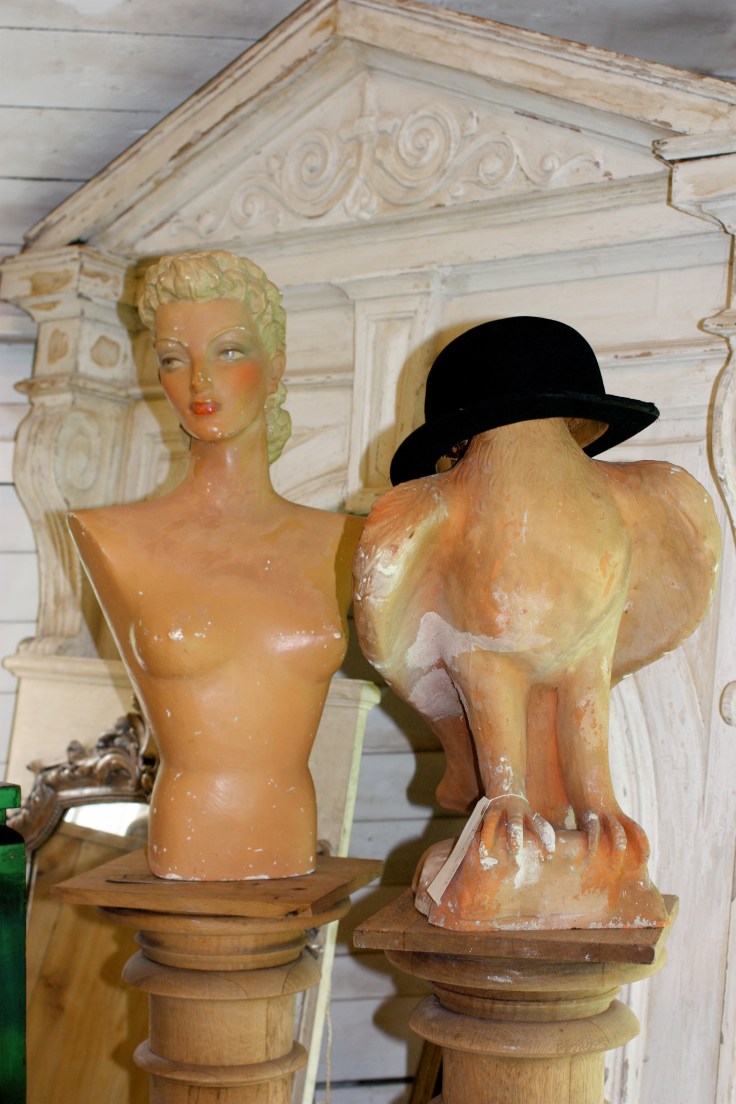
Succulent blackberries before picking.Mis en place for the red wine cake with my new antique cupboard from Arundel, England in the background.
Lips that touch wine will never touch mine. Come on, who wrote that nonsense. I suppose they don’t like cake or chocolate either.
I sent The Handyman off to the Naramata store for a bottle of red with a good price point for it’s cake ingredient fate and he came back with a $10 bottle which I was worried was too good to be true…even for a cake. Surprisingly, Bodacious was pretty darn good in the cake and in the chef’s glass.
This recipe makes one three-layer 6-inch cakes that served our party of 10 perfectly with no left-overs.
Red wine cake
1 1/2 all purpose flour
1/2 cup plus 1 tbsp unsweetened cocoa powder (I like Droste, amazing chocolate…)
3/4 tsp baking soda
1/2 tsp baking powder
1/2 tsp salt
3/4 cup unsalted butter at room temperature (never skip the room temperature step…if you don’t have time…put the butter in a bowl in a warm water bath in your sink to soften it up)
1 1/2 cups granulated sugar
1 tsp pure vanilla extract
2 large eggs
1 large egg yolk
1 cup full-bodied red wine
Pre-heat the oven to 350F and grease and flour three 6-inch cake pans and set aside. I did it the hard way and used my one and only 6-inch pan and made the cake in three batches.
Sift together the flour, cocoa powder, baking soda, baking powder and salt and set aside.
In the bowl of a stand mixer fitted with the paddle attachment, beat the butter on medium until smooth. Add the sugar and mix on medium-high until the butter is light and fluffy, 3 to 5 minutes. Stop the mixer and scrape the bowl.
Turn the mixer to low and add the flour mixture in three batches, alternating with the red wine, while taking sips from your wine glass in between, beginning and ending with the flour mixture. Mix on medium for no more than 30 seconds.
Evenly divide the batter among the prepared pans and bake for 23 to 25 minutes or until a toothpick inserted into the centre of the cakes comes out clean. Cool on a wire rack for 10 to 15 minutes before removing the cakes from their pans.
Blackberry ganache ingredients.
Blackberry ganache
3 cups whole fresh blackberries
2 tbs granulated sugar
1 cup chopped good quality bittersweet chocolate
3/4 cup confectioners’ sugar, sifted
Place the blackberries and granulated sugar in a saucepan. Heat over medium-high until the berries start to break down and expel their juices, about 10 minutes. Remove the pan from the heat and strain the juice through a fine-mesh sieve set over a bowl. Discard the solids.
Place the chocolate in a heat-safe bowl and set aside. Reheat 6 tablespoons of the blackberry juice in the saucepan until it begins to simmer (reserve the remaining blackberry juice for finishing the cake). The simmering juice smells amazing p.s. Pour the hot juice over the chocolate. Let sit for 30 seconds, then whisk until combined. Set aside until the ganache cools to room temperature but is still spreadable.
Once the ganache has cooled, whisk to loosen it and stir in the confectioners’ sugar until smooth.
A Naramata evening walk while the cake cools. This view of the lake is on our regular walking route. Never gets old.
Some assembly required
Once the cakes have cooled completely, level them and choose which layer will at the bottom. Generously brush the layers with the remaining blackberry juice. Place the bottom layer on a cake plate or serving dish. Spread about 1/3 cup of the blackberry ganache with an offset spatula. Top with the next layer of cake and repeat with the ganache, finishing with the final layer. Frost the top and sides of the cake with remaining ganache and top with the whole blackberries.
Review
This is an excellent cake from a few standpoints. It’s relatively easy to make as the filling between the layers and the icing is one recipe. It looks great with the blackberry topping and doesn’t involve mad piping skills. Verdict on the taste was a 10 at the party it was served at…”rich, moist, earthy and chocolatey”. I will make this one again.
This recipe comes from fellow Canadian’s Tessa Huff’s amazing book, Layered. Every cake I’ve made from this book has been stellar. Her easy to follow instructions will make you a better baker. As Tessa says, “layer cakes are the ideal vehicle for both creative expression and deliciousness…And let’s fact it — everyone loves a layer cake…It’s time to toss the cake mix and canned frosting and reach the height of your cake-baking potential!” Cheers to that.
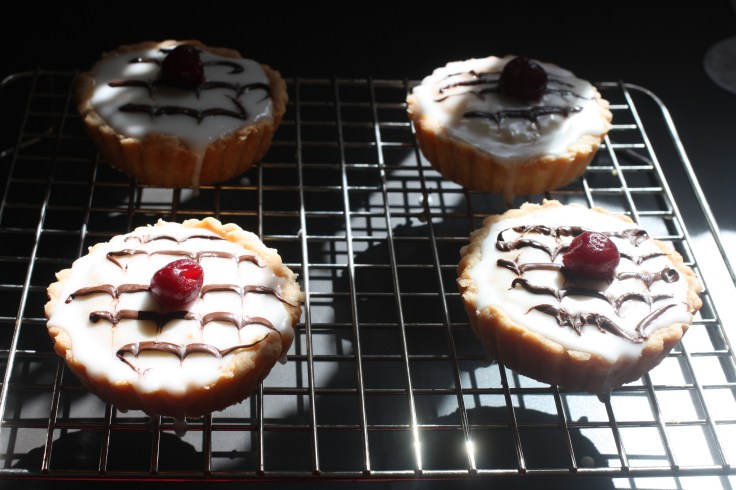
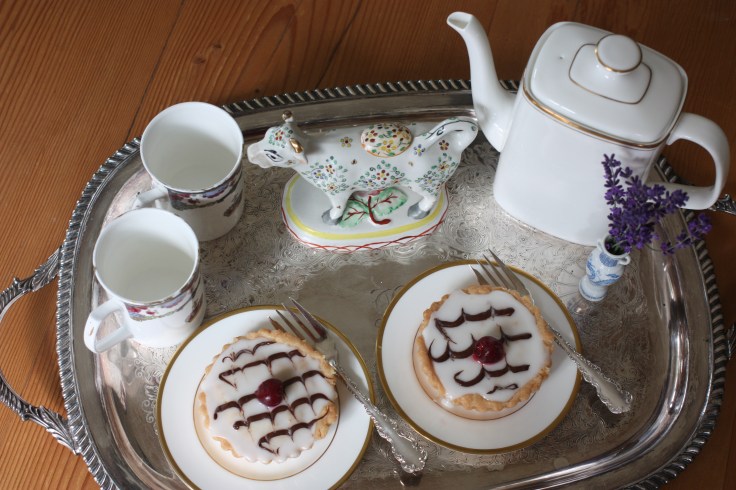
The recipe for these delectable pastry, jam, sponge-and-almond filled tarts comes from Belinda’s tea room in the beautiful castle town of Arundel in West Sussex, England.
Belinda’s Tea Room has been serving up the best of English tea goodies for more than 100 years in a building that originally served as a stable in the 16th Century in the incredibly beautiful historic town of Arundel, England. Introduced to us by The Handyman’s Aunt Ann and Uncle John, Belinda’s is a much-anticipated stop on all our visits to England. Our trip this summer to swim the English Channel on a relay team with friends called for a “double crossing.” We celebrated our swim from England to France with morning tea at Belinda’s, some antique shopping, a tour of Arundel Castle and a second crossing of Tarrant Street for a Belinda’s lunch. My new favourite, Bakewell tart, is served warm with custard and the proprietress graciously shared her secret recipe with me of this magical English invention.
A trip to Belinda’s is just as much about the atmospheric historic building as it is about its teas and cakes.
A bit of Bakewell Tart history…
Despite my idea that a Bakewell is a dessert that is simply baked well, Bakewell is a market town in the Derbyshire Dales district of Derbyshire, England. The town is named after a guy called Badeca and the name means Badeca’s spring or stream (Old English wella). The Bakewell tart started life as a happy accident in pudding form in 1820 when the landlady of the White Horse Inn left instructions for her cook to make a jam tart with an egg and almond paste base. The cook, instead of stirring the eggs and almond paste mixture into the pastry, spread it on top of the jam. The tart version of this accident is made with a shortcrust pastry, an almond glaze topping and an almond sponge and jam filling.Too much information? Get down to the darn recipe already?
Grease and flour one 23cm tart pan or four 10cm tart pans
Shortcrust pastry
All-purpose flour 215 grams
Icing sugar 30 grams
Unsalted butter 120 grams
Egg yolks (free run) 2
Cold water 2 tbsp
Place all the dry ingredients in the bowl of your food processor and give them a quick pulse. Add the butter and pulse until the mixture resembles bread crumbs. Add the egg and water and pulse a few times until the mixture starts to come together. Gather into a ball and wrap in plastic wrap and place into the fridge until required (at least an hour to chill).
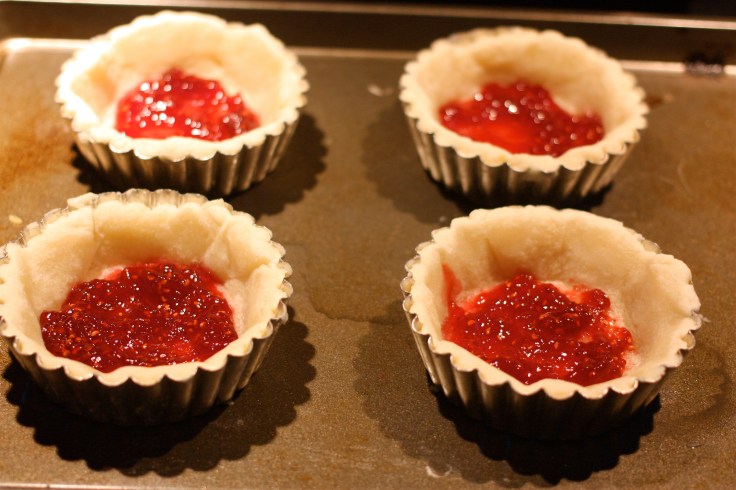
Pre-heat oven to 350F and roll out the pastry. Roll the pastry onto your rolling pin and carefully drape over the tin or tins, easing the pastry into position and trimming off any excess from around the edges. Prick the surface of the pastry with a fork and cover with a sheet of parchment. Fill the centre or centres with baking beans, pie weights or rice and blind bake for 15 minutes.
Once the pastry has been removed from the oven spread 2 tbsp of high-quality raspberry jam evenly over the base.
Frangipane ingredients
Frangipane
Unsalted butter 75 grams
Caster sugar (super-fine or fruit sugar) 75 grams
(note…you can make this from regular granulated sugar by using your coffee grinder and grinding for 20 seconds or so…don’t grind too long or you will end up with icing sugar)
Ground almonds 75 grams
All-purpose flour 1 tbsp
Almond extract 1 tsp
Lemon zest finely grated from 1 lemon
Egg, free-range 1
Pre-heat oven to 350F. Cream together the butter and sugar until pale and fluffy, this takes about 5 minutes in a kitchen mixer fitted with a paddle, or a little longer with a hand mixer. Fold in the remaining ingredients and place the mixture in a disposable piping bag. Cut the end off the bag and make a hole about 12mm wide and pipe the mixture evenly into the pastry case over the jam layer. Smooth out gently using a palette knife or spatula. Place the tart tin or tins on a baking sheet and bake for 25 to 30 minutes until the filling is golden. Test with a skewer in the centre, it should come out clean and the frangipane should be firm to the touch.
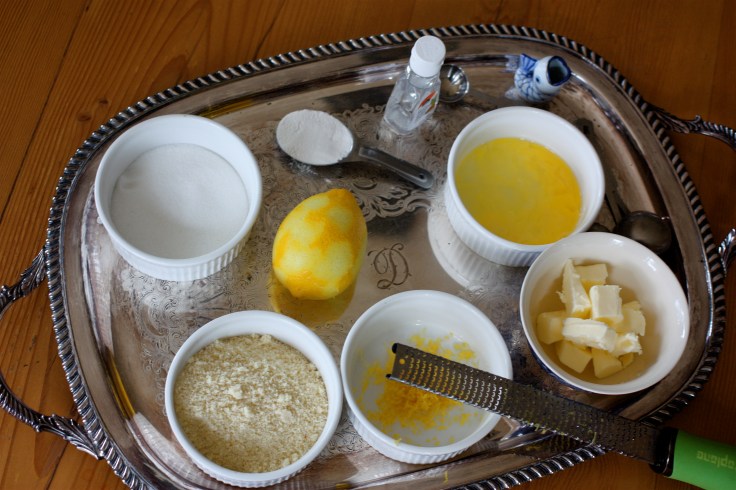
Cool before frosting.Just a few simple ingredients and some good quality chocolate are needed for decorating.
Icing
Icing sugar 200g
Almond extract 1tsp
Glace cherry or cherries
Good dark chocolate 100g
Mix the icing sugar and almond extract together and add a little water until you have a thick, smooth fondant. Pour the fondant into the tart tin or tins and level with the top. Pipe parallel lines of melted chocolate on the tart and then drag a toothpick across the lines to create a feathered effect. Place the cherry in the centre.
The original Belinda’s BakewellMy Bakewell Tart which The Handyman has dubbed Tastesgreat Tart
Belinda’s recipe translated beautifully but the atmosphere of the tea room in Arundel is only a nice memory in my Naramata kitchen. Here a few photos of Arundel to give you an idea of what my favourite town in England is like.
View from Arundel Castle battlements of the market town built along the banks of the River Arun.Arundel Castle was built by the Normans to protect the wooded plain to the north of the valley through the South Downs.Arundel Castle is the seat of the Duke of Norfolk.Just a glimpse of the castle’s gardens.Antique shopping is great in Arundel.Too big for my suitcase…Naramata tea room in my kitchen…
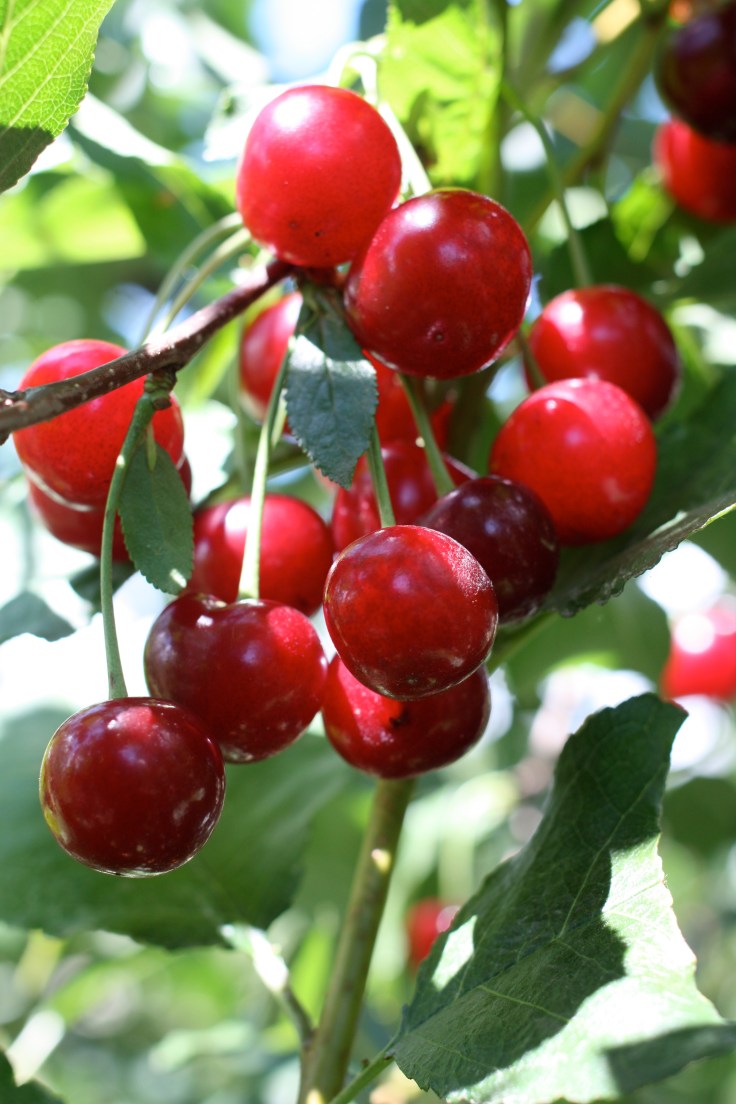
Balaton cherries ripe for the picking which I did just after I took this shot.
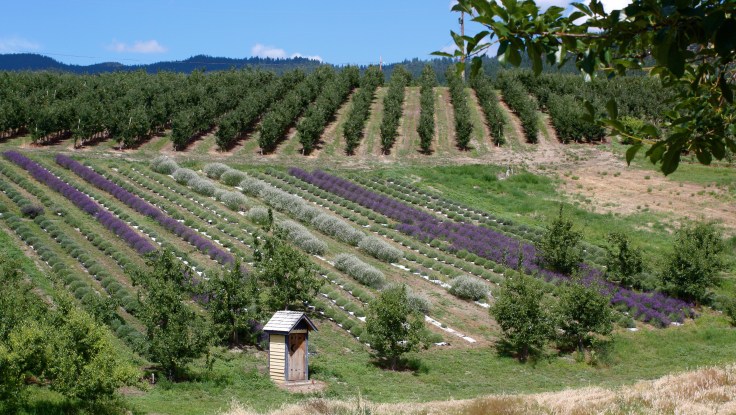
In a karma exchange I acquired 30 pounds of the most beautiful sour cherries known to man from Forest Green Man Lavender Farm in Naramata. I started some white lavender from cuttings for the farm in the spring and traded for these coveted puckery babies. The farm takes names every year for these Balatons, which originally hailed from Hungary, and they sell out. The catch, which really wasn’t a catch at all, was I had to pick them myself.
This was my view as I picked cherries.I’m a big fan of the raspberries and blueberries we grown but don’t you agree that cherries are the prettiest fruit going?
Then it got messy. Hot tip…wear something red.
Cherry pitting the old-fashioned way. It took about four hours to pit the 30 pounds. I did it outside and the deck looks like a CSI episode.This is about 15 pounds of cherries.
I made four pie fillings and froze them and then went on a jam-a-thon with a recipe that couldn’t be any easier. After pitting all the cherries they went into two large pots. I added the zest and juice of two fresh lemons to each pot and cooked them until wilted and soft, which takes about 20 minutes.
At this point, measure how many cups of cherries you have, including the juice and add them back into the pots with 3/4 cup of sugar per each cup of cherries. I added a dash of Kirsch to each pot as well because more cherry flavour is cherrier and one package of pectin crystals. The jam may have jammed without the pectin but I didn’t want to take any chances.
While the cherries are cooking, stick a small plate in the freezer to use to test the doneness of the jam. Remain on alert and stir often. Once the jam appears a bit thick and looks like it is beginning to gel put a small amount of the jam on the frozen plate and return to the freezer. After a few minutes, when you nudge it if it wrinkles, it’s done. If not, cook it some more and re-test…
Load your jam into sterilized jars. You can either decided to store your jam in the fridge and use it up within several months or boil it in a canner for 10 minutes, which I did as it’s pretty hard to use 24 jars in a few months. No half measures here.
I marked my jars with a Wine Glass Writer pen which is super cool. I can wash my label off and recycle my jars without dealing with the left-overs of a sticky label. Genius. Wish my hand-writing was prettier.
 Sweeter and milder than onions, leeks make a lovely, creamy and delicious fall soup loaded with bucketful’s of fresh market garden vegetable healthy goodness like carrots, onion, potato and celery and a dollop of Naramata Bench wine for added flavour.


 Ingredients
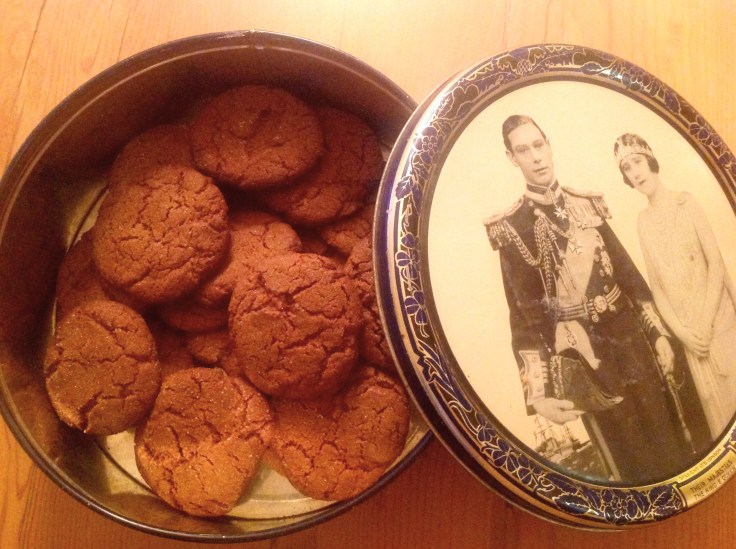
 Best eaten warm with a lovely cup of coffee or hot chocolate.