Rather prosaically, a Crown Maker is called a jeweller but I think this intricate art form needs a more suitable moniker. How about latin? Factorem Coronam comes closer to capturing the magic of this sorcery. Naramata’s Queen of Crowns is Darlene Jones and here are some of her diadems to die for.
No shrinking violets allowed.Fairy tale right?
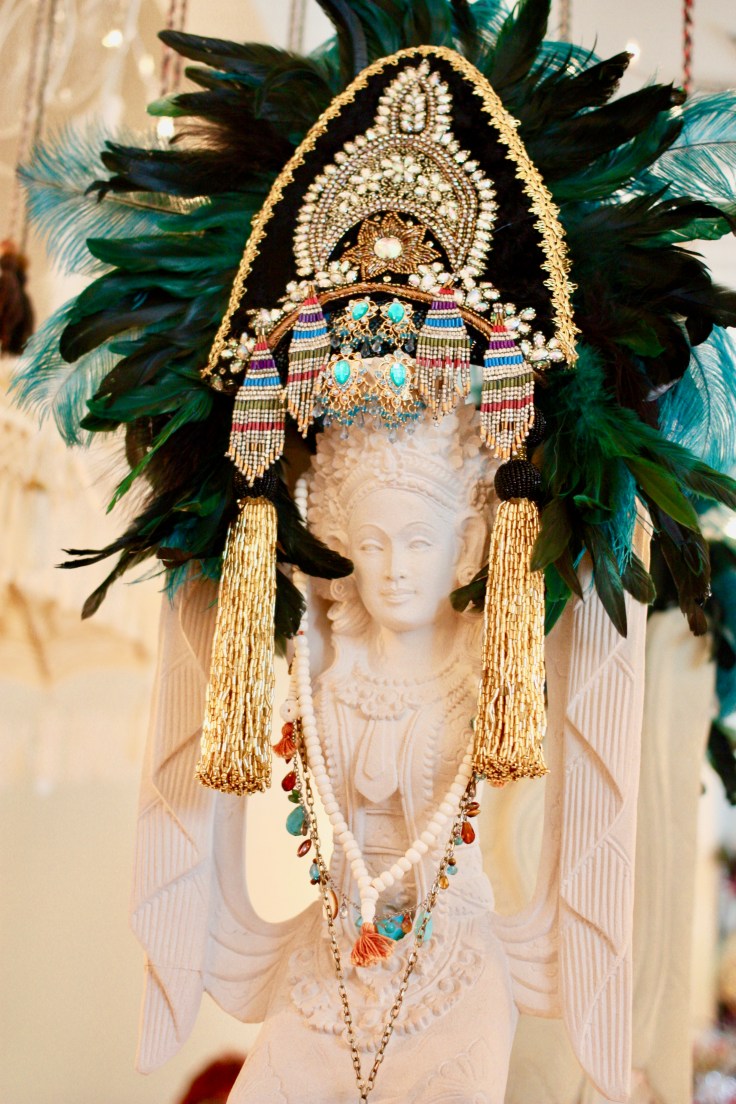
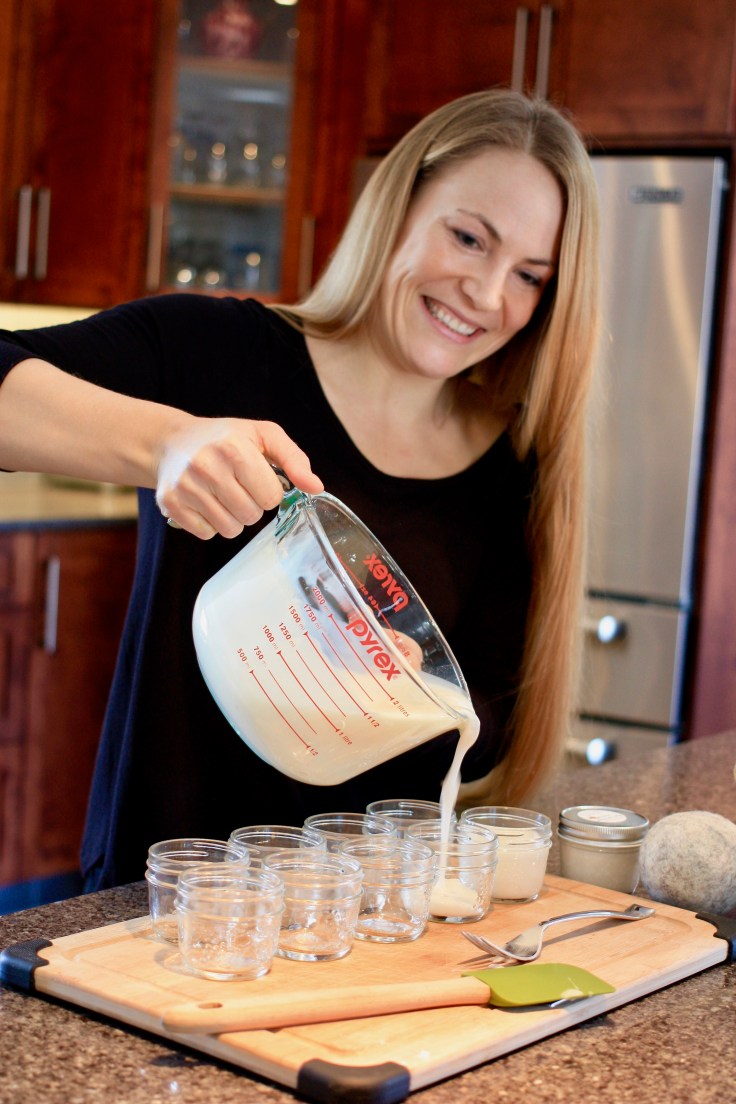
Ice QueenHow exotic is this one?Even her deer creations sport crowns.Detail from a sun goddess crown.
Darlene herself sporting one of her amazing creations.
Dubbed by her daughter as a “Glue Ru”, she has perfected the art of making the ordinary extraordinary in her jewel box Naramata studio. Within minutes I was trying on crowns, hats and headpieces with the artist who believes in making the world a more colourful and sparkling place.
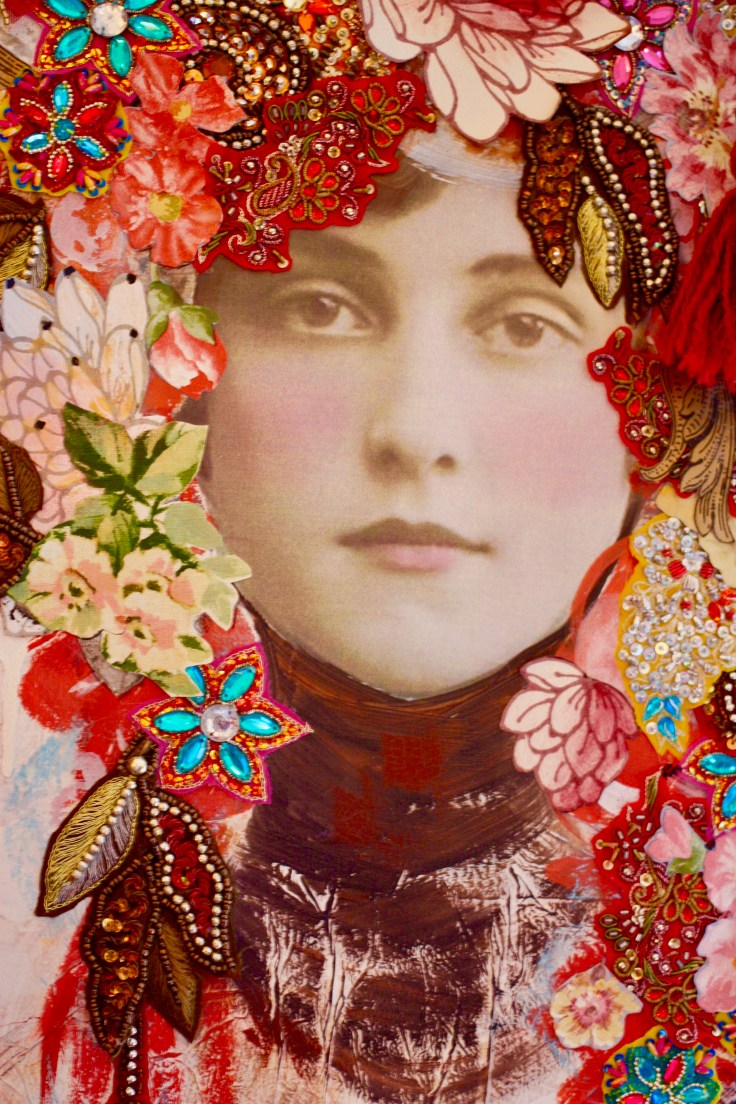
Here she has transformed a photograph of her grandmother and given her some bling. Darlene looks like her.
“As you can see I’m a magpie and am very attracted to sparkle,” says Darlene who gets lost for hours in her art. She also gets huge satisfaction when her “earth mother-type friends transform themselves into goddesses,” with the addition of a crown. “It touches something childlike in them and it’s amazing to see what happens when they see themselves as beautiful. I’m a big advocate for big girl dress-up.”
Crowing selfie.Darlene’s dazzling studio.A crown fan from way back, this is my coronal, or nuptial crown beautifully made by my mother-in-law.This little number came home with me. This is a perfect example of why blogging costs me money but pays me in so many other ways. Thanks Darlene. Happy to have more of your flamboyant art.
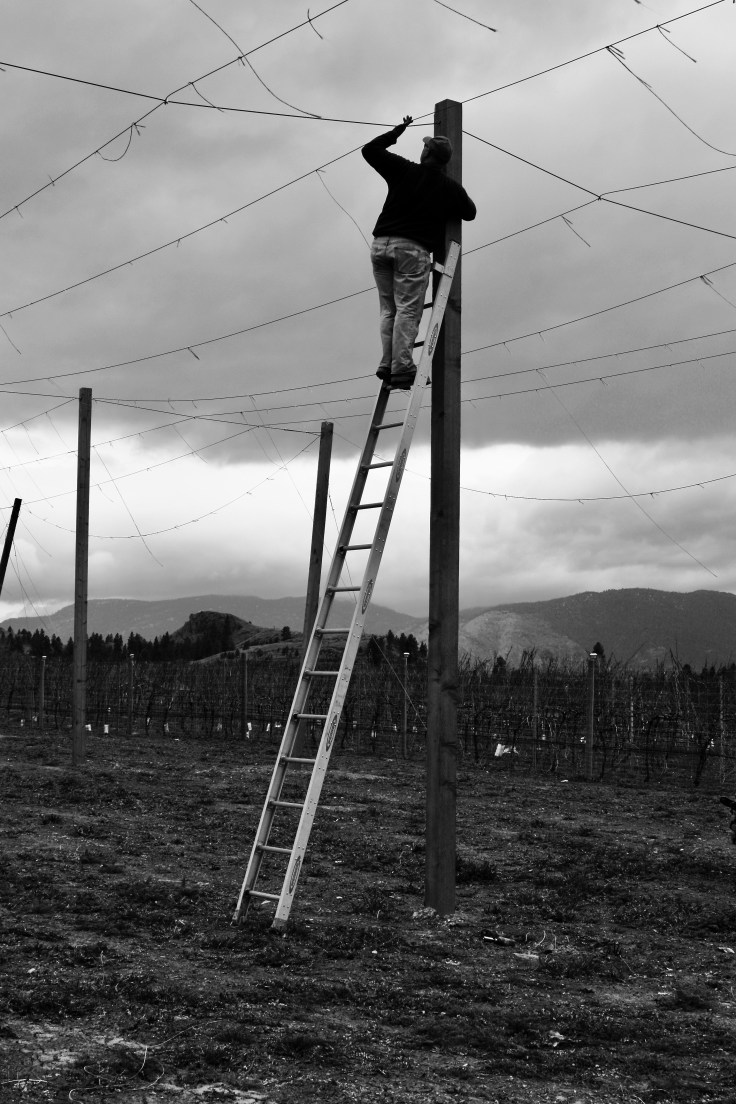
Brent Tarasoff in Square One Hops‘ hopyard shoring up trellis on a dreary spring day in Penticton
Bines not vines
“After we bought this beautiful piece of land we looked around us and saw grapes and more grapes,” says Kari Tarasoff of Square One Hops. “Brent woke up one morning and said, ‘Hey, we should do something different and grow hops.'” Two key prerequisites helped them clinch their decision to grow bines not vines — they both love craft beer and Brent is a seasoned agrologist with years of farming under his belt.
It’s a labour of love, Kari says and “wildly unprofitable compared to grapes. We are big into it on a small acreage.” The couple, hailing from Alberta, are embracing the lifestyle in their new community and their new passion. “There is so much to learn that its like drinking from a fire hose,” she says.
Brent learned from hop growers and their association in Yakima, Washington and quickly became a confident grower because of his professional agrologist background. The bines are happy here too, producing more hops than anticipated.
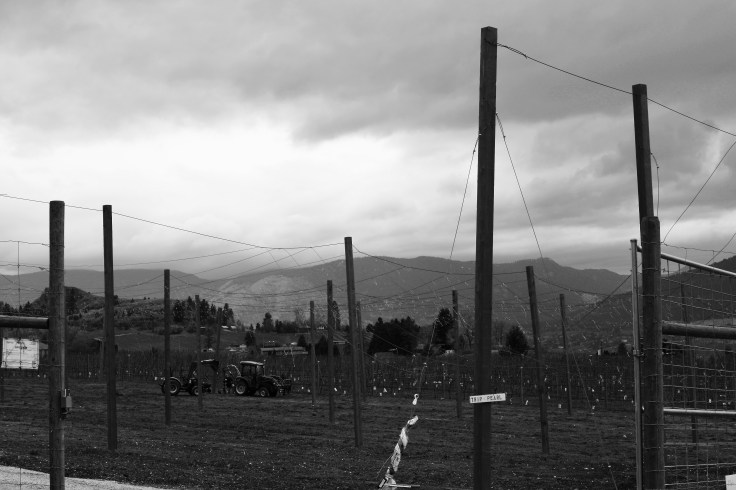
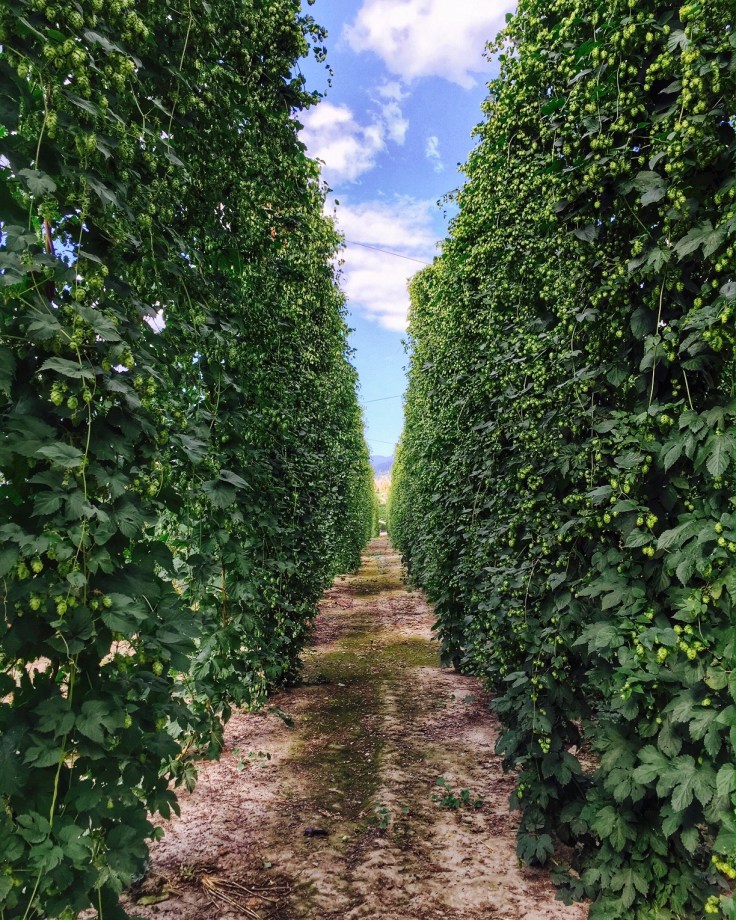
Square One Hops has a prime location adjacent to the Kettle Valley Railway Trail mid-way between Penticton and Naramata. Their view is stunning.
Frankengrapes
“Because we were doing something so different here there was a lot of speculation from passerbys on the KVR as to what we were going to grow,” says Kari. “We overheard people saying that we were planting GMO grapes that were super tall. I wonder how they thought we would pick them?”
No Frankengrapes at Square One. Their hop varieties include Cascade, Centennial, Columbus, Chinook, Glacier, Hallertau, Magnum, Mount Hood, Nugget, Super Alpha and Willamette and some small amounts of Pacific Gem, Saaz and Galena and sell them fresh ($10/pound) or pelletized ($14 top $20/pound). The Tarasoffs sell their hops to local craft breweries such as Bad Tattoo Brewing Co., BNA Brewing Co., Barley Mill Brew Pub, Firehall Brewing,Kettle River Brewing Co., Highway 97 Brewery, Detonate Brewingand Marten Brewing Co. The breweries are thrilled to have a local supplier of fresh hops in the hood. The breweries will buy a percentage of the hops but about 75 to 80 per cent of the hops they grow this year will going to a very special place…Siding 14 Brewing Company in Ponoka, the couples next venture…more later…
Kari and Brent Tarasoff…out standing in their hopyard (couldn’t resist the farmer joke)
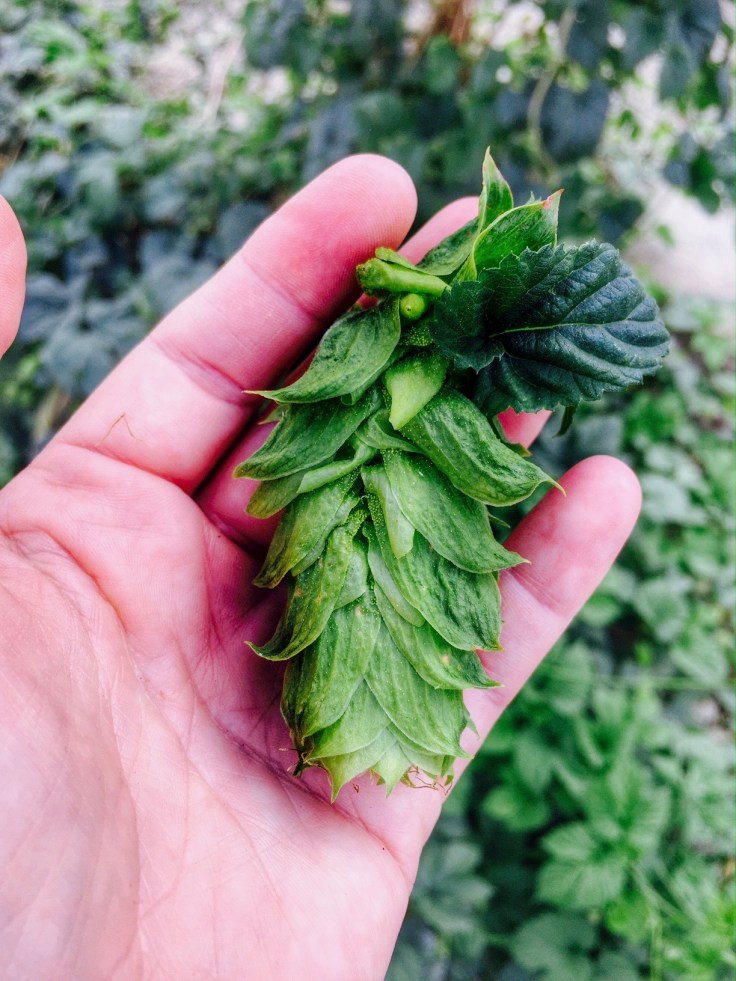
Hops 101
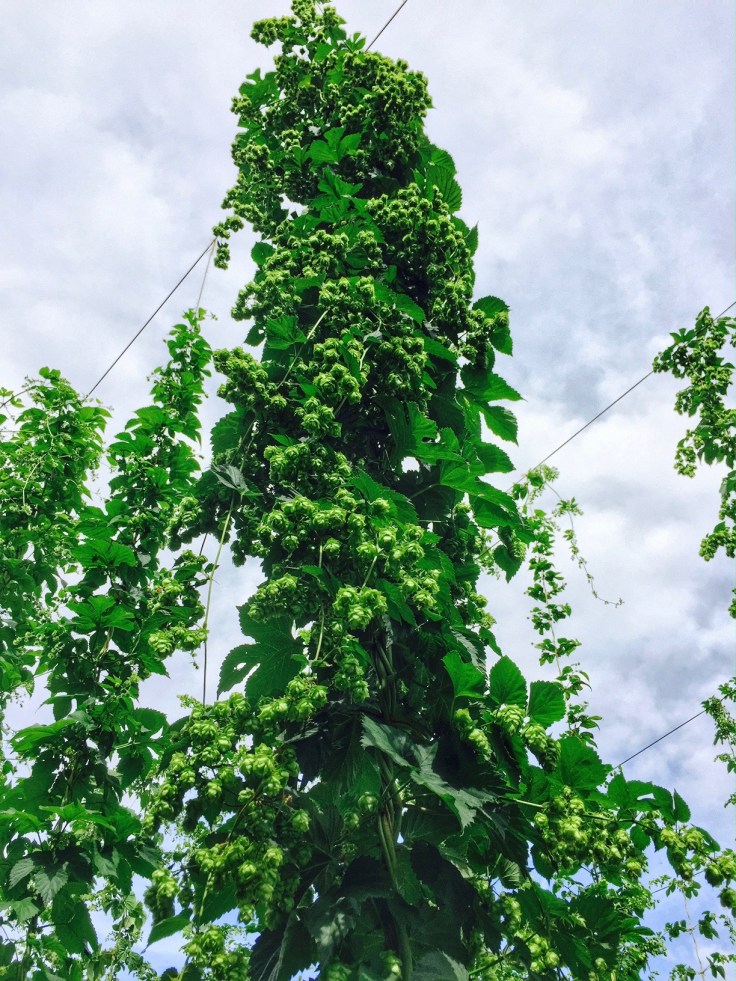
Hops are the flowers (also called seed cones or strobes) of the hop plant. They are used primarily as a flavouring and stability agent in beer, to which they impart bitter, zesty, or citric flavours. The hop plant is a vigorous, (crazily so…Kari says the plants grow a foot a day in the peak growing season…”You can almost see and hear them growing…it’s crazy.”) climbing, herbaceous perennial trained to grow up strings in a field called a hopfield, hop garden, or hopyard when grown commercially. Many different varieties of hops are grown by farmers around the world, with different types being used for particular styles of beer.
Drying racks awaiting this year’s harvest.
Is hops growing for you? Kari says there are tons of want-to-be growers out there with romantic notions of the hip lifestyle of the hops grower. “It’s farming,” she says. “It’s really labour intensive farming. When Brent farmed in Saskatchewan he did it with big machinery. Here it’s very hands on.”
She countered her buzz killing statement a moment later however. “It’s pretty magical walking through the hopyard at the height of the growing season. It’s unbelievably peaceful and fascinating. There is not another plant that I know that grows so fast. You can almost hear them talking. The most fun part for me are the plants themselves. They all look different, both the cones and the leaves. They all smell differently, feel differently and react to rain differently.”
As in the Wizard of Oz I’m going to take you from my black and white shots of a grey spring day to the magic of technicolour thanks to these beautiful photos taken by Kari.
Siding 14
Next for the Tarasoffs? A brewery of their own to make some magic with their Penticton-grown hops. Partnering up with barley growers Josh and Femke Lubach of Pridelands Grain, Brent and Kari are opening Siding 14 Brewing Companyin Ponoka (the town was originally named Siding 14) in late spring. Cheers to that.
Caramelizing is king… Photo by class participant Patrizzio Dunn
Vegetable stock…how hard can that be to make? Done right, it’s not so much hard as slow, Chef Mike Sonier tells participants of the third Naramata-Blend cooking class, “Cooking done right takes time. You can’t make great food on the fly. There is no cutting corners. Food takes time. Cooking with proper ingredients and from scratch is about flavour and nutrition. If you take one thing away tonight it’s take time to cook for yourself.
“Take a minute to look at the ingredients on a packaged stock from the grocery shelf,” he says. “It’s full of MSG, sodium, food colouring and some things not on the labels like GMO ingredients and pesticides.” In addition to the superior flavours of home made stock, it’s also about what’s not in it, he says.
Chef Mike shares his vegetable stock recipe with us and more importantly his tips to make it well.
Vegetable Stock
Ingredients
Choose organic vegetables if at all possible. On a side note Chef Mike says always choose organic vegetables for juicing as the process will pull out any of the chemicals found in non-organic vegetables, “not doing yourself any favour.” Good quality ingredients makes a night and day difference to your end product, Chef Mike adds.
2 cloves garlic
1 head celery
3 pounds carrots
6 yellow medium onions
Handful of fresh herbs (thyme, rosemary, basil stems, parsley
4 bay leaves
½ tablespoon whole peppercorns
4 tablespoons cold-pressed organic extra virgin olive oil
10-15 litres spring water
Choose organic vegetables and buy local if possible.
Method
Wash celery and carrots thoroughly. Peel very top layer of onions.
Chop celery and carrots into 2” pieces. Chop onions into 6 pieces while leaving shells and ends on.
Place stock pot on burner over medium heat until pot is warm but not hot.
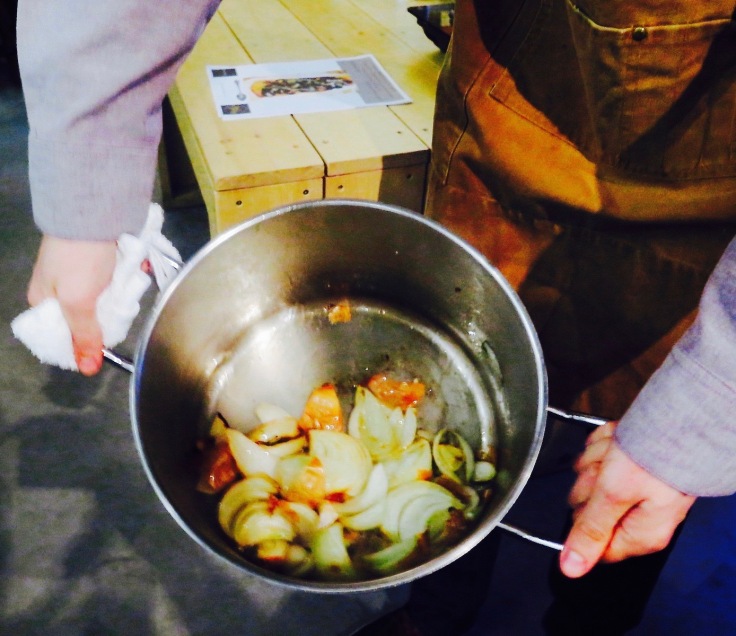
Place onions and olive oil into pot. Reduce temperature to a low heat and caramelize until starting to brown.
Mike says that the onion caramelizing is crucial to making a good stock. The sweet flavour of the caramelized onions will be the main flavour of your stock and sweet makes for a great flavour profile. Some of the onions will stick to the bottom of the pot…this is what you want.
Onions starting to caramelize. Mike says Chefs work by their noses and can tell by the sweet smell when the onions are caramelized to perfection.
Add garlic cloves, celery and carrots. Increase temperature to medium-high heat, stirring frequently and allowing vegetables to stick and brown to pot. (Keep a close eye on temperature as you may need to reduce heat if starting to burn).
The garlic will turn dark brown and some will even turn black which Mike says is “totally fine.” “You want a really dark colour in your stock because that will mean its flavourful.”
Chef Mike shows us the technique of scraping only some areas of the pot at a time incorporating the dark flavourful bits into the mixture.
Once vegetables have fully caramelized (this takes awhile…don’t rush this step) then add in your spring water, herbs, peppercorns and bay leaves. Increase temperature to high heat until boiling.
Once boiling lower your temperature down to a low-simmer and continue to reduce liquids until pot has only ¾ left. This can take from 6 to up to 18 hours depending on how potent or concentrated you want your stock to be. For soup you may only want to reduce by a quarter but for a more intense flavour for a dish like risotto, Mike says to reduce by 3/4 or more.
Taste stock as it’s reducing to achieve desired flavour profile that suits your needs.
Cool down in pot. Once cooled, cover and set in refrigerator to incorporate full-flavourfor a minimum of 24 hours.
Double strain liquids with mesh strainer into sealable containers to keep in the refrigerator or freezer. Discard the vegetables which no longer have any nutritional value.
Will keep in refrigerator for up to 7 days. Freezes in 1 litre containers for up to 6 months.
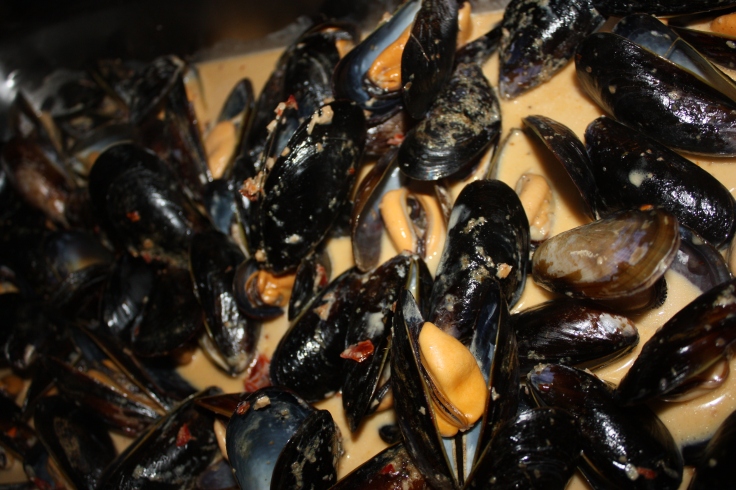
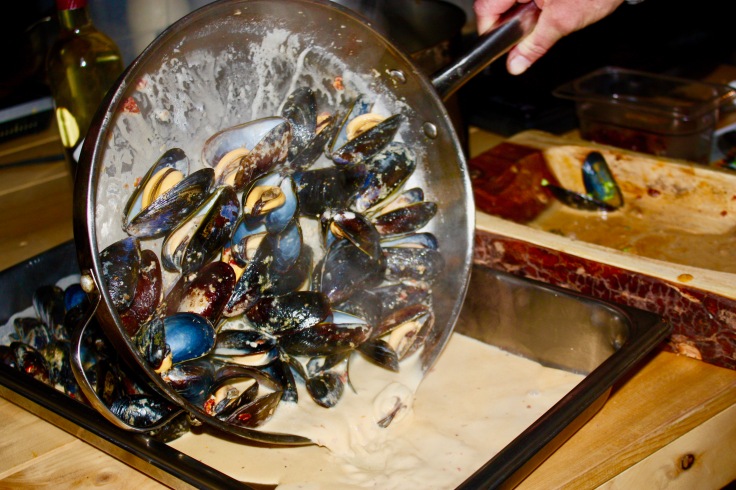
The Naramata-Blend cooking class was a combination of demonstration and hands-on.We also learned how to make Salt Spring Island Mussels in a garlic cream sauce giving some Naramata Blenders their first taste of a mussel.The white wine, garlic, cream sauce was amazing.
Chef Mike Sonier and his business Knotweed is focused on catering events around British Columbia, consulting and finishing up a cookbook that has been in the works for several years. Coming soon, he will be opening a new location that will be geared towards a gastro-styled restaurant on BC’s coast. Knotweed will also be catering, hosting pop up events and workshops in the Okanagan.
“I’m more than stoked to be back on the coast creating coastal dishes that will complete my cookbook, after creating all my land dishes over the years when I’ve been in British Columbia’s interior,” he says. “This journey that I’ve been on out here in B.C has been absolutely incredible and it feels like it has just begun.”
Chef Mike and his Sous Chef and partner Sierra
Next up on the blog, a recipe for Legend Distilling‘s Rosemary Swizzle from the mixology component of the cooking class.
Wayce Bartels making a batch of her All Natural Deodorant in her Naramata kitchen.
Wayce Bartels’ cottage industry making all natural home products, like many such businesses, was born out of a desire for products to meet her own needs which she then shared with family that generated word-of-mouth and voila…Made With Love is cleaning up.
“I’ve always been pretty natural,” says Wayce. “We eat healthy and local, I use little make-up and when I do it’s all natural. I decided to take a good look around the house to see what else I could change. How important is our washing? Think about your clothes and sheets and how they contact your skin.”
Regular detergents are loaded with alcohol, dyes and artificial scents, she says. “The stronger a product smells the worse it is for you.”
Wayce says that many “all natural” cleaning products marketed in stores are not really so natural and devoid of toxins, allergens and carcinogens nor are they sustainable and economical.
Some of Wayce’s products.
After extensive research and experimentation she settled on using soap berries in her liquid laundry soap.
Soap berries gave her a natural, biodegradable and petroleum-free laundry soap alternative. They grow as a fruit on trees in Nepal and India. The tree itself is from the genus Sapindus. Soap berries contain large amounts of saponins in their shells, which are a natural surfactant. Surfactants are compounds that lower the surface tension of a liquid, and so can be used as detergents or foaming agents.
To get technical, surfactants break the surface tension of the water to penetrate the fibers of your clothing, lifting stains from the fabric and leaving dirt suspended in the water that is rinsed away.
Wayce’s Made With Love Soap Berry liquid laundry soap is gentle on both clothes and skin, making them ideal for those with sensitive skin and allergies. Because they are so mild, they are perfect for baby clothes and even cloth diapers. Soap berries are also great for septic and grey water systems. Unlike commercial soaps, that have artificial foaming agents, soap berries do not produce lots of bubbles or foam so will work well in HE washers. While commercial detergents and soaps have marketed heavily around that visual, foam simply is not an indicator of cleaning power.
The berries are wild-harvested, meaning they are gathered from wild trees grown without any kind of chemicals, fertilizers, or pesticides. Saponin actually tastes bad to insects so no pesticides are needed and the trees naturally love poor uncultivated soil.
That’s all well in good but the stuff’s got to work well. I gave it a six load whirl and so far so good. She adds some essential oils (like lavender, lemon or grapefruit) from Naramata’s Pure Potent WOW to the liquid Soap Berry so your clothes smell nice or you can go with unscented.
“My husband works in mining and getting his socks clean was my ultimate test,” she says. “Whites stay white.”
Wayce’s deodorant is made with coconut oil, arrowroot powder and organic baking soda. Aluminum-free, it has a nice coconut smell and is soft on your skin.
She sells her laundry soap in 500 ml jars for $12 and each jar will do 40 loads of washing. She accepts the mason jars back for a dollar off your next one.
Pure wool dryer balls
Another product in her green clean arsenal are wool dryer balls that she makes from Alberta wool. Six to nine dryer balls will help fluff up clothes, prevent static and actual reduce dryer time, saving energy, says Wayce.
How dryer balls work
Dryer balls are used to help dry clothes more quickly than usual as well as to soften fabrics in the dryer. When you load a big armful of wet towels into the dryer they will flop and tumble around. Normally fabric will stick together in the dryer, slowing down the drying process.
When you add dryer balls into your clothes dryer the balls will get in-between the towels and clothing. The balls will separate and pull them apart with their weight. This in turn allows more hot air in and around your laundry helping the dryer to heat your laundry more quickly and suck the evaporated water out of the dryer more efficiently.
Good in theory so put it to the test
I washed two loads of six towels and tried them in the dryer with and without the Made by Love dryer balls. The load with the dryer balls was done about eight minutes sooner than the load without. Claim proven. That is a good energy savings right there and the towels in the dryer ball load came out nice and fluffy. Savings are even greater when you think of all the dryer sheets you don’t have to buy. The balls will last from 500 to 1,000 loads before needing to be replaced. A few drops of essential oils on the balls will make your clothes smell nice too.
“I buy the wool from a custom woollen mill in Alberta and its nice to shape and work with,” she says. “My husband helps me make the balls if I pour him some wine. They are time consuming and hand crampy to make.”
She also makes and sells canned goods and dried fruit from locally sourced produce. Her salsas are garnering a loyal following and sell-out.
Wayce and one of her egg laying pals.
Kermit has it all wrong, it’s easy to be green when there are local products that are economical, do the job well and are good for you and the environment.
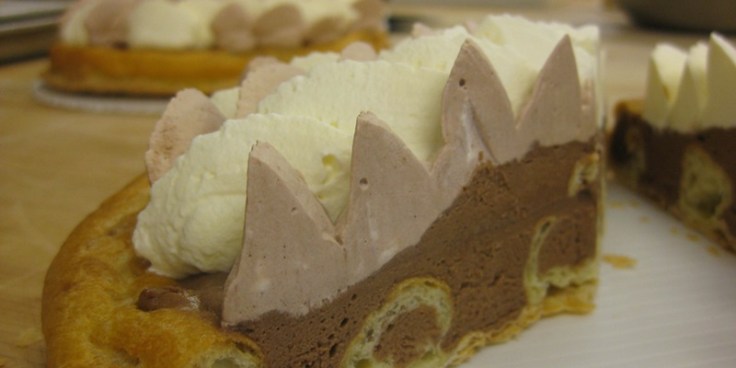
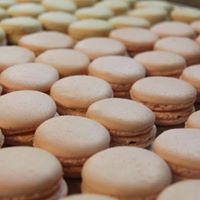
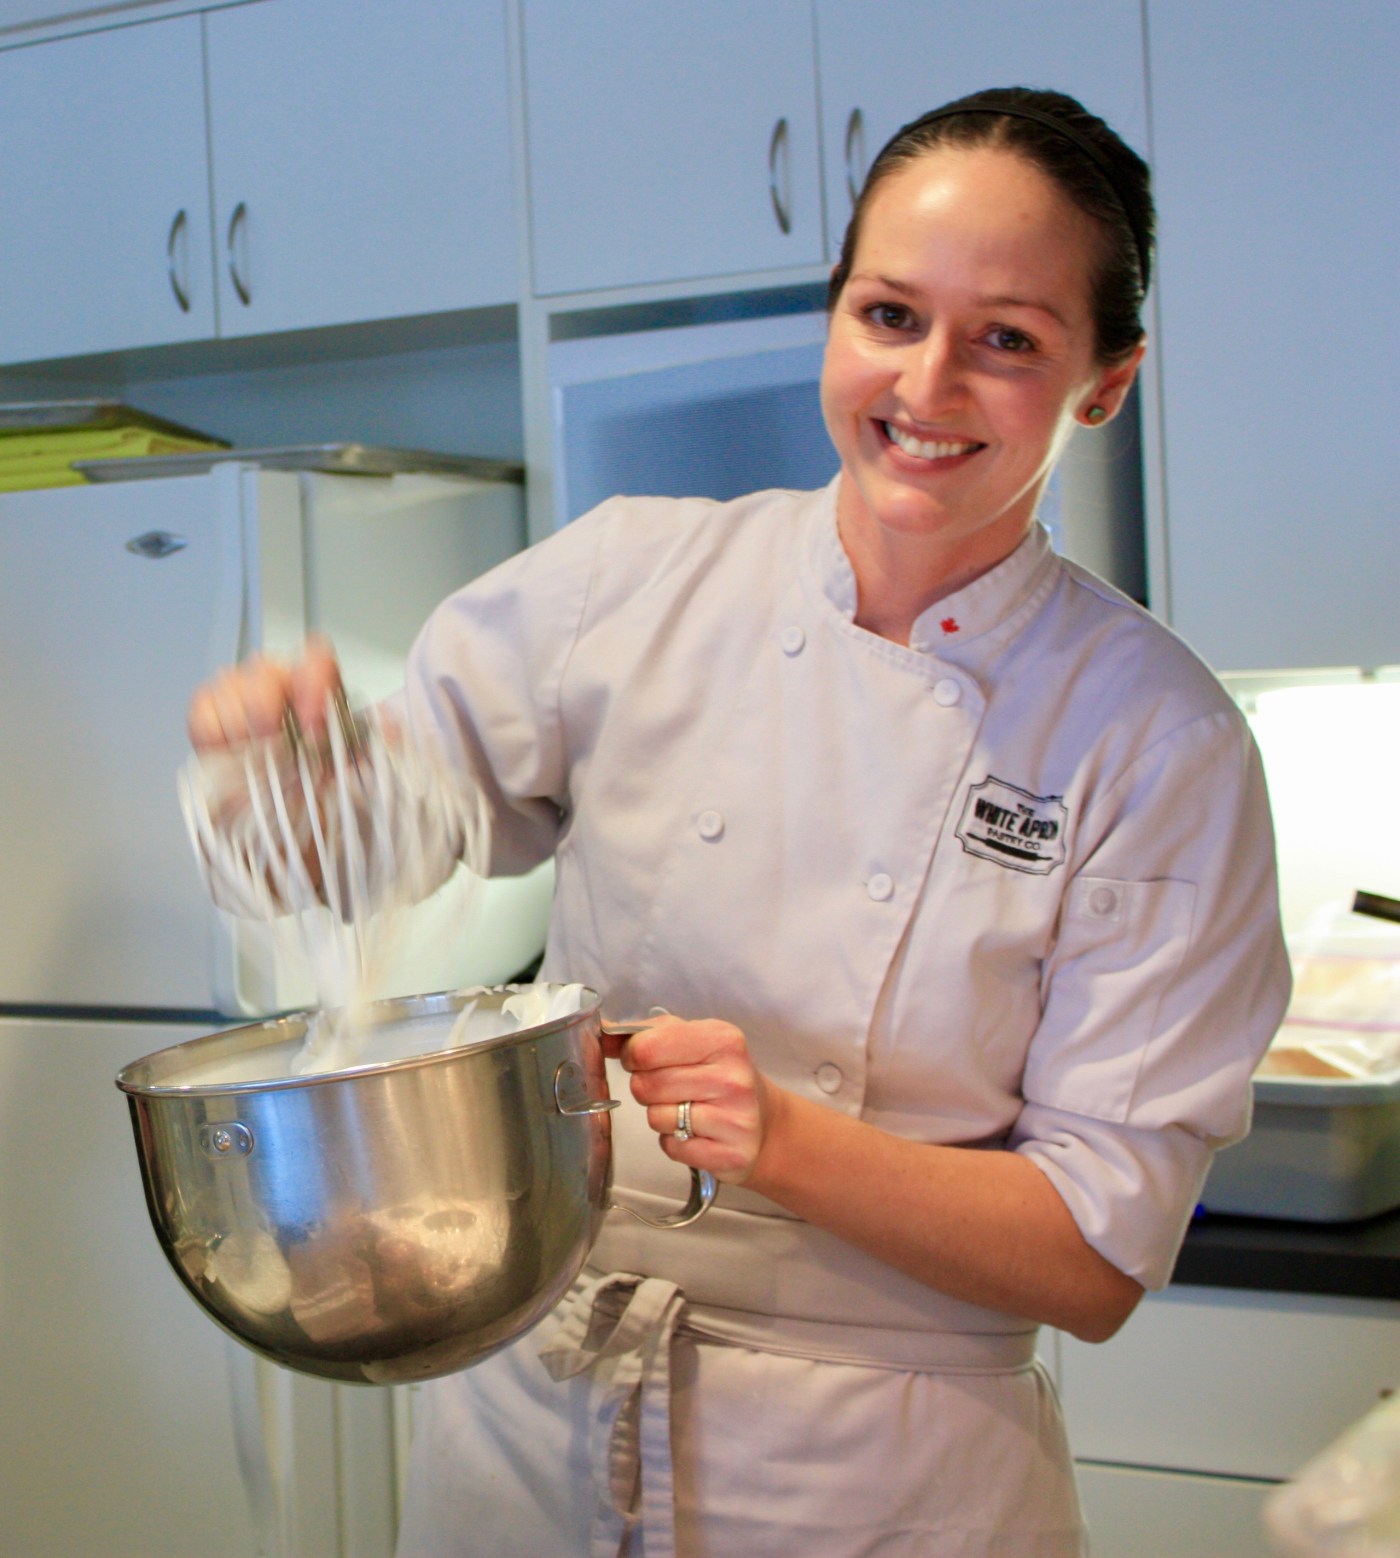
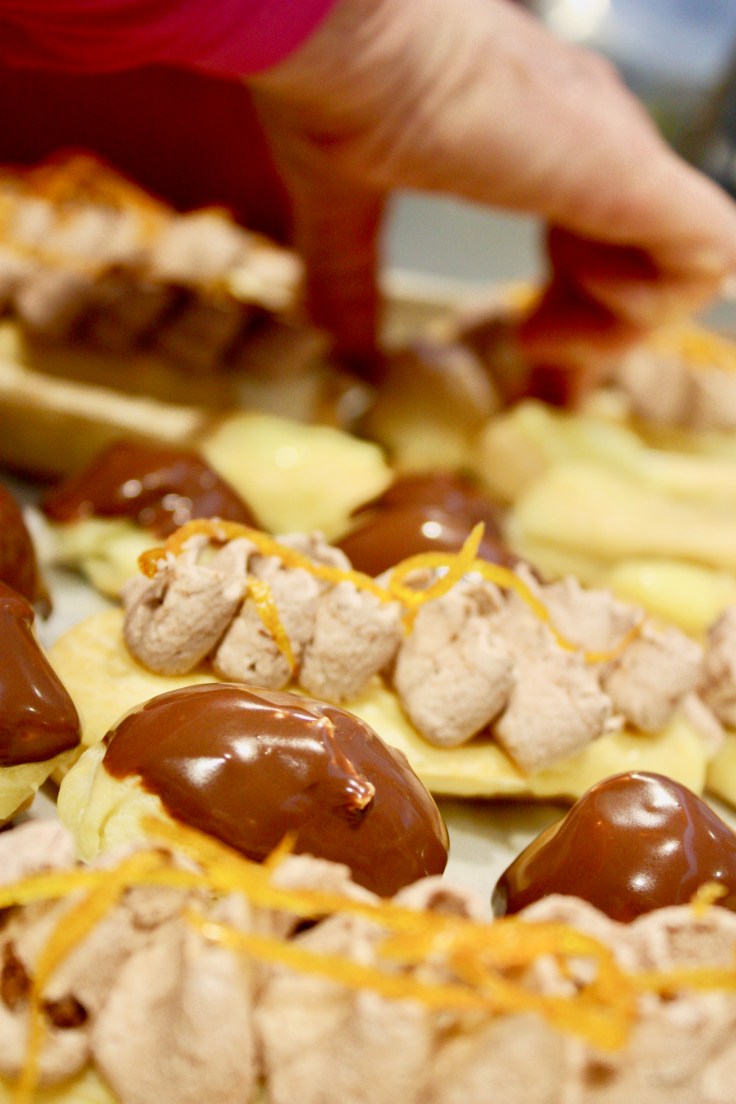
Chef Amanda Perez of The White Apron Pastry Co. in Naramata is a pastry sorceress. She used her magic to teach 20 home cooks of varying skill how to make four different choux pastry creations with fillings and toppings with voluptous names: Pate a choux, vanilla, raspberry and chocolate chantilly cream, chocolate ganache glaze, lemon curd (OK, not sexy but tastes pretty zippy), Swiss meringue and chocolate creme chibout.
The cooking class series was organized under the auspices of the blog and this class was a sweet success participants tell me because of Chef Amanda’s knowledge, organization, and enthusiasm, the fun group of participants and the tasty bubbles from Bella Wines in Naramata.
Charlie goes a bit off piste with her take on the St. Honore.
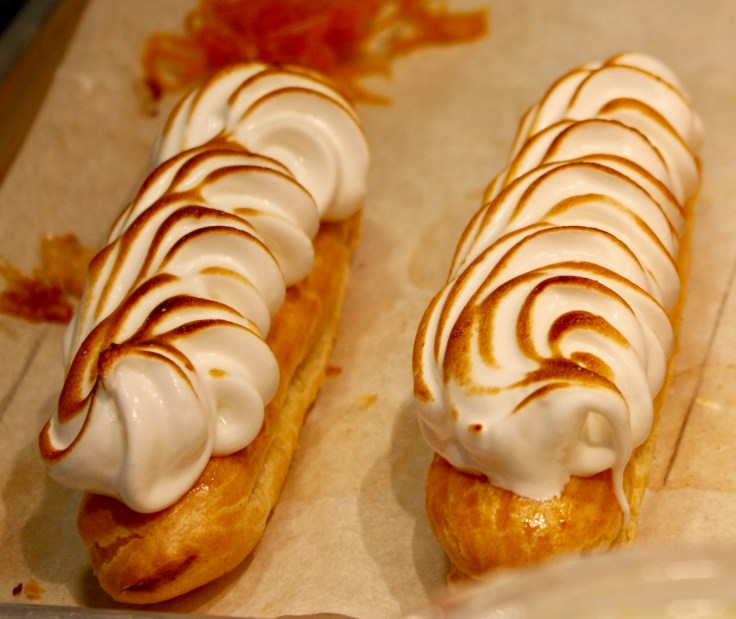
Chef Amanda is happy to share with all you chibouts three of the recipes from the class that miraculously combine to make lemon meringue eclairs.
Pâte à choux
Pâte à choux, or choux paste, is a paste made of flour, water, butter, and eggs — it’s slightly thicker than a batter, but not quite as thick as a dough. It’s pronounced “pat a shoe”. “Pâte” means paste and “choux” means cabbage — the name comes from the resemblance to little cabbages when the puffs come out of the oven.
The paste is thick enough that it can be scooped or piped into almost any shape you can think of, from puffs to éclair shells to thin straws. It contains no yeast or other leavening; instead, as the liquids in the paste evaporate in the oven, they puff up the pastry, creating a hard outer shell and a nearly hollow interior perfect for piping in creamy bursts of flavour.
The goal, according to Chef Amanda, is a light, crispy delicious pastry.
Ingredients
Water 500 ml
Butter 225 g
Salt 5 g
Bread flour 275 g
Large eggs 9
Directions
Cut a sheet of parchment paper to fit a baking sheet. Fit a star-shapped piping tip into a disposable piping bag. Preheat oven to 375 F.
Bring the water, butter and salt to a boil in a medium pot. Once boiling add the flour all at once and stir vigorously to remove all the lumps. The goal here is to cook some of the starch out and remove a good amount of the moisture through steam so the dough won’t result in a soggy pastry. Keep stirring until the paste comes away from the sides of the pot and there is a bit of a film on the pot’s bottom.
Transfer the paste to a stand mixer with the paddle attachment and beat for about 30 seconds or so to release more moisture. (Don’t skip this first step and add the eggs too early or they will scramble in the hot mixture.)
Add the eggs one by one until the paste comes together smoothly.
Fill a pastry bag with the paste and begin by piping four small dots of choux paste on the corners of your baking sheet under the parchment paper to adhere your paper to the tray.
Using the star-shapped piping tip, pipe 4-inch lines of dough onto your parchment paper-lined baking sheet. Wet down a finger in a bowl of water and smooth out the end tip once piped. (Amanda tells us that the pastry tip makes lines that bring more space for the eclairs to rise and open. If you don’t have a star tip…use a fork to make the lines.)
Bake in a 375F oven for about 20 minutes or until the pastry is golden brown. Let cool on a rack while making your lemon curd and Swiss meringue.
Lemon Curd
Lemon curd is similar to pie filling but the texture is smoother and the flavor more intense. Pie filling is thickened with flour or cornstarch while lemon curd uses egg yolks and natural pectin in the zest and juice of the lemon. The secret to the smooth texture in lemon curd is butter unlike the commercial pie fillings.
Chef Amanda gift to us – her super secret lemon curd recipe.
Ingredients
Lemon juice & zest 500 ml (about 9 lemons)
Large eggs 6
Large egg yolks 12
Sugar 400 g
Butter (cold) 340 g
Directions
Combine the lemon juice & zest, eggs, egg yolks and sugar in a bain marie (a non-reactive metal bowl set on top of a pot of gently boiling water or double boiler). Cook until thick and foamy. Remove from heat and add the butter in chunks stirring well until all the butter is incorporated. Strain the curd and chill well before use either over an ice bath or in the fridge.
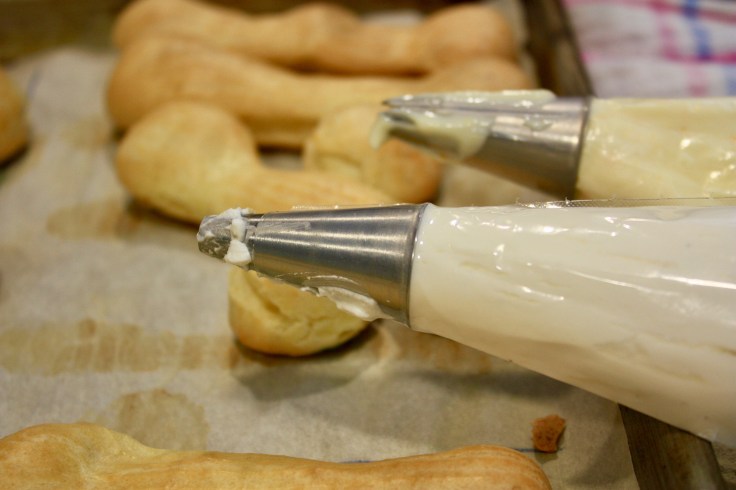
Locked and loaded…ready for filling.Champagne doesn’t hurt or more precisely, sparkling rose Orchard House Gamay from Bella Wines in Naramata.
Swiss Meringue
Ingredients
Egg white to sugar ratio by weight 1:2
Directions
Whisk over bain marie (double boiler) until sugar is dissolved. Whisk on high with the whisk attachment in a stand mixer until stiff peaks form.
Some assembly required
Using a wooden skewer, poke a hole near each end of the top of the eclair.
Fill a pastry bag with a round tip with lemon curd and squeeze the curd into both holes in the eclair moving the bag around to fill as much of the hollow choux pastry eclair as possible. Wipe off any excess on the top of the eclair.
Fire up the torch!
Using a star tip pipe overlapping dollops of the Swiss meringue onto the filled eclairs. Use a kitchen torch to give the meringue its signature caramelized topping.
Some suggested resources from Chef Amanda
Local (Penticton)
Bulk Barn – cake boxes and boards, gel food colourings, bulk Callebaut chocolate,
Wholesale Club – plastic deli cups, large bags of flour and sugar
Vancouver
Gourmet Warehouse – pastry tools and molds galore, some specialty ingredients
Williams Sonoma offset spatulas, Chicago Metallic brand good quality baking sheets, Silpats, the blowtorch that I use
Ming Wo — only the Chinatown location (Vancouver restauranteur secret – the Chinatown Ming Wo has every tool and gadget that a professional chef could need)
Online www.goldaskitchen.ca – Canada’s leading online resource for specialty pastry and decorating tools. www.jbprince.com – the most complete tool catalog for pastry chefs. Every specialty product and tool imaginable can be found here! www.vanillafoodcompany.ca – a great Canadian website for Valrhona and Cacao Barry chocolate, Neilsen Massey extracts, and also quite a good selection of tools.
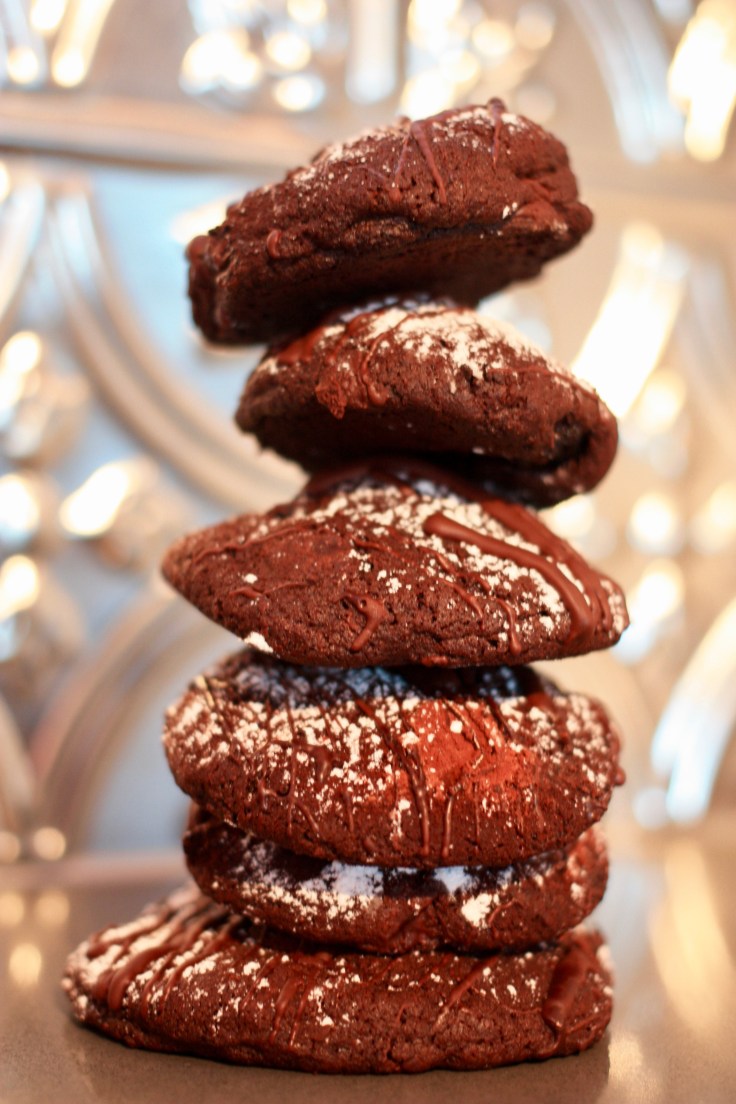
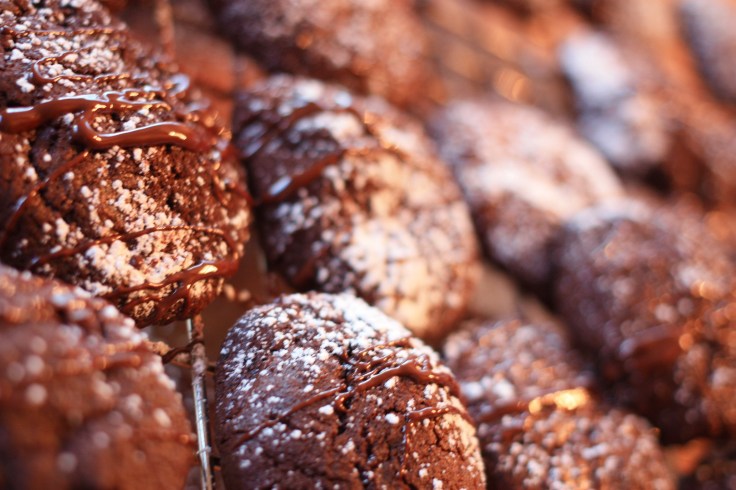
I created this recipe to showcase the unveiling of a bespoke Okanagan chocolate. With this trademarked chocolate the Okanagan Valley has put the frosting on its reputation as Canada’s food and wine capital. Chocolate, wine and orchard fruit…yes!
Until you can get your hands on this beautiful chocolate from Okanagan College, the locally-sourced CC OrchardsNaramata dried cherries and special Wild Goose Dunkelfelder wine to create the ultimate gooey, chocolatey, tart cookie I will suggest substitutes…
Okanagan College is the first post-secondary institution outside of Europe and only the second in the world to create its very own chocolate recipes. The exclusive milk and dark chocolate recipes were created by Chef Danny Capadouca and Chef Bernard Casavant last summer when the pair traveled to Paris to the Or NoirTMII tasting laboratories of Cacao Barry, a chocolate company founded in 1842. More on how you design a chocolate in an upcoming post on the blog with an interview from Chef Bernard…It’s tough work right?
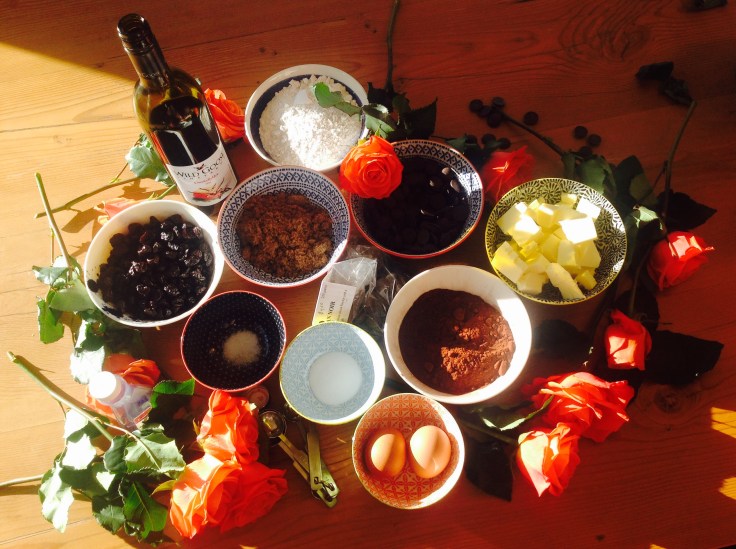
Ingredients
1 3/4 cups all-purpose flour
1 1/4 cups unsweetened Dutch-process cocoa powder
2 teaspoons baking soda
1/4 teaspoon salt
1 1/4 cups (2 1/2 sticks) unsalted butter, room temperature
1 cup Wild Goose Dunkelfelder (or other fruit-forward red high quality red wine)
icing sugar for dusting (optional)
further 1/2 cup of Okanagan Noir or other high-quality dark chocolate for drizzling over baked cookies (optional)
Directions
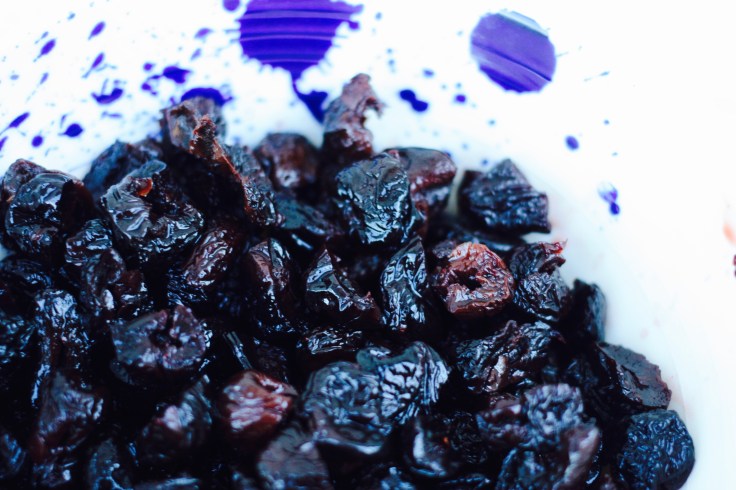
The night before you want to make your cookies, macerate (soak) the 1 1/2 cups of dried cherries in one cup of red wine overnight in the refrigerator.
Preheat oven to 350 degrees. Line two baking sheets with parchment paper; set aside. In a medium bowl, sift together the flour, cocoa, baking soda, and salt; set aside. Strain the cherries reserving the wine to drink! Chop the cherries into two or three pieces; set aside. In the bowl of an electric mixer fitted with the paddle attachment, cream the butter and sugars until fluffy. Add eggs and vanilla extract; beat until well combined. Add the flour mixture, and beat on low speed, until just combined. Do not overbeat.
With a wooden spoon, fold in Okanagan Noir chocolate and cherries. (Dough can be frozen at this point, wrapped well in plastic, up to 1 month; thaw completely before baking.)
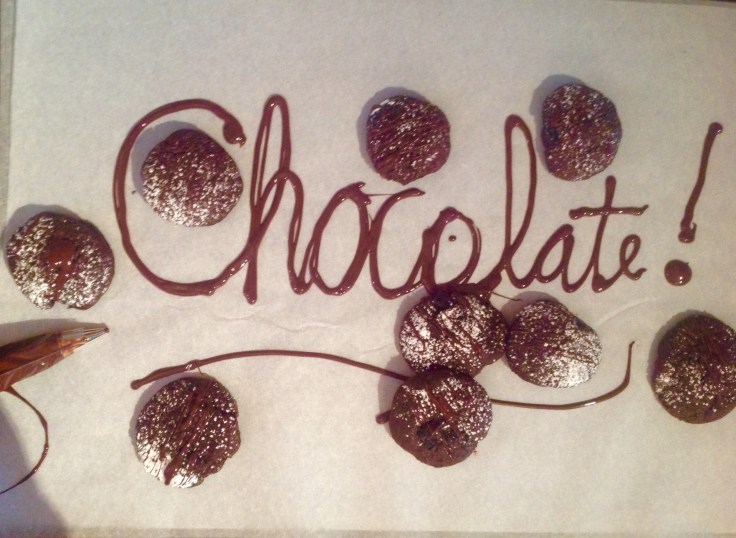
Form balls of dough, each about 1/4 cup; place balls on baking sheet about 3 inches apart. Bake until puffed and cracked, 9 to 11 minutes. Transfer to a wire rack to cool completely.
Dust with icing sugar and drizzle melted Okanagan Noir over the icing sugar topped cookies for even more chocolatey flavour.
Store in an airtight container, at room temperature, up to 3 days. Three days? As if that is going to happen…
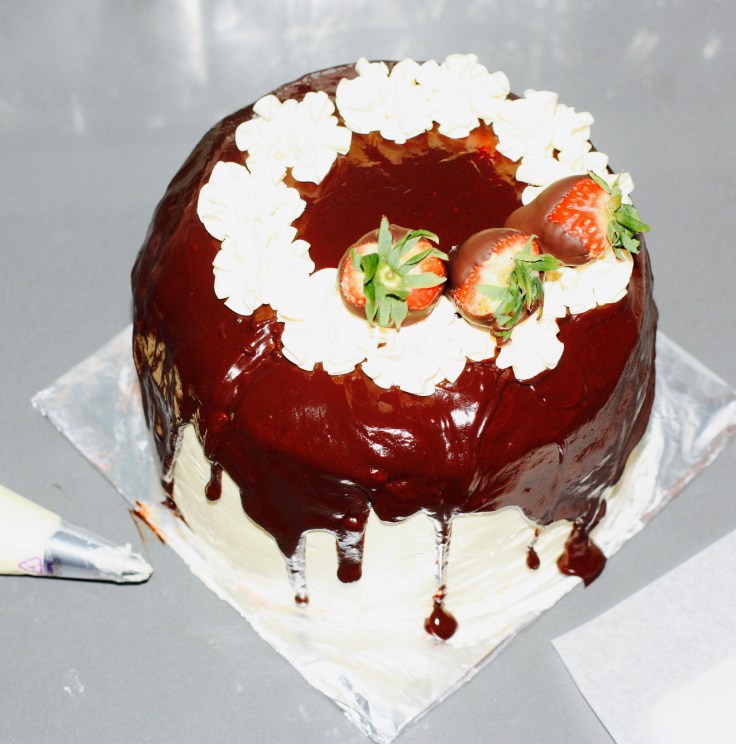
“Cake is happiness! If you know the way of the cake, you know the way of happiness! If you have a cake in front of you, you should not look any further for joy!” ― C. JoyBell C.
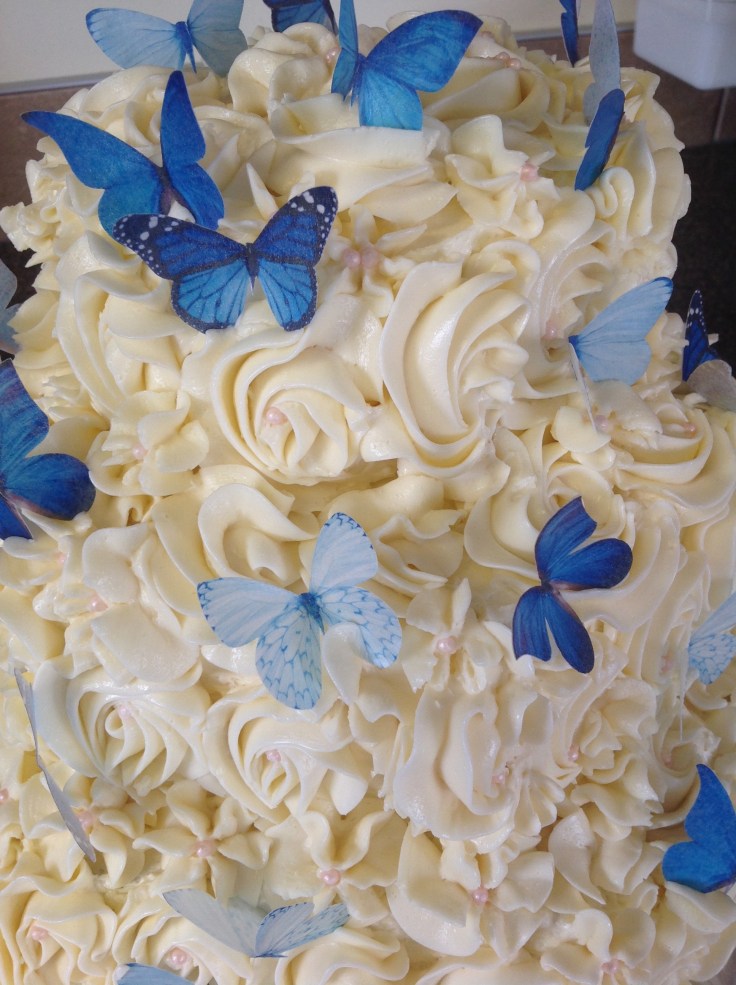
From start to chocolatey towering finish, this velvety white chocolate, rich dark chocolate, strawberry filled, Swiss meringue vanilla buttercream topped, chocolate glazed, chocolate-covered strawberry four-layer Neapolitan Cake took six hours to bake and assemble. I can’t think of a better way to spend six hours can you?
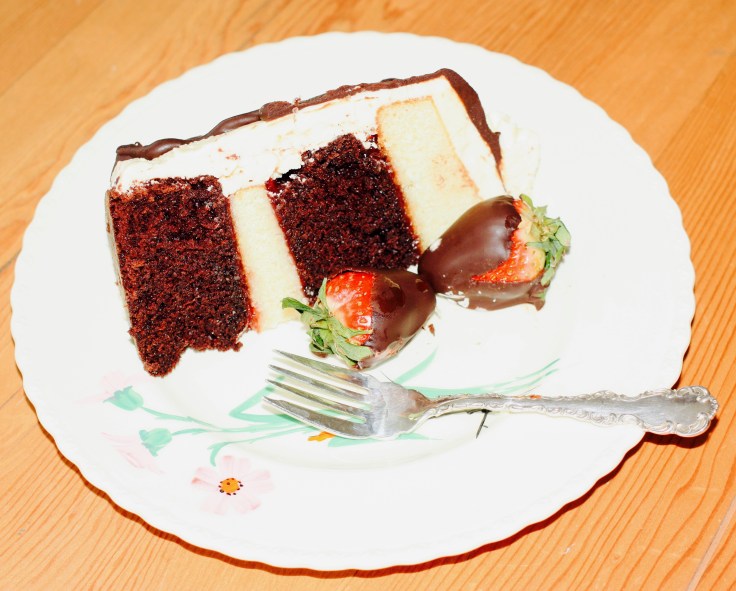
There are a total of five recipes involved including two cake recipes that will give you a pretty dramatic piece of cake when sliced with alternating layers of white chocolate and dark chocolate cake. I can totally picture an evening dress and a tuxedo to celebrate its formal look whereas expanding sweatpants are probably a better option.
White Chocolate Cake
5 large egg whites (My eggs came from Bella Wines farm…thanks Jay!)
3/4 cup whole milk
2 3/4 cup (360 g) cake flour
1 1/4 cups (250 g) granulated sugar
1 tablespoon plus 1/2 teaspoon baking powder
1/2 teaspoon salt
3/4 cup (170 g) unsalted room temperature butter
1 1/2 teaspoons pure vanilla extract
6 ounces (170 g) white chocolate, melted and cooled
Note — you will also need a jar of (80 ml) strawberry preserves for assembling the cake and 12 strawberries
Directions
Preheat oven to 350F. Grease and flour two 8-inch cake pans.
Stir together the egg whites and 1/4 cup of the milk in a small bowl, set aside. Sift the flour, sugar, baking powder and salt into the bowl of a stand mixer fitted with the paddle attachment. Mix on low until combined. With the mixer on low add the butter, vanilla and the remaining 1/2 cup of milk until the dry ingredients are moistened. Turn the mixer to medium and mix for about a minute until combined. Stop the mixer, scrape down the bowl.
Turn the mixer to medium. Add the egg white mixture in three parts, mixing for about 20 seconds after each addition. Stop the mixer, scrape down. Add the white chocolate and mix until just combined.
Evenly divide the batter between the two prepared pans. Bake for 25 to 28 minutes or until a toothpick inserted into the centre of the cakes comes out clean. Cool on a wire rack for 10 minutes before removing the cakes from their pans.
Yipeee…you have completed one recipe at this point!
Chocolate Cake
2 1/2 cups all-purpose flour
1 cup unsweetened high-quality cocoa powder
2 1/2 teaspoons baking powder
1 teaspoon salt
3/4 teaspoon baking soda
1/2 cup plus 2 tablespoons (150 ml) grapeseed oil (could use canola)
2 cups (400 g) granulated sugar
2 large eggs
1 large egg yolk
2 teaspoons pure vanilla extract
1/2 teaspoon pure almond extract
1 1/2 cups whole milk
1 cup hot strong-brewed coffee
Directions
Grease and flour two 8-inch cake pans. Your oven will also be at 350 F for these layers.
Sift together the flour, cocoa powder, baking powder, salt and baking soda, set aside.
In the bowl of a stand mixer fitted with the paddle, beat together the oil and sugar on medium for 2 minutes. Add the eggs, egg yolk, vanilla and almond extract. Stop the mixer and scrape bowl.
Turn the mixer to low and add the flour mixture in three batches, alternating with the milk, beginning and ending with the flour mixture. Stop the mixer and scrape bowl. With the mixer on low, stream the coffee. Mix on medium-low for no more than 30 seconds or until combined.
Evenly divide the batter between the prepared pans and bake in a 350 F oven for 25 to 28 minutes or until a toothpick inserted into the centre of the cakes comes out clean. Let them cool on a wire rack for 10 to 15 minutes before removing the cakes from the pans.
Melt the chocolate in the top portion of a double boiler. Line a baking sheet with parchment paper. Remove the chocolate from the heat and dip each strawberry into the chocolate one at a time and set it on the parchment paper to dry and harden.
Vanilla swiss meringue buttercream
1/2 cup plus 2 tablespoons egg whites
1 1/4 cups granulated sugar
2 cups unsalted butter (very important that it be at room temperature or it won’t combine properly) cubed
2 teaspoons pure vanilla extract
Note…you may end up making two batches to fully cover your cake and have enough left over for the rosettes…
Directions
Place the egg whites and sugar in the bowl of a stand-mixer. Whisk them together by hand to combine. Make a double boiler by filling a medium pot filled with water over medium-high heat. Place the mixer bowl on top of the pot. The bottom of the pot should not touch the water.
Whisk intermittently and heat the egg mixture to 160F (candy thermometer) or until it is hot to the touch. Carefully fit the mixer bowl onto the stand mixer and whip with the wire attachment on high speed for 8 to 10 minutes, until it holds medium-stiff peaks. The bowl should be back to room temperature at this point. Stop the mixer and swap out the whisk attachment for the paddle.
With the mixer on low, add the cubed butter, a few tablespoons at a time then the vanilla. Once incorporated, turn up the mixer speed to medium-high and beat until the buttercream is silky smooth, 3 to 5 minutes.
Some Assembly Required
Once the cakes are cool, level them and choose which layer will be at the bottom. Place it on a cake plate. Spread on about 1/3 cup of strawberry preserves. Place the second layer of cake on top, alternating between the white and dark chocolate cakes and repeat. Smoothly frost the cake with the buttercream and refrigerate it, uncovered until firm.
Chocolate Glaze
2/3 cup (4 ounces/115 g) chopped semisweet chocolate
1/2 cup (120 ml) heavy cream
1/4 cup light corn syrup
1 teaspoon pure vanilla extract
1/8 teaspoon salt
Directions
Place the chocolate, cream and corn syrup in a small saucepan. Heat over medium-low until the cream begins to steam and the chocolate starts to melt. Remove from the heat and stir in the vanilla and salt until combined. Cool to room temperature, about 10 minutes.
More Assembly
Starting with about 1/2 cup at a time, pour the chocolate glaze into the centre of the frosted cake and use an offset spatula to spread it around the top allowing it to drip over the edges. Add more glaze until you like the way it looks.
Fill a pastry bag with a star tip with the remaining buttercream. After the glaze has set, pipe rosettes around the top edge of the cake. Place the chocolate-dipped strawberries on the rosettes.
Voila!
“Your good friend has just taken a piece of cake out of the garbage and eaten it. You will probably need this information when you check me into the Betty Crocker Clinic.” Cynthia Nixon
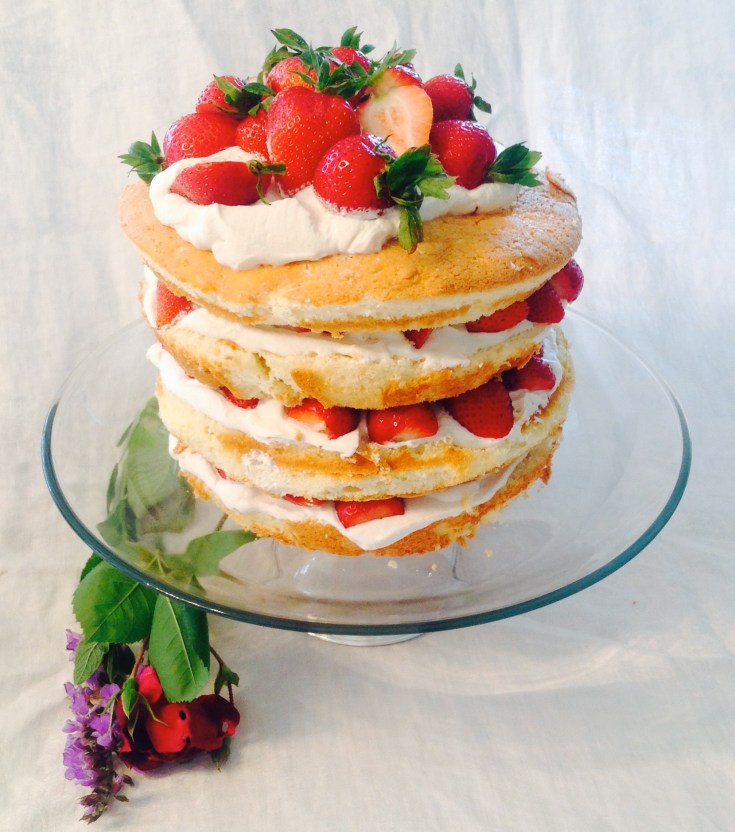
Strawberry shortcake with basil-infused whipping cream.
A house that smells deliciously yeasty of bread baking, or intensely chocolatey from the rich cake in the oven or of cinnamon from the sticky buns baking are the scents that make us the most nostalgic for our childhood. Dr. Alan Hirsch, a neurologist who studies such things tells us that the smells produced by baking have a particularly powerful effect on memory.
Baking is also about celebrating. Any event is made an occasion with a cake. Audrey Hebpburn was onto something when she said, “Let’s face it, a good, creamy chocolate cake does a lot for a lot of people.”
Baking is also about sharing. A four-layer cake with a filling, buttercream frosting, and elaborate decorations is not made to be be eaten solo.
Baking is also about science that seems more like magic when a sloppy cake batter rises in the oven and turns golden. It’s about the comforting rhythm of measuring, mixing and folding. It’s about taking an indulgent amount of your time to give pleasure to someone else. In the end, it’s very little about the eating.
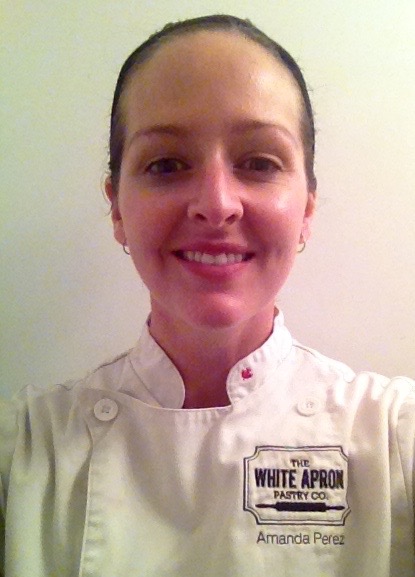
For some like Amanda Perez of Naramata’s The White Apron Pastry Co., baking becomes an avocation for many of these reasons so much so that she delved into as second career.
Work of art right? Photo: The White Apron Pastry Co.
How, why did you end up pursuing your career as a pastry chef?
I came into the culinary world in a roundabout way, as it seems that many chefs do. It wasn’t my first career — I actually already went to Simon Fraser, earned a degree in Communication, and worked in Public Relations/event planning for a number of years. But, I had always harboured a dream of going to pastry school, and I have always found comfort in baking. One day, I realized that although I liked my current job at the time, I wanted to feel passionate about how I spent my work day….and so, the pipe dream of going to pastry school became a reality. Many of the students in my class were career changers as well. After graduating with straight A’s from the grueling but exciting year-long foray into French Pastry, I worked at a number of high-end restaurants in Vancouver, mostly doing 5 pm – 2 am dinner service plating desserts, and then more prep, and eventually, becoming pastry chef for two restaurants in Vancouver.
Some of Amanda’s fabulous creations
Upon deciding to leave the coast and move to the Okanagan, I was offered the Pastry Chef role at Burrowing Owl in summer 2011. Instead, I accepted a Pastry Cook position at Mission Hill Family Estate, where I did the majority of the prep for the high end Terrace restaurant, as well as the large number of private functions, celebrity dinners, concert events etc. Every day I made beautiful crisp loaves of sourdough bread, which were served at lunch and dinner, as well as all of the desserts. I returned to Mission Hill in 2012, and that summer, found the little spot on Front Street in Penticton, recognizing it as a great spot for a tiny little pastry shop. The White Apron was born at that time.
What do you like most about having your business?
It feels good to create something. I worked for years in Public Relations, where my days were spent promoting other people’s products, and I felt like something was missing. It feels very satisfying to create something from start to finish. To work in a trade where there is so much creative license. To own my own business where I can have the flexibility to work around my family’s schedule (and our orchard, as well!) is a blessing to me and my family. And…..not having to do night shifts any more is pretty great. Plus, my husband has a pretty flexibly but demanding work schedule (he is a Financial Consultant with Investors Group), so having the flexibility to be able to stay home and raise our children while still working in the field I am passionate about is worth more than anything.
What are your future business plans?
After having my Front Street bakery for two years and recognizing the summers are where the business is at (and winters were too slow to even be financially worth opening), I decided that solely focussing on Farmers Markets and custom orders would be where I wanted to focus. I parted with my Front Street shop, moved our family to a property that is zoned to allow having a commercial kitchen on the premises (our previous home in the village wouldn’t allow one), and after a one year hiatus from orders while raising our Sous Chef #2, Zach, The White Apron is getting ready for business.
Currently, our garage space is being renovated into a commercial kitchen. I am at the electrical upgrade stage, and then the fun work begins. I plan to be open in May, and plan to do the Penticton Farmers Market, and quite likely, the Naramata Market as well. I am also taking wedding and special occasion orders now, and will again have a menu of holiday orders, particularly for Thanksgiving and Christmas. I look forward to possibly partnering up with B&B’s to offer my freshly baked brioche cinnamon rolls to guests and possibly even partnering with a couple wineries in the future as well!
Do you still enjoy baking?
I do! I bake as much as I can (which right now, is generally kid-friendly treats baked while the littlest one naps), and I am counting down the days to having my kitchen ready downstairs so that the real fun can begin! I should note that since selling my Front Street location, I haven’t been taking orders, because producing food that is to be sold from a home kitchen, is not permitted by Interior Health (or insurance companies).
Will you teach your kids to bake?
I already am! Clara helps me bake quite often and she is already learning a lot of valuable skills. Pretty impressive for a three-year-old. She loves scooping muffin batter with a portion scooper, cracking eggs and of course, taste testing.
What do you think is responsible for the increasing popularity of baking and cooking?
The Food Network has been instrumental in increasing the popularity for professional cooking. It is a bit of a double-edged sword though, because as great as it has been for increasing interest in the field, and in bringing attention to the effort and art that properly prepared food takes, it only shows the glamour and glitz and not the true experience and cost to those who choose it as a profession. This new popularity in baking and cooking has brought us a newfound interest in food in general, both in the preparation and consumption of it all.
Five tips for the home baker that will make a big difference to what they make?
1. Get a scale and use recipes that measure by weight rather than by volume. A cup of flour, scooped, can vary by as much as 20%, but 250g of flour will be 250g of flour no matter which way you scoop it.
2. Be confident. It’s just food. If you think a substitution or addition will work, try it. Recipes don’t have to be adhered to 100%. Have fun with it. And don’t bake when you’re rushed or in a foul mood!
3. Clean as you go. My favourite way of doing this is fill the sink with hot soapy water before you start cooking. Toss dirty dishes in the sink as you use them. Washing up is a breeze afterwards, and you’ll find you’ll bake or cook more often when you don’t dread the clean up. Also, start with a clean kitchen, with all your dishes put away.
4. Find a few websites and cookbooks that you trust, and use those when trying out new dishes. My favourites are www.food52.com, www.smittenkitchen.com and for baking/pastry, www.davidlebovitz.com
5. If you want to really go pro, scale out your ingredients in advance. At the very very least, gather all of your ingredients out on the counter before you start, and as you add each ingredient, put it away. I can admit to forgetting key ingredients by not doing this.
Five tools or pieces of equipment that you couldn’t live without?
Kitchen Aid mixer, bench scraper, my stack of glass mixing bowls, lots of rubber spatulas, and parchment paper.
Why should a home baker take a baking class?
Because it is fun! We don’t often get a chance as adults to take a class and learn something new. You’ll leave with a few new recipes, a few new techniques and an enjoyable afternoon out. Why not! I have taken a few classes myself for inspiration and just for fun, and never regret it.
Good advice. Check out the next Naramata-Blendbaking class with Chef Amanda teaching us how to make fancy French pastries.
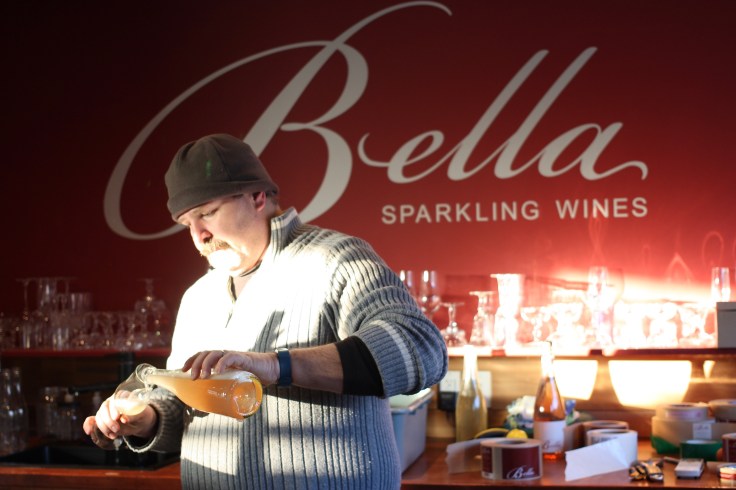
British Columbia’s only winery exclusively dedicated to bubbles and one of a very few in Canada, Bella Sparkling Wines focuses on single vineyard expressions of classic Champagne grape Chardonnay and Gamay Noir, an underdog BC grape that won’t be for long. Bella is special too as the exceptional sparkling wines are made using traditional and ancestral methods.
Newsflash: Making wine, as everyone in the Okanagan Valley knows, is hard work. It’s dependent on the weather and growing conditions that change from year-to-year. It’s about hard physical, unglamorous, labour. It’s about finicky science with art, research, education, knowledge and risk thrown in. Making sparkling wine? Double, triple, quadruple the work. Making traditional and ancestral (natural) sparkling and the work goes off the scale.
Bella Wine Maker/Owner Jay Drysdale showing me how his painstaking work riddling has dislodged particles allowing them to settle out at the mouth of the bottle making it possible to remove the sediment during the discorging step
Found a niche
“I love what I do,” says Bella wine maker/owner Jay Drysdale. “It’s hard to get a true sense of the fruit with so much makeup,” says Jay. “I love to see what the ground gives us with nothing added to hide the flavours or strip the colours.
“It may be hard but we have also found a niche.” After a thoughtful pause, Jay says, “I don’t know how to put this properly but it is amazing to share my science experiments, work at making the wine better and better and share my passion with others.”
Mission accomplished. Bella, now five years in, is selling out of all they produce and is garnering a loyal and effervescent following.
Sur lie aging happening here.
Riddle me this?
How many times does Jay touch a bottle to do a process such as hand riddling and hand discorging before it’s sold? “About 85 times,” says Jay. “All we do has become the norm and we don’t really think about it anymore but the 2,000 cases we produce is a lot to do by hand.”
Jay says Bella is about using traditional techniques that are a dying art. Jay likens what he does to the pushback in what’s happening with our food. “Our grandparents used real butter in their food. Our generation went to using margarine and all the stuff that’s put into that. Now we are seeing why our grandparents’ generation were healthier and enjoyed better tasting food.”
Of Bella’s 2,000 cases, 500 of them are natural wine made with ancestral methods. When wine was first made 8,000 years ago, it was not made using packets of yeast, vitamins, enzymes, reverse osmosis, cryoextraction, powdered tannins…among other additives and processed used in winemaking worldwide. Wines were made from crushed grapes that fermented into wine. Full stop.
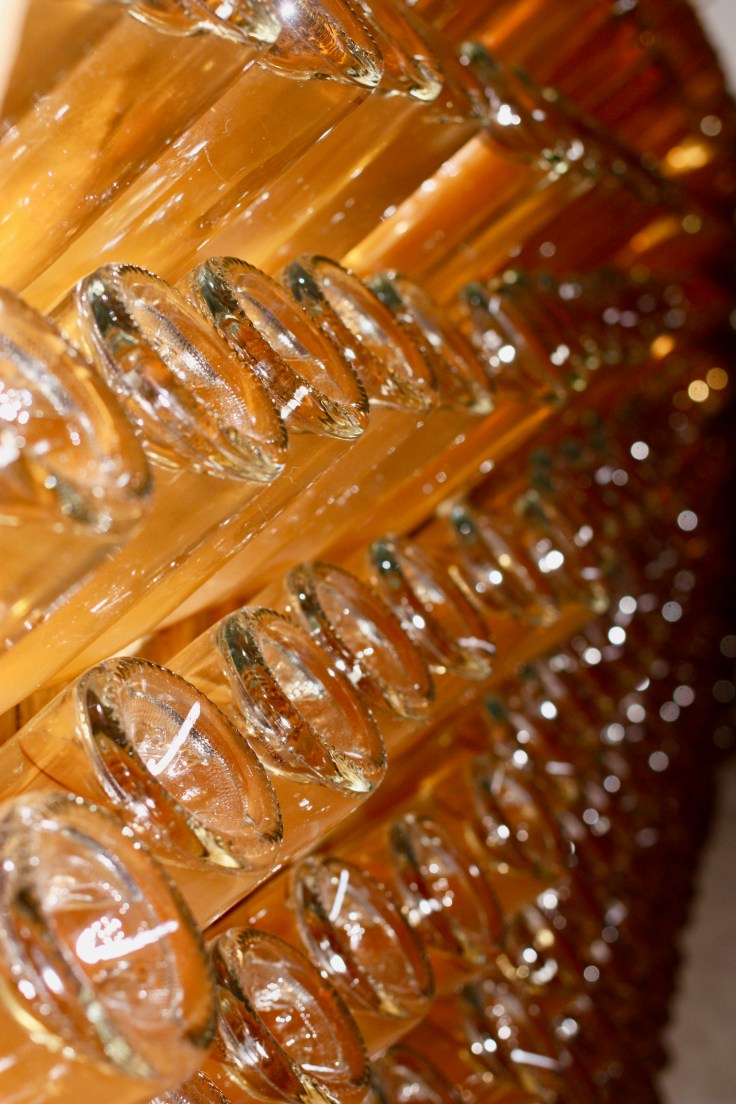
Wines getting their sparkle on in riddling racks are a beautiful thing.
Traditional and ancestral methods
Jay explains that his wines made with the traditional method involve a first ferment in a tank. The clear wine on top is then racked or siphoned off the murky lees and sometimes aged in oak barrels during or after this clarification and racking. The second step involves bottling with the addition of yeast and sugar for the second ferment. This is where the riddling comes in. Jay grabs each bottle, giving it a small shake, an abrupt back and forth twist, every day over a period of one to four weeks. The shaking and the twist dislodges particles that have clung to the glass and prevents sediments from caking in one spot. (A Gyropalette is on Jay’s wish list…a computer-automated machine that would reduce his workload enormously.) The final step is discouraging where a small amount of wine is released along with the sediment plug.
Natural wine has only one ferment involved and no added yeast, sugar or sulphur.
Jay pouring me a flute of Orchard House Gamay, a natural wine made with ancestral methods so I could compare it to a glass of traditional Champagne-style sparkling made with Chardonnay.
We compared Bella’s first vintage of Orchard House Gamay with a glass of their traditional Champagne-style sparkling, B2 (Buddhas Blend), 100 per cent Chardonnay from two vineyards, one in Oliver and one in Kamloops to blend two levels of acidity. (Editor’s note – I love my job.) The traditional style was lovely. To quote Dom Perignon, “I am drinking the stars!” Fresh, dry, citrus notes.
Bella’s Orchard House Gamay, with grapes from a small holding on the Naramata Bench was more flavourful with sherry, apricot and peach notes and it was a lovely pale pink. Made with traditional methods, the sparkling wonderfulness was made with Gamay Noir that remained on the lees for a year in a tank. The lees act as a natural preservative and as long as it stays smelling clean no sulphur is required. As Jay says, each sip tasted a little differently. (Editor’s note – for better or worse re the writing quality – I’m sipping a glass as I write this. Worth a typo or two…)
The lucky students at my Naramata-Blend valentine baking classwill be among the first to sample Orchard House Gamay, this special sparkling of only 40 cases that will be released for Valentine’s. There are a few tickets left if you want to learn to bake fancy French pastries with Chef Amanda Perez of The White Apron Co.
Orchard House Gamay will be a treat for students at the next Naramata-Blend baking classjust in time for Valentine’s Day.
Champagne love story
For their first date Jay took Wendy Rose and his dog (Bella) truffle hunting just outside of Portland, Oregon. They had a lot in common including a shared rich culinary background. Jay was a retired chef, currently working in the wine industry and Wendy grew up in a household where her mom was a chef and her dad’s only hobby was wine. Long story short, the couple has been celebrating ever since. Wendy and Jay founded Bella in 2011 on a four-acre Naramata homestead that incorporates vineyard, pigs, chickens, bees, organic gardens and heritage fruit.
I left Bella with a bottle of sparkling and two dozens freshly laid eggs. I love Naramatians –shirt off their back = wine from their cellar. Their view…winter or summer…is stunning.The ultimate oxymoron…Beautiful Bella is located on Gulch Road in Naramata which always brings to mind The Wizard of Oz’s Miss Gulch whose alter-ego was the Wicked Witch.Got carried away with photos of the bubbly on the riddling racks. Just so cool after all my visits to traditional Okanagan wineries.
 Rather prosaically, a Crown Maker is called a jeweller but I think this intricate art form needs a more suitable moniker. How about latin? Factorem Coronam comes closer to capturing the magic of this sorcery. Naramata’s Queen of Crowns is Darlene Jones and here are some of her diadems to die for.
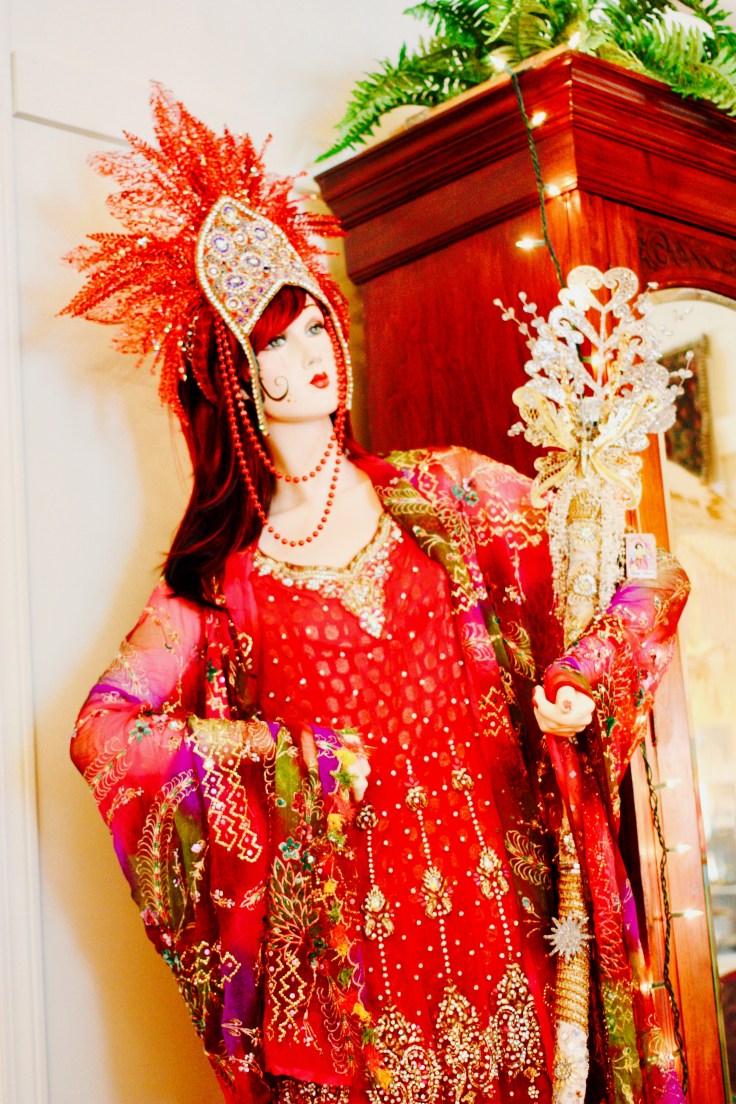


 “Cake is happiness! If you know the way of the cake, you know the way of happiness! If you have a cake in front of you, you should not look any further for joy!”
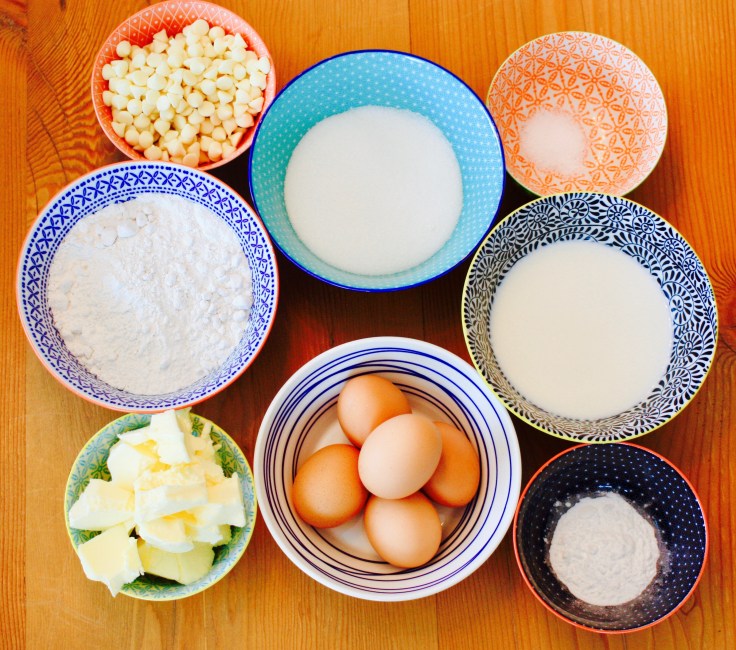

 Chocolate-dipped strawberries