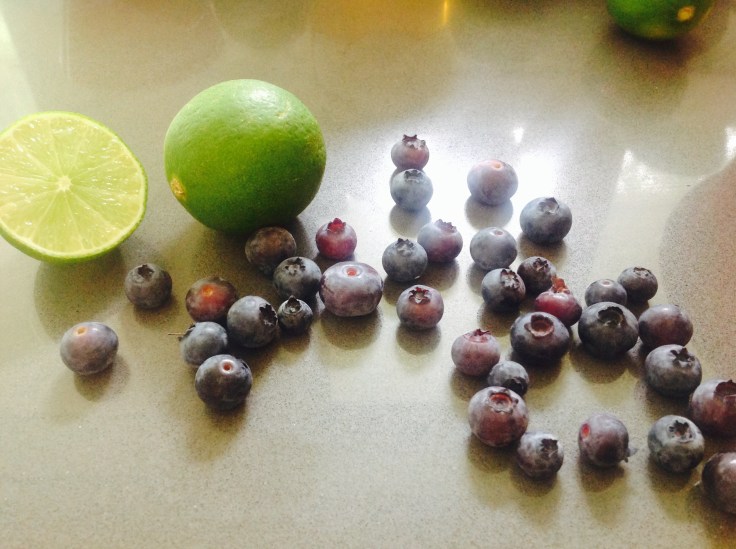
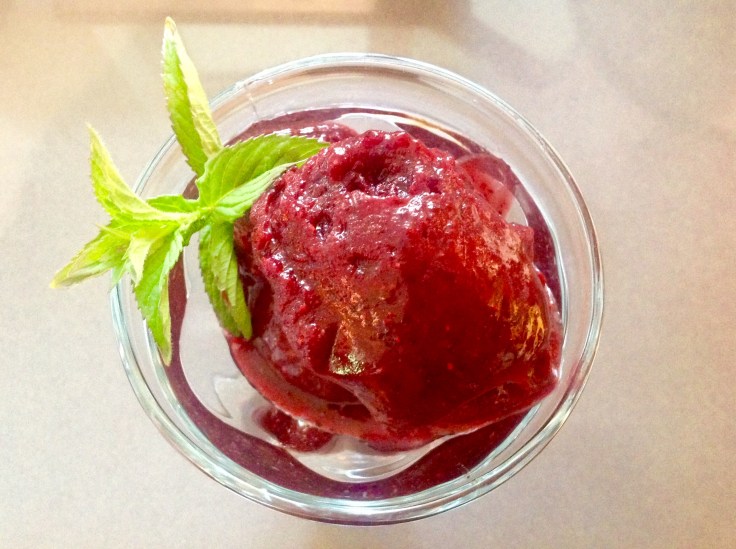
Adding fresh lime and ginger zings up the blueberries in this summer sorbet in the most amazing way. You need a bit of technology to make this one…a blender and an ice cream maker. If you don’t have an ice cream maker I highly recommend getting one. There are a million ice cream and sorbet recipes to choose from and it’s easier to make than you can imagine.
Makes 8 1/2 cup servings.
Ingredients
5 cups fresh, washed and stemmed blueberries (I picked my own from our farm but it’s blueberry season and they are everywhere at the farmer’s markets and supermarkets.)
1/4 cup honey (Penticton Farmer’s market purchase)
1/4 sugar
1/4 cup freshly squeezed lime juice (about 6 limes)
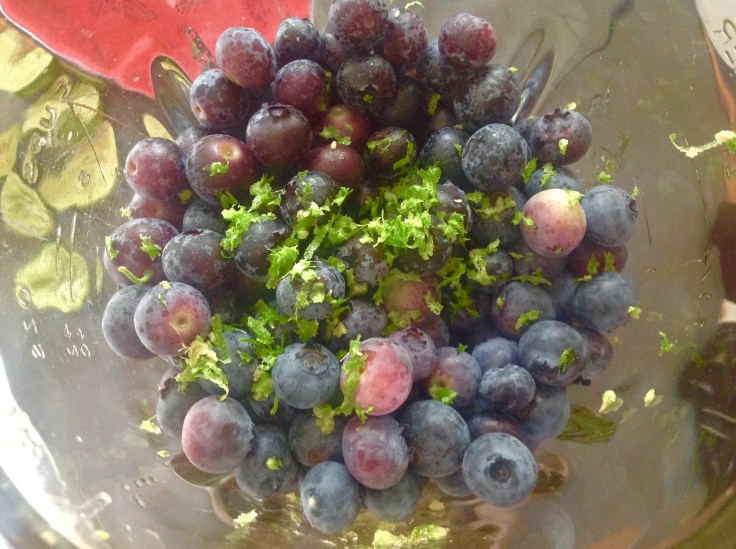
1 teaspoon lime zest
2 teaspoons fresh grated ginger
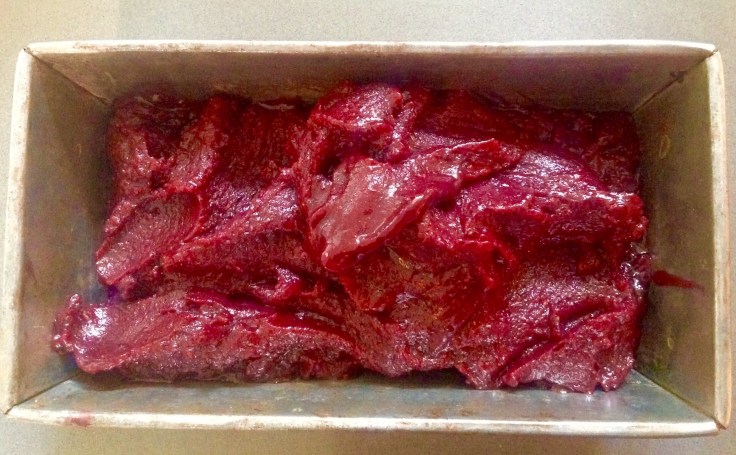
Add all ingredients to a blender and liquefy about 2 minutes until the mixture reaches a deep purple colour. Refrigerate for about 2 hours until cool. Taste and add more sugar if you desire but I like it a bit tart so didn’t add any more sugar.
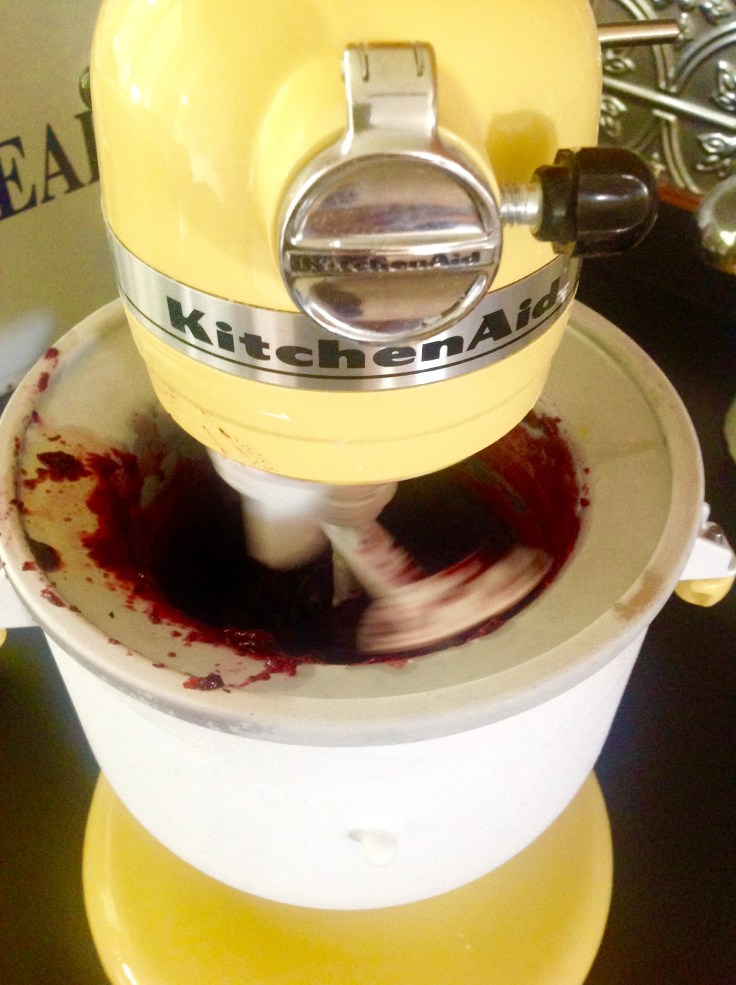
I store my ice cream maker vessel in the freezer so it’s ready when I am.
Follow the instructions of your ice cream maker. Run the ice cream maker for 20 to 25 minutes — until the sorbet thickens to soft serve consistency.
Loaf pans work great to freeze and store your sorbet in.
Transfer to a container and freeze for 4 hours or overnight. Scoop and serve.
It’s purple rain at our Naramata berry farm and throughout British Columbia as blueberries come into season. What better way to celebrate than with a blueberry tart recipe?
My first step was to pick. Your’s may be to pick up a couple of pints at a farmer’s market or the grocery store.
You can adorn the tart with icing sugar if you like but I was happy to celebrate purple and leave it as is. The blueberry heart tart is also known as Nicole’s wedding tart at our house or more recently, Gone in 60 Seconds.
This recipe involves three steps: The pastry, a gourmet crumble and the blueberries and cream filling.
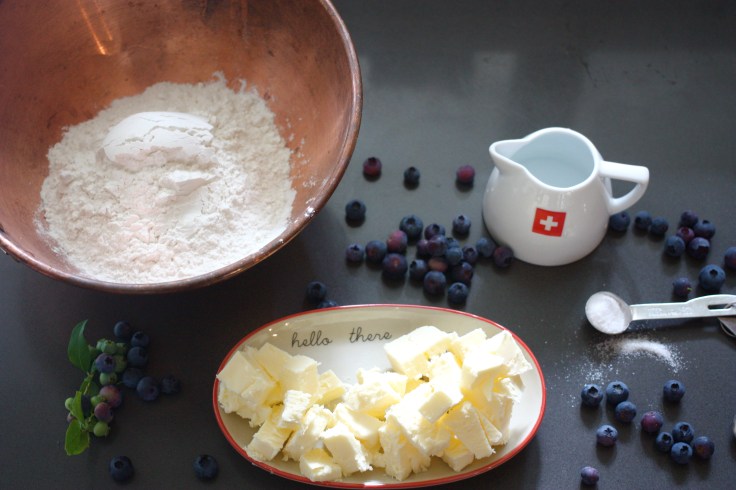
For the pastry I elected to use a Pâte Brisée, which is a wonderful flaky pie dough that works well as a dough to line tart shells. Although there are many methods to make it either by hand, with a mixer or a food processor, I find the later is the easiest.
Ingredients for pastry dough
1 teaspoon sea salt
6 tablespoons cold water
1 cup butter
3 cups minus 2 tablespoons all-purpose flour
Combine salt and flour in the bowl of a food processor and pulse a few times. Add the butter in cubes and pulse after each small batch. Add the water and mix only until the dough comes together. It is important not to over-mix. Scrape the dough onto a sheet of plastic wrap, flatten and place in the refrigerator for at least a few hours or preferably overnight.
Roll out the dough, place into your tart pan, perforate the bottom of the dough with the tines of a fork and blind bake. Preheat the oven to 325 F and top the pastry with parchment and add rice or beans all the way to the edges. Bake with this faux filling for 15 minutes, the remove the rice or beans and return the shell to the oven for another 15 minutes until golden brown and evenly coloured. Remove from oven and cool completely before filling. Just before assembly, brush the tart shell with an egg wash (1 egg beaten with a tablespoon of water) and bake for 5 minutes.
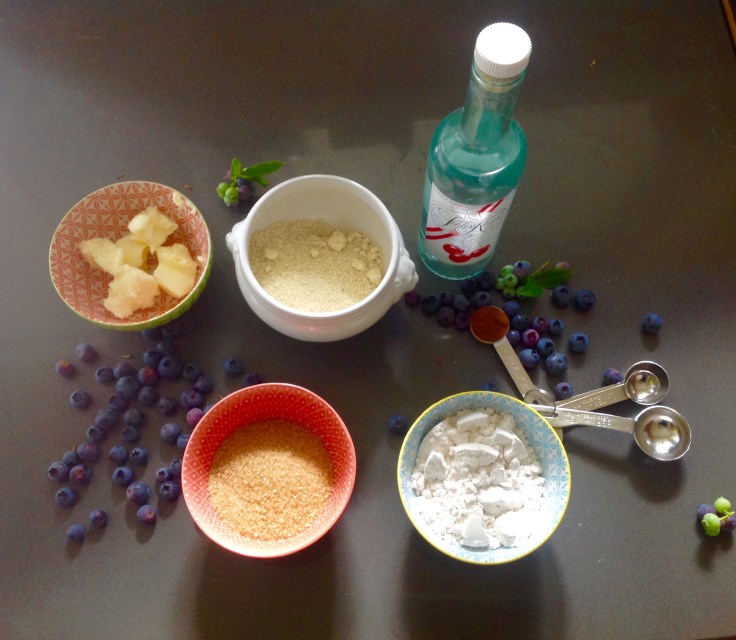
This crumble recipe is gourmet with the addition of Kirschwasser which gives it a lovely cherry flavour.
Crumble ingredients
4 tablespoons butter
1/3 cup turbinado sugar (sometimes called sugar in the raw)
1/2 cup cake flour
3/4 cup ground almonds or almond flour
1/2 teaspoon cinnamon
1 tablespoon Kirschwasser
Preheat oven to 325F and line a sheet pan with parchment paper. Cut the butter into pieces and place all the ingredients in a bowl and rub the mixture between your hands. Spread on the parchment-lined baking sheet and bake 20 to 25 minutes, stirring occasionally, until golden brown and crisp. Cool completely. Store left-overs in the freezer for future use on ice cream or muffins.
One cow contains the cream and the other the milk.
Ingredients for blueberry filling
2 1/4 cup blueberries
1/4 cup sugar
1 1/4 teaspoons fresh squeezed lemon juice
1 1/4 teaspoons water
1 teaspoon cornstarch
1/2 vanilla bean
2 plus 1 teaspoon egg yolks
1/4 cup whole milk
1/4 heavy cream
In a saucepan, combine the blueberries and 1 teaspoon of the sugar and bring to a boil. Turn the heat to low and boil for 2 minutes. Meanwhile, whisk together the lemon juice, water and cornstarch in a bowl and gradually stir into the berries and simmer 1 minute until thickened. If the juice is still watery and another 1/2 teaspoon of cornstarch in a tablespoon of the juice and stir in. Remove from heat when thickened.
Use a paring knife and split the vanilla bean in half lengthwise and scrape the seeds into a medium bowl. Add the egg yolk and remaining sugar and whisk together. Add the milk and cream and stir until the sugar is dissolved. Stir in the blueberries and take a moment to celebrate the colour.
Some assembly required
Preheat oven to 325 F.
Sprinkle about 6 tablespoons of the crumble in an even layer over the bottom of the pre-baked tart shell. Spread the blueberry filling on top. Place on a sheet pan and bake 30 to 40 minutes until just set. If you shake the pan gently, the middle will jiggle a bit under the surface until it cools, when it will firm up. Remove from the oven and place on a wire rack to cool. Sift on some icing sugar if you like. We served our’s with whipped cream.
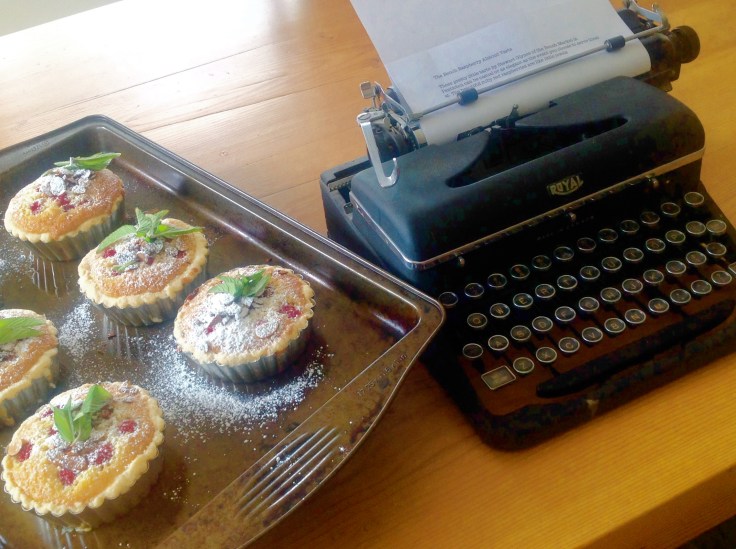
The first recipe from the first crop of our Naramata raspberry farm berries is fittingly by our favourite Chef, Stewart Glynes, the owner of The Bench Market and it’s from my new favourite cookbook, The Butcher, the Baker, the Wine & Cheese Maker in the Okanagan and we are taking them to good Naramata pals’ place for dinner tonight. So much love packed in there that I had to use a run-on sentence…
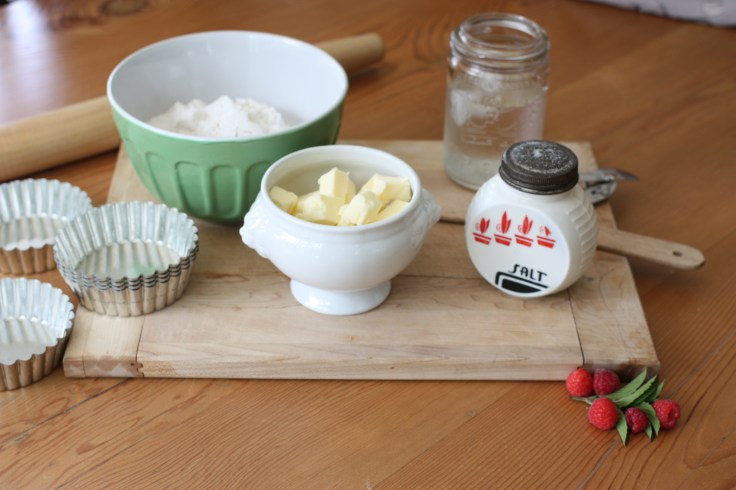
Step one…go and pick berries in pyjamas with a coffee in one hand and colander in the other.Step two…put on clothes and dash to the Naramata Store for butter. It’s not unusual to see horses hitched at the store but I drove. The store is a true general store and has: liquor store, bottle depot, DVD rentals, ice cream shop, deli, groceries, post office…
Pastry
2 cups all-purpose flour
2/3 cup cold unsalted butter
pinch of salt
3-5 Tbsp cold water
Mix together flour, butter and salt in a bowl with hands until it is a fine sand-like texture. Add cold water a little at a time, until dough comes together but is not sticky. Form into flat dish shape and chill for about an hour.
Almond filling
1 cup butter
1 cup white sugar
1 cup ground almonds
4 eggs
1/2 cup all-purpose flour
In your mixer with a paddle attachment, cream butter and sugar until smooth (about 7 minutes) on medium-high speed. Add almonds and eggs, one at a time, until incorporated. Add flour and mix on low until just combined.
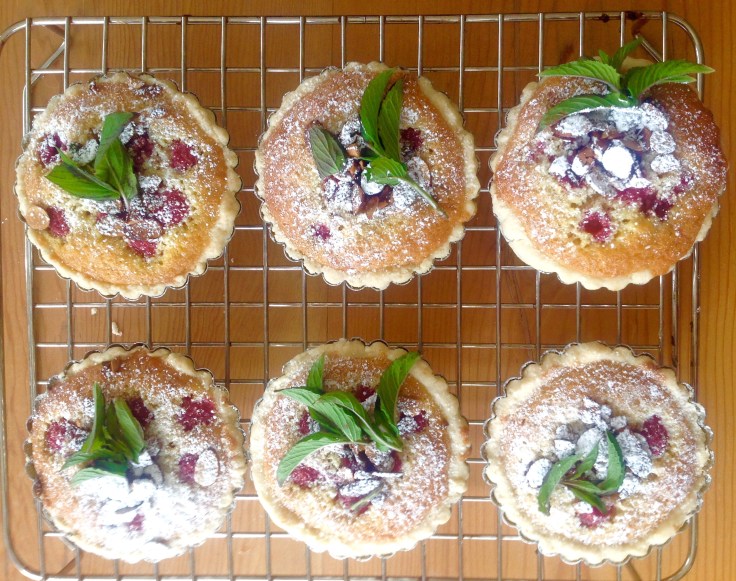
Preheat oven to 350. (Stewart says this recipe makes about 12 4-inch tarts but my tart rings must have been taller as I only had enough pastry for 6 tarts…) Place dough on floured surface and roll out. Cut a circle slightly larger than your tart rings or tart pans and fold into bottom of shell. Add 5 or 6 raspberries to the bottom of the shell. Add enough almond cream to come even with the top of tart. Press another 5 or 6 raspberries into top of almond cream in whatever design you like.
Bake for about 15-20 minutes or until top is lightly brown around edge. Top with powdered sugar and some sliced almonds toasted for a short while in the oven and garnish with a sprig of mint.
This is step one, the lemon curd which needs a four-hour chill session in the fridge.
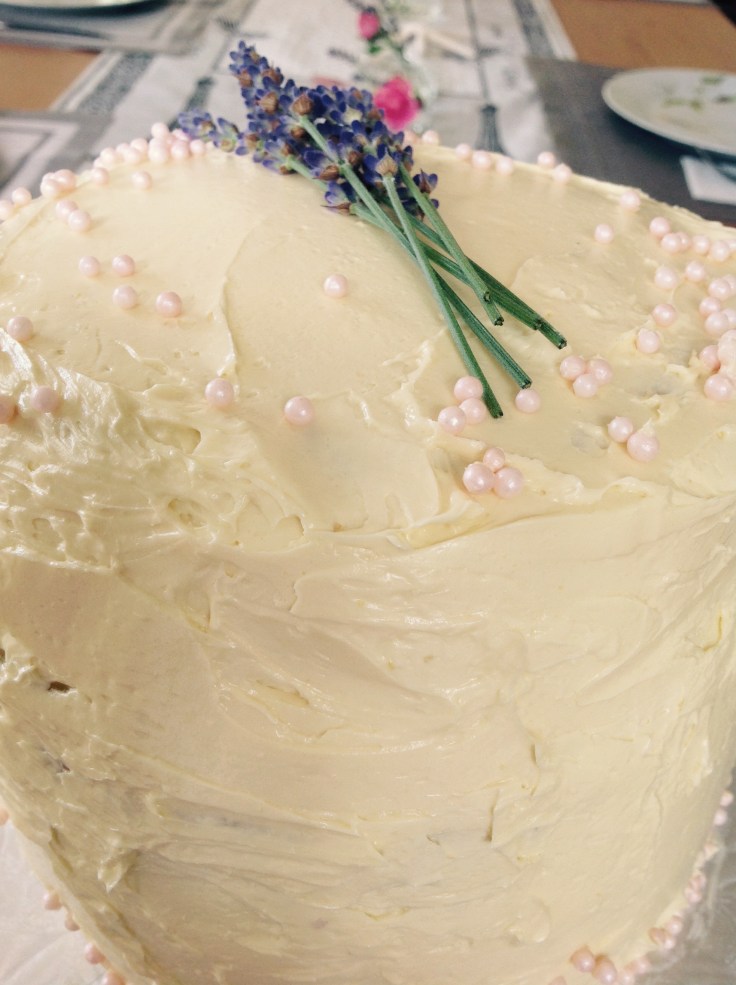
A series of fortunate events brought together my niece and family, including her 10-month-old blue-eyed lady-slayer, and the baby’s great-grandma all together for her 81st birthday. A fresh, light, three-layered Lemony Snicket buttermilk cake is just the ticket. Lemon buttermilk cake, glued together with lemon curd, soaked in lemon syrup and topped with a luxuriously buttery, vanilla swiss meringue buttercream icing is a worthwhile afternoon’s bake-a-thon.
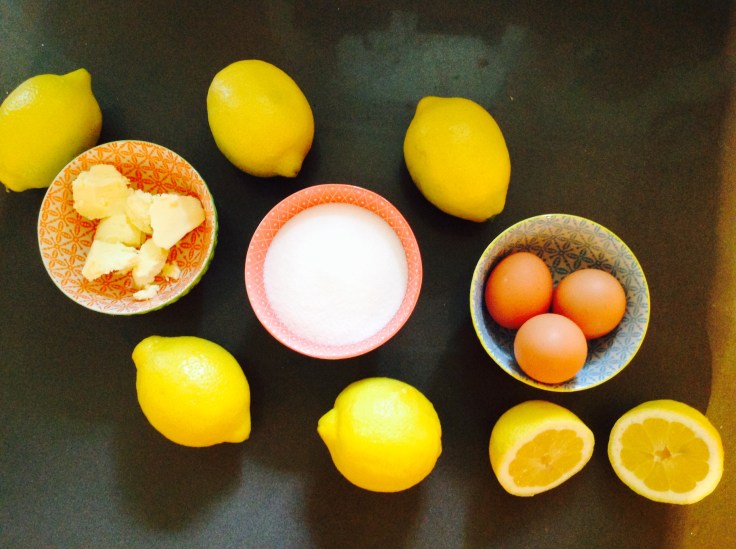
Lemon curd
5 tablespoons butter, diced
3/4 cup granulated sugar
5 tablespoon fresh lemon juice, don’t even think about bottled
2 large egg yolks
1 large egg
Place the butter in a heat-proof bowl and set aside. Whisk together the sugar, lemon juice, egg yolks and egg in a medium sauce pan and cook over medium heat stirring to prevent the eggs from curdling. Cook about 6 to 8 minutes until thick enough to coat the back of a spoon. Remove from the heat and strain it through a sieve over the bowl containing the butter. Sir to combine and cover with plastic wrap touching the curd to prevent a nasty skin from forming and put in the fridge for about 4 hours to cool and set.
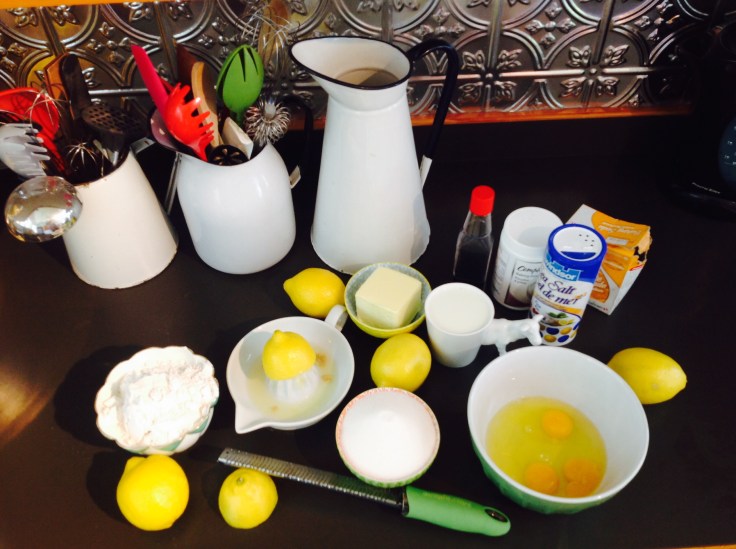
Step two, buttermilk lemon cake…I dare you not to lick the spoon
Lemon cake
butter and flour three 6-inch cake pans
2 1/4 cup cake flour
1 1/2 teaspoons baking powder
3/4 teaspoon baking soda
1/4 teaspoon salt
1 1/2 cup granulated sugar
1 tablespoon finely grated lemon zest
3/4 cup butter at room temperature
2 tablespoons fresh lemon juice
1 teaspoon pure vanilla extract
3 large eggs
2 egg whites
1 cup buttermilk
Pre-heat oven to 350F. Sift together flour, baking powder, baking soda and salt and set aside. Place the sugar and lemon zest in a bowl and rub them together. In the bowl of a stand-mixer fitted with a paddle attachment, beat the butter on medium speed for 2 minutes. Add the sugar mixture and mix on medium-high until light and fluffy, 3 to 5 minutes. Stop the mixer and scrape down the bowl. Turn the mixer to medium-low and add the lemon juice, vanilla, eggs and egg whites, one at a time. Stop the bowl and scrape it down. Turn the mixture on low and add the flour mixture in three batches, alternating with the buttermilk. Just mix until combined, about 30 seconds or so. Evenly divide the batter into prepared 6-inch pans and bake for 22 to 24 minutes checking with a toothpick for doneness. Cool for 15 minutes on a rack before removing the cakes from the pans.
Lemon simple syrup
1/4 cup granulated sugar
2 tablespoons fresh lemon juice
2 teaspoons finely grated lemon zest
Stir all the ingredients together in saucepan and bring to a boil. Reduce the heat to low and simmer for 10 minutes. Cool.
Last step before some assembly required…the vanilla Swiss meringue buttercream
Buttercream icing
1/2 cup egg whites
1 cup granulated sugar
1 1/2 cups butter at room temperature cubed
1 1/2 teaspoons pure vanilla extract
Yellow food colouring
Place the egg whites and sugar in the bowl of a stand-mixer and whisk together by hand and place over a medium saucepan filled with a few inches of water to create a double boiler. The bottom of the bowl should not touch the water. Whisk intermittently and heat until it registers 160F or until it is hot to the touch. Fit it onto your stand mixer and with the whisk attachment, beat on high for 8 to 10 minutes. Stop the mixer and swap out the whisk for the paddle and turn the mixer to low. Add the butter lumps a few at a time and then the vanilla and beat for 3 to 5 minutes until very smooth. Add a tiny bit of yellow food colouring a bit at a time until you achieve a pale yellow colour.
Some assembly required…
Level the cakes and select one for the bottom layer. Using a pastry brush, brush the top of each cake with the lemon syrup. Pipe a line of buttercream around the top edge of the first layer to create a dam. Fill in with half of the lemon curd, top with a second layer and repeat the procedure using the rest of the lemon curd. Add the final layer. Crumb coat and frost the cake with buttercream and decorate with sugar pearls if you want to get fancy.
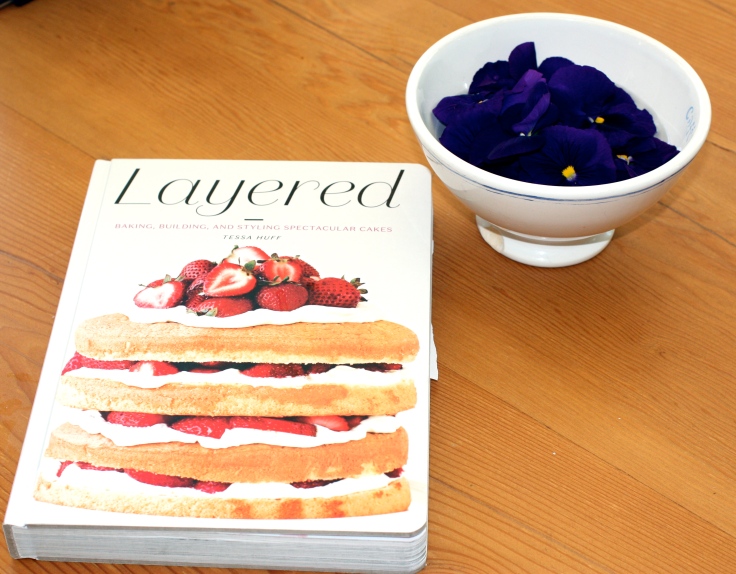
This recipe is from Tessa Huff’s Layered with some re-branding. She calls it a Lemon Supreme….Check out this Vancouver cake-builder’s blog here.
The apples are local, from BC Tree Fruits, a farmer’s cooperative and my eggs are from neighbour Lucy’s happy chickens
This cake is on wheels for four reasons:
It’s the creation of Klemens Koester of Bread on Wheels in Kelowna
It’s so straightforward to make that you can invite your friends over for coffee and have it coming out of the oven in about an hour…so fast — like a cake on wheels.
The apple slice decorations make the cake resemble a wheel.
3 apples, peeled, cored and sliced into 1/8-inch (3-mm) wedges
apricot jam, for glazing
icing sugar, for dusting
Cool completely after baking before sifting on the icing sugar and brushing with the hot apricot jam or the sugar will disappear into the cake.
Preheat oven to 375F (190C). Grease and flour two 10-inch (25-cm) baking pans. In a mixer bowl, whisk room-temperature butter and sugar together until nice and fluffy, then add eggs slowly and mix well. Add flour, baking powder, vanilla and lemon zest. Mix until batter is even.
Spoon batter into cake pans evenly. Spread out until top is nice and smooth. Lay apple slices gently onto batter. Do not push into the batter.
Bake in the middle of the oven until golden brown, for about 30-40 minutes. Test for doneness with a toothpick which should come out without crumbs. Remove from oven and cool in the pan on a rack.
Try substituting other fruits for the apples. My apricots are just about ready so I’m going to try those next.
The nicest way to finish up: Dust icing sugar over cake and glaze apples with hot apricot jam or jelly.
The new amazing recipe book’s Bean Scene’s best-ever ginger cookie recipe is equally on wheels and will be my new go-to Christmas cookie. The spice mix is spot on.
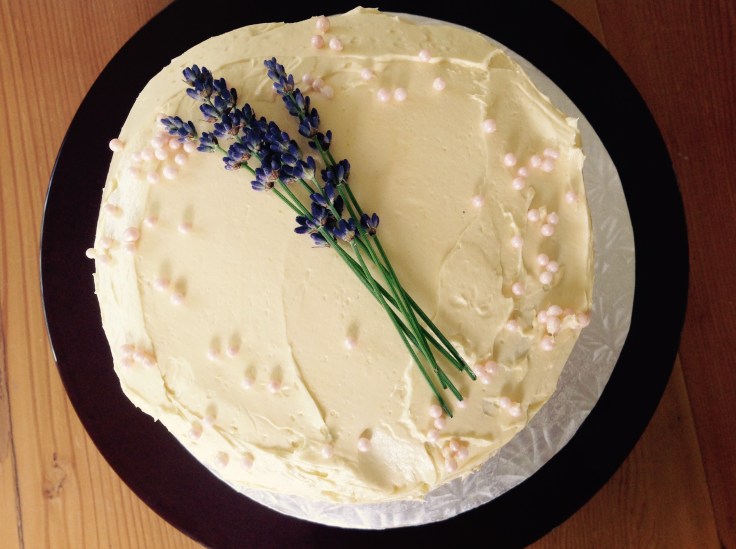
It’s strawberry time in the Valley and this cake is a celebration of just-picked, ripe, red berries smothered in a basil-infused whipped cream slathered between the lightest, fluffiest chiffon sponge cake you will ever baked. I don’t even feel like I’ve oversold it.
I’ve never used grapeseed oil in a cake before and was skeptical. Colour me wrong. I knew as soon as the batter started to come together that it would be super light and produce a wonderful sponge and it’s wine country here. What a perfect use for a by-product…
Chiffon cake ingredients
2 cups cake flour
2 teaspoons baking powder
1/2 teaspoon salt
1/2 cup grapeseed oil
1 1/4 cups plus 2 tablespoons granulated sugar
2 teaspoons pure vanilla extract
6 large egg yolks
1/2 cup whole milk
8 large egg whites (from my neighbour Lucy’s chickens)
3/4 teaspoon cream of tartar
Preheat the oven to 350F and grease and line the bottoms of two 8-inch cake pans with parchment paper.
Sift together the flour, baking powder and salt and set aside.
In the bowl of a stand mixer fitted with the paddle attachment, beat together the oil and 1 1/4 cups of the sugar on medium speed for one minute. Add the vanilla and egg yolks, one at a time and mix for about three minutes. The mixture will increase in volume (I told you) and be pale in colour. Stop the mixer and scrape down the bowl.
Turn the mixer to low and add the flour mixture in three batches, alternating with the milk. Mix on medium for no more than 30 seconds after the last streaks of dry ingredients are combined. Pour the batter into a large bowl and set aside.
Clean the mixer bowl and paddle and dry well. In the clean bowl of the stand mixer fitted with the whisk attachment, whisk the egg whites on medium-low speed until foamy. Add the remaining two tablespoons of sugar and the cream of tartar and whisk on high until stiff peaks form.
Stop the mixer and fold the egg whites into the cake better. Evenly divide the batter between the prepared pans and bake for 25 to 28 minutes, or until a toothpick inserted into the centre of the cakes comes out clean. Let them rest on a wire rack until cool before running a paring knife around the edges of the cakes and removing them from their pans.
The basil-infused whipping cream gives the cake an extra something. The basil flavour pairs beautifully with strawberries. The Handyman, whose heart is only really moved by chocolate, says he would have skipped this whole basil step but my other food critics disagreed. I feel Gwen Stefani would be cool with it too.
Basil-infused whipped cream ingredients
2 1/2 cups heavy cream
1 to 1 1/2 cups lightly packed fresh basil leaves
2 tablespoons granulated sugar
1/2 teaspoon pure vanilla extract
Slowly heat 2 cups of the cream in a medium saucepan over medium-low heat until it begins to simmer. Meanwhile, gently muddle the basil leaves with mortar and pestle (or crush them up a bit with your hands if you are short of kitchen equipment.)
Once the cream begins to steam and simmer, remove the pan from the heat and add the basil leaves, cover and let them steep for 30 minutes. Transfer the mixture to a container and refrigerate until cold.
Strain out the basil leaves, re-measure the cream and top it off with more cream if necessary so you have a total of 2 cups. In the bowl of a stand mixer fitted with the whisk, whisk the cream on medium speed until it begins to thicken. Add the sugar and vanilla and whisk on high until it forms medium peaks. For best results, store the whipped cream in the fridge and assemble the cake just before serving.
Some assembly required
Four cups fresh strawberries
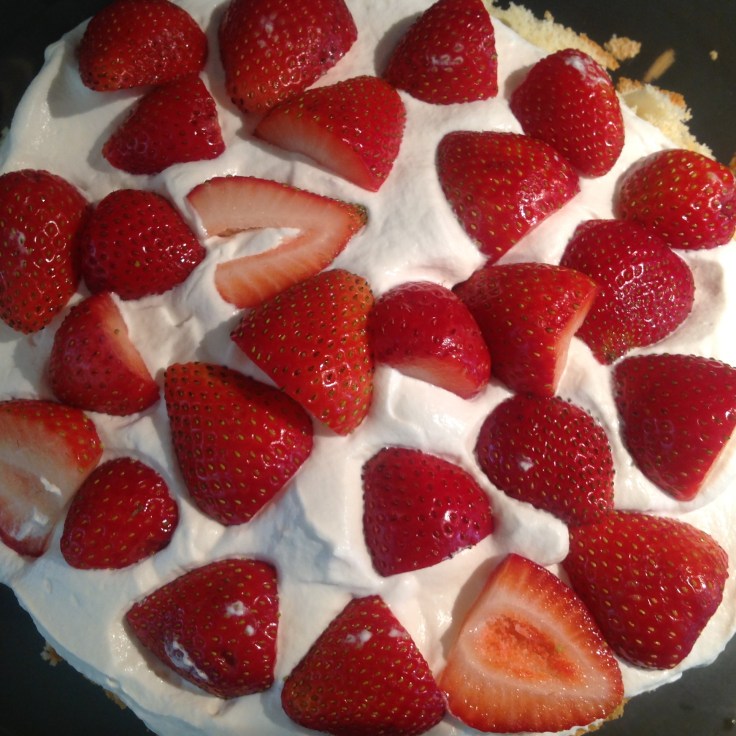
With the assistance of my son’s lovely fiancé, the cake was easy to assemble. Hull and slice the fresh strawberries 1/4 inch thick until you have about four cups of sliced berries. Reserve a few whole berries with their tops on for decoration.
Once the cakes have cooled completely, carefully halve them horizontally to create four even layers. Level the cakes and choose which layer will be the bottom. Place it on a cake plate and spread on one-quarter of the basil-infused whipped cream and one cup of the berries.
Top with the next layer of cake and repeat. Place the reserved strawberries on top of the last layer to decorate.
Eat your Gwen Chiffani immediately or keep refrigerated for up to two days.
This recipe, with some re-branding, came from Layered by Tessa Huff, a fellow British Columbian. My new mission in life is to make every single cake in this amazing cook book.
Blueberry tart wouldn’t be possible without good bird netting.
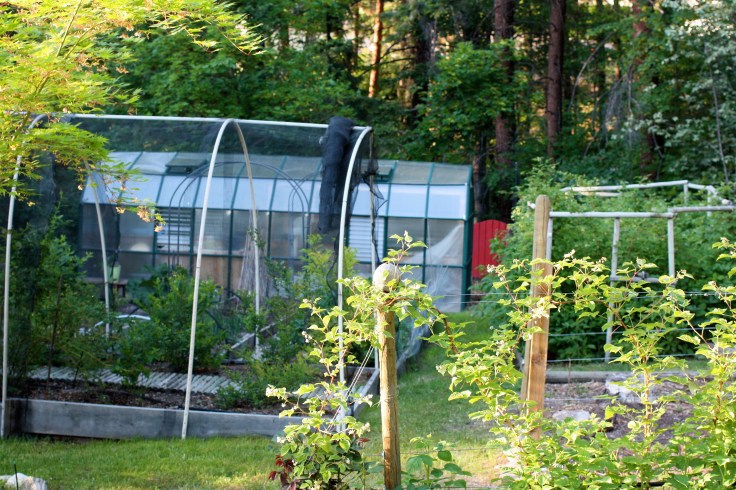
The birds know a good thing when they see it. The very minute blueberries are ripe and ready to eat they are on it. If you want to find your thrill on blueberry hill you need some pre-planning. Our berries in our first producing patch are just blueing up nicely so it’s time for The Handyman to work his magic.
The Handyman used 3/4″ PVC with some t-joints and PVC glue to make the structure, spending about $50 on materials. He measured the width of the blueberry bed and the height. Our box was 8 feet wide and he used two 10-foot sections of PVC to give us a 7-foot clearance at the apex of the hoop. He says you could also add some rebar inside the PVC to make the structure sturdier which he plans to do in the future when we enclose the much larger commercial patch for the berry farm. If you need to make the structure more freestanding, ie. you don’t have a wooden box as your bed to staple the PVC too, you will need to insert a section of rebar into the ends of the PVC to allow you to dig the PVC into the ground. The bird netting was a lucky drive-by find found at the side of the road with a “free” sign on it. Of course, you can purchase netting…
We heaped lovely soil with lots of peat moss into this raised box and I top with a mulch of pine needles to keep these acid-loving berries happy.Here is a side view…we have left one end up so the bees can finish up their last bit of pollination for us. We will secure this opening when the berries are ripe and weigh down the bottom with a few rocks we can remove to lift the flap when harvesting.Here is a look at the roof structure. The nets are secured with zip ties.Blueberries are safe as houses from the birds but easily accessible for picking.Jacquy Pfieiffer’s blueberry tart is a pretty good pay-back for The Handyman’s work.
Blueberry Tart
Day one:
Sweet Dough (makes enough for two 9-inch crusts)
168 grams or 6 ounces of unsalted butter
1.4 grams or 1/4 teaspoon of salt
112 grams or 1 cup confectioners’ sugar
39 grams or 1/3 cup of almond flour
7 grams or 1 1/2 teaspoons vanilla extract
1 extra large egg plus 1 to 2 teaspoons
315 grams or 2 7/8 cup sifted cake flour
In a stand mixer fitted with the paddle attachment cream the butter and sea salt on medium speed for about 1 minute. Scrape down the bowl and add the confectioners’ sugar and combine with the butter at low speed. Scrape down the bowl and then add almond flour and vanilla and combine at low speed. Add the eggs, one at a time and about a quarter of the cake flour and beat on low until just incorporated. Stop the machine and scrape down the bowl. Gradually add the remaining flour and mix just until the dough comes together. Don’t over mix. Press the dough into a 1/2″ thick rectangle block, wrap in plastic and refrigerate overnight or for at least two to three hours.
You could also make the streusel (see below) on day one and or the blueberry filling and refrigerate until ready to assemble and bake.
Day two:
After it has chilled, remove the dough from the refrigerator, cut it into two equal portions and roll one out in a 1/4 ” thick circle and line a 9-inch tart pan, ring, or heart.
Using a fork, perforate the bottom of the shell making rows of little holes. Place in the refrigerator uncovered for at least an hour. (Freeze the second portion of dough for a future use). Pre-bake the shell in a 325F oven. To do this, line the shell with parchment and add rice, dried beans or pie weights. Bake with this “faux” filling for 15 minutes and then remove the parchment and rice, beans or weights and return the tart shell to the oven for another 5 to 15 minutes until it is golden brown and evenly coloured. Brush with an egg wash (1 beaten egg with 1 tablespoon of water) and return to the oven for five more minutes. Remove from the oven and allow to cool completely before filling.
Blueberry filling
280 grams or 2 1/4 cups blueberries. If using frozen, choose wild blueberries
51.5 grams or 1/4 cup granulated sugar
6 grams or 1 1/4 teaspoons freshly squeezed lemon juice
6 grams or 1 1/4 teaspoons water
2.5 grams or 1 teaspoon cornstarch
1/2 a vanilla bean
36 grams or 2 yolks plus 1 teaspoon egg yolks
56 grams or 1/4 cup whole milk
56 grams or 1/4 cup heavy cream
In a medium saucepan, combine the blueberries and 1 teaspoon of the sugar and bring to a boil. Turn the heat to low and boil for 2 minutes. Meanwhile, whisk together the lemon juice, water and cornstarch in a medium bowl. Gradually stir the mixture into the berries and simmer 1 minute until thickened. If the mixture is too watery, dissolve another 1/2 teaspoon cornstarch into a tablespoon of juice and stir in. Simmer until thickened and then remove from heat.
Using a knife, split the vanilla bean in half lengthwise and scrape the seeds into a medium bowl. Add the egg yolk and remaining sugar and beat together with a whisk. Add the milk and cream and beat together until the sugar has dissolved. Stir in the blueberries.
Streusel
60 grams or 4 tablespoons unsalted butter
88 grams or 1/3 cup turbinado sugar
70 grams or 1/2 cup of cake flour
70 grams or 3/4 cup almond flour
1 gram or 1/2 teaspoon ground cinnamon
13 grams or 1 tablespoon Kirschwasser
(This will make more than you need. You can freeze the leftovers and use to make fruit crumbles or top muffins.)
Preheat oven to 325 F and line a baking sheet with parchment. Cut the butter into cubes and place all of the ingredients in the bowl of a mixer and mix on medium for about 2 minutes until crumbly.
Spread on the parchment-lined baking sheet and bake 20 to 25 minutes, stirring occasionally until golden brown and crisp. Allow to cool.
Assembly
Sprinkle 17 grams or 2 tablespoons plus 1 teaspoon of the streusel in an even layer on the bottom of the pre-baked tart shell. Spread the blueberries on top. Place on a sheet pan and bake 30 to 40 minutes until just set. Remove from the oven and cool on a wire rack. Sprinkle with confectioners’ sugar before serving.
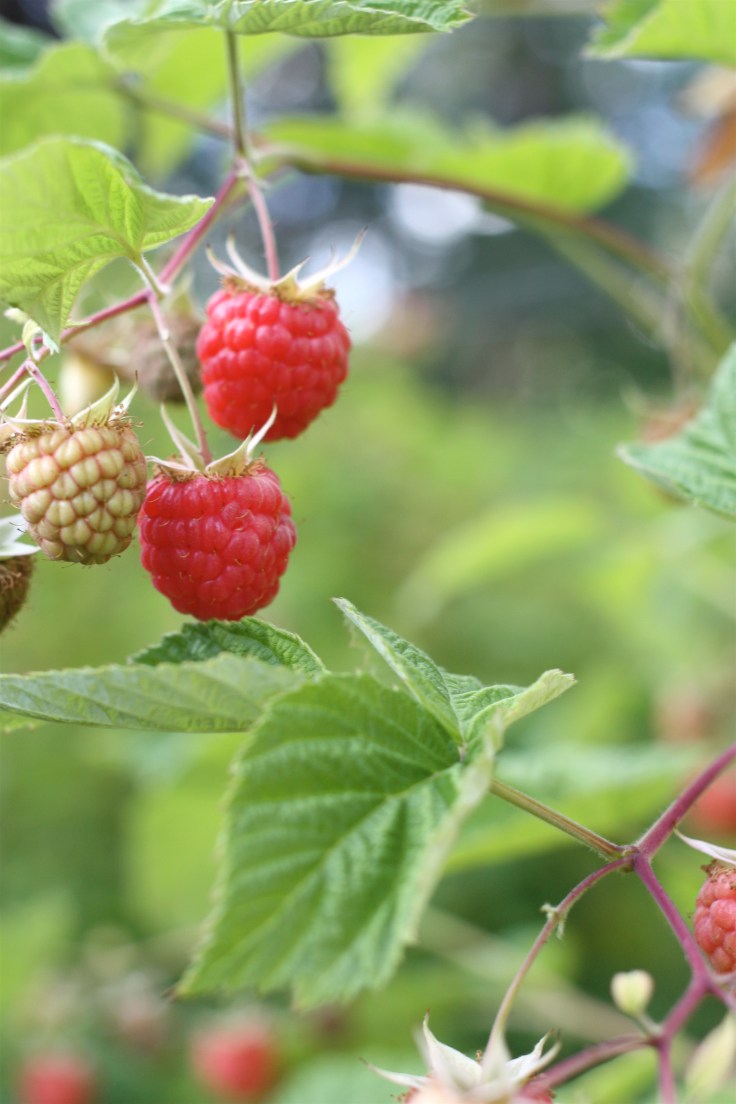
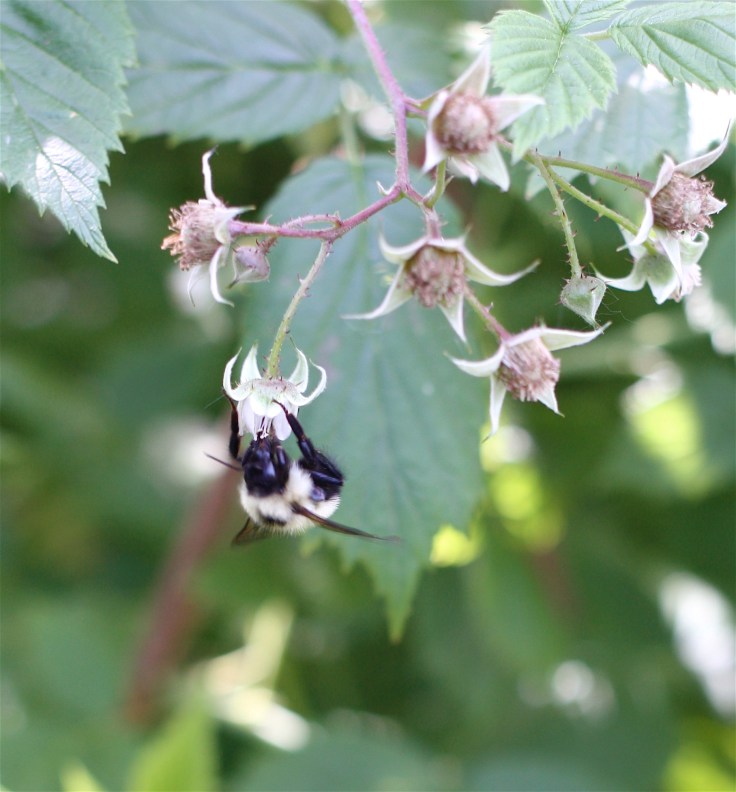
Each raspberry “flower” has many stamens and styles, each attached to a carpel with two ovules. Because the small individual flowers on each receptacle open over an extended period, bees must visit each plant several times to ensure that enough individual flowers are pollinated to make enough fruit for us to sell.
We are relying on wild bees to do the work for us.The flowers are kind of pretty close-up
We are talking 100 to 125 pistils, per raspberry to which pollen must be transferred to create a mature seed and the tasty red druplet surrounding the seed. If each and every one of these druplets is not pollinated, the overall integrity of the fruit is compromised and the fruit will be misshapen and crumbly.
I feel like I should be bringing out pitchers of iced tea for them or offering them tiny, careful massages.
Some of the many variety of bees I spotted include honey, bumble, carpenter, cuckoo, digger, mason, yellow-faced and mining bees. I would just get them in focus and they would be off before I could capture their photo. These few photos in the post were among about 100 of blurred or vanished bees. They are busy right?
You can tell that this guy is a honey bee as you can see the pollen basket on its hind leg (white). The bee moistens the pollen with nectar and packs it in the pollen basket for transport.
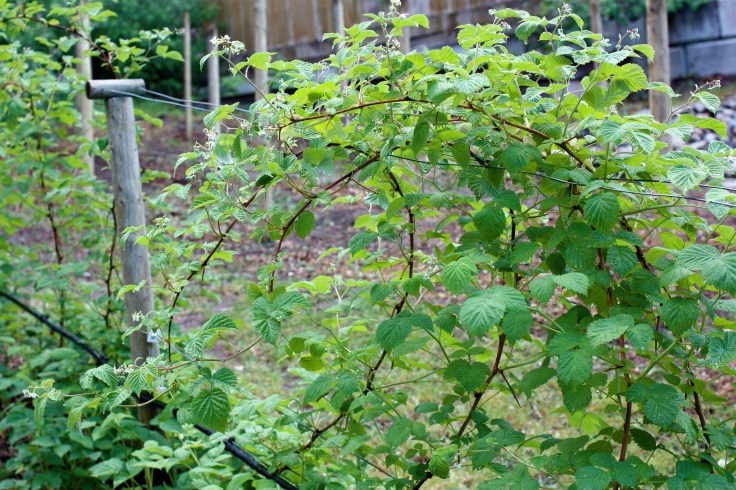
During this time of the year it’s important not to water the raspberries too much as the nectar will drip off the immature berry and the pollinators won’t be attracted to them. Pesticides are a concern too but not for us and we don’t use them on our organic berries. Even it the pesticide is not toxic to bees, they often repel them.
Encore raspberries.We made mason bee houses at a recent Naramata Garden Club meeting. I plan on making more to give the little guys a reason to stick around and help us out.
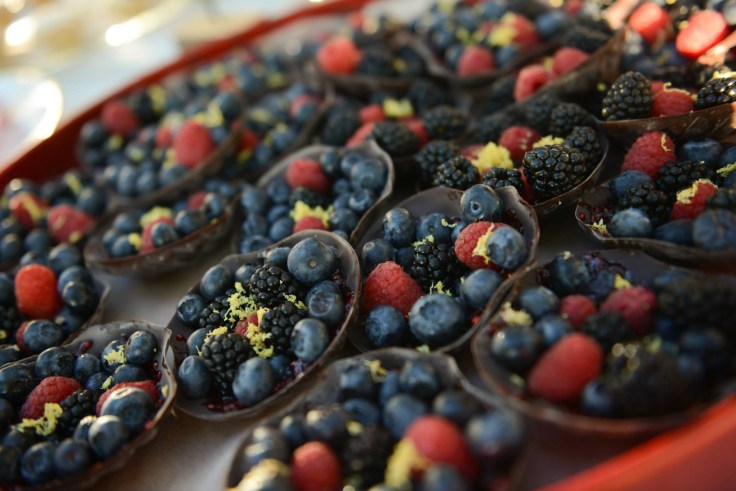
There are so many recipes that use berries made possible by the work of all those bees. Here’s an easy one that looks and tastes great.
Easiest ever elegant dessert…part of the dessert table I made for my lovely niece Nicole’s wedding…
Chocolate berry shells
Buy pre-made chocolate shells
Daub a teaspoon or so of jam onto the shell and spread it around…it will act as “glue” for the berries
Decorate with a mix of blueberries, blackberries and raspberries
“Here’s the basic difference between Morelli and me. My first thought was always of cake. His first thought was always of sex. Don’t get me wrong. I like sex…a lot. But it’s never going to replace cake.” Janet Evanovich, Eleven on Top.
Your mission Mr. Phelps:
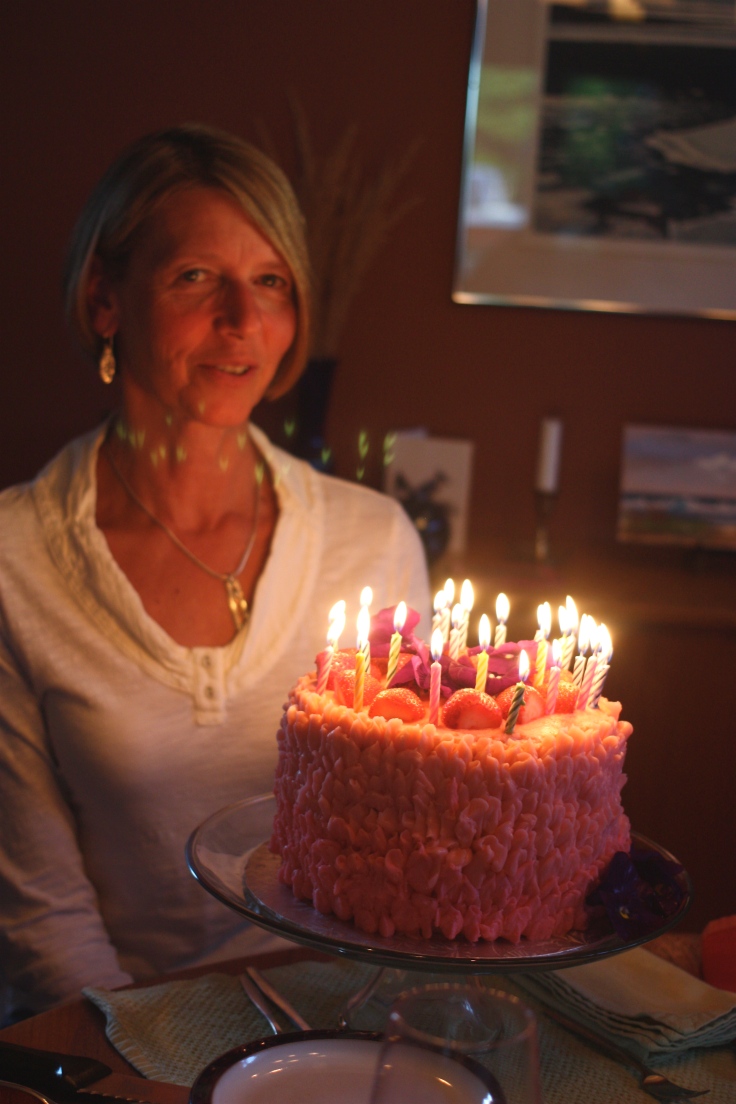
Celebrate an adventurous (she has done Ultraman…twice) friend’s and English Channel swim team mate’s birthday by baking a worthy layer cake.
Try a bold challenge that requires piping.
Have an excuse to buy a cake turntable for decorating.
Have an excuse to buy yet another cookbook…Layered by fellow British Columbian Tessa Huff. (I came to order the book thanks to the blogosphere. Joy the Bakerrecommended Layered in her cookbook roundup. I’m a huge Joy fan.)
Find a recipe where you can drink wine while baking.
I accept the mission Mr. Phelps.
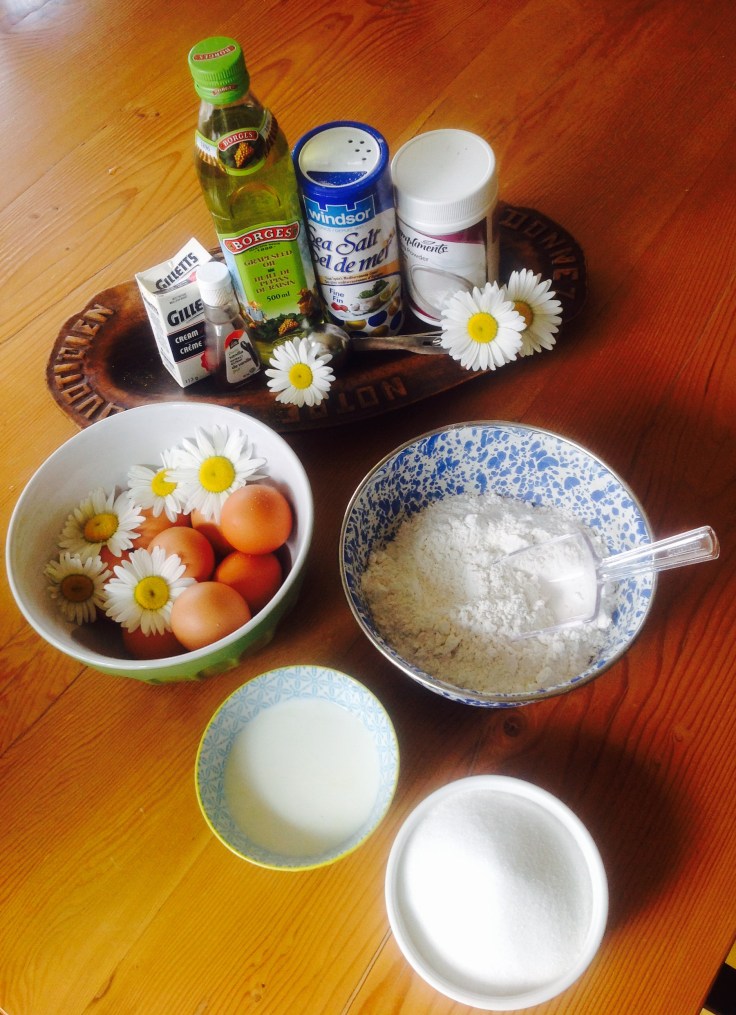
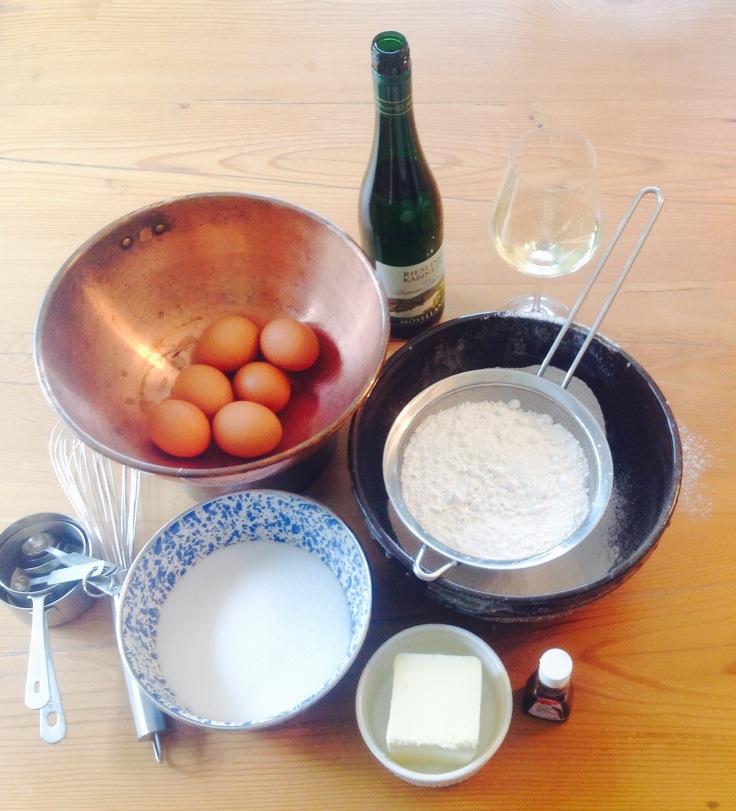
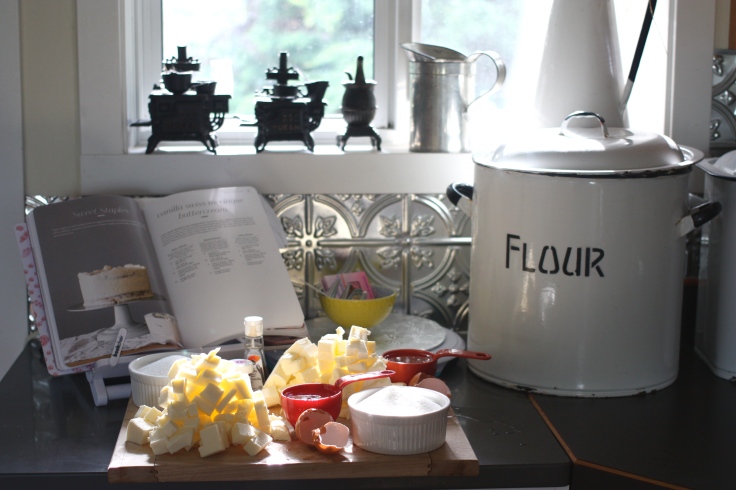
Mis en place for the cake portion of the recipe
Ingredients for the Reisling cake:
3 1/4 cups cake flour
1 tablespoon plus 1/2 teaspoon baking powder
3/4 teaspoon salt
1 cup room temperature unsalted butter
2 cups granulated sugar
2 teaspoons pure vanilla extract
6 large egg whites (I buy mine from Lucy, a neighbour with happy free run chickens)
1 1/2 cup sweet Riesling plus 1 glassful for sipping while you bake
Preheat the oven to 350F and grease and flour three 8-inch cake pans.
Sift together the flour, baking powder and salt and set aside
In the bowl of a stand-mixer fitted with the paddle attachment, beat the butter on medium speed until smooth. Add the sugar and mix on medium-high until the butter is light and fluffily, 5 minutes. Stop the mixer and scrape down the bowl.
Turn the mixer to medium-low and gradually add the vanilla and egg whites until combined. Stop the mixer and scrape down the bowl.
Turn the mixer to low and add the flour mixture in three batches, alternating with the Riesling, beginning and ending with the flour mixture. Mix on medium for no more than 30 seconds after the last streaks of flour are combined.
Evenly divide the batter among the prepared pans. Bake for 23 to 25 minutes, or until a toothpick inserted into the centre of the cakes comes out clean. Let them cool on wire rack for 10 to 15 minutes before removing the cakes from their pans.
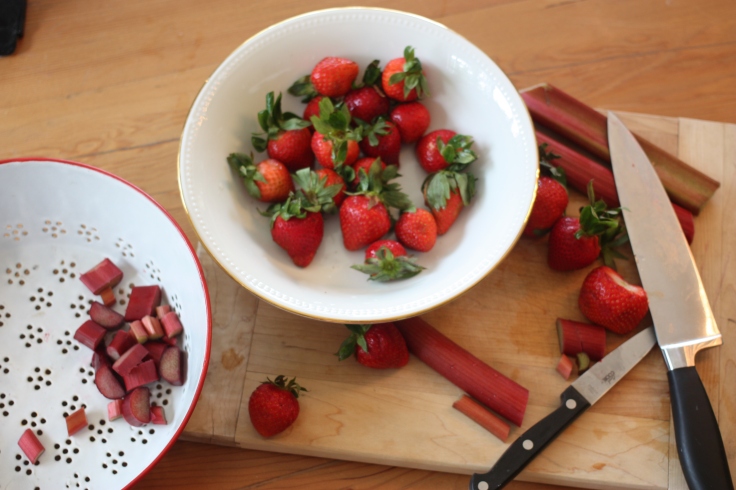
The rhubarb is from my garden but the it’s too early for my strawberries so these are Californian.
While the cakes are baking, make the rhubarb strawberry compote.
1 3/4 cup fresh strawberries, hulled and quartered
1 cup fresh rhubarb cut into 1/4 inch pieces
1/4 cup granulated sugar
2 tablespoons fresh lemon juice
Combine the strawberries, rhubarb, sugar and lemon juice in a saucepan and cook over medium-high head, stirring occasionally with a wooden spoon, until the juices start to bubble. Reduce the heat and simmer for 8 to 10 minutes. Remove from the pan and let cool.
I had to make the cakes in two batches as I only have two 8-inch pans.
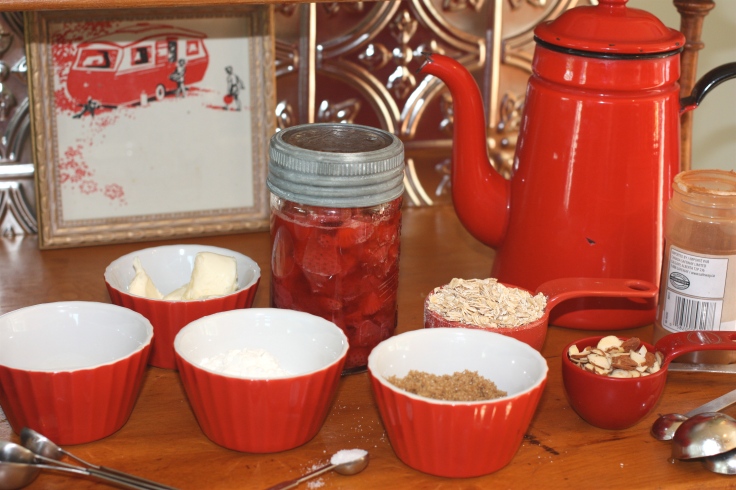
Make the oat crumble.
1/2 cup quick-cooking oats
1/4 almonds
1/4 cup brown sugar
1/4 cup all-purpose flour
3 tablespoons unsalted room temperature butter
2 tablespoons honey
1/2 teaspoon ground cinnamon
1/4 teaspoon salt
Preheat the oven to 375F and line a baking sheet with parchment.
Mix the oats, almonds, brown sugar, flour, butter, honey, cinnamon and salt with a wooden spoon and sprinkle over the lined baking sheet. Bake 8 to 10 minutes, stirring halfway through. Let it cool and crumble the mixture into smaller pieces.
“A party without cake is just a meeting.” Julia Child. “With enough butter, anything is good.” Julia Child.
You will need to make two batches of this vanilla swiss meringue buttercream:
1/2 cup plus 2 tablespoons egg whites
1 1/4 cups granulated sugar
2 cups unsalted butter (very important that it be at room temperature or it won’t combine properly) cubed
2 teaspoons pure vanilla extract
Place the egg whites and sugar in the bowl of a stand-mixer. Whisk them together by hand to combine. Make a double boiler by filling a medium pot filled with water over medium-high heat. Place the mixer bowl on top of the pot. The bottom of the pot should not touch the water.
Whisk intermittently and heat the egg mixture to 160F (candy thermometer) or until it is hot to the touch. Carefully fit the mixer bowl onto the stand mixer and whip with the wire attachment on high speed for 8 to 10 minutes, until it holds medium-stiff peaks. The bowl should be back to room temperature at this point. Stop the mixer and swap out the whisk attachment for the paddle.
With the mixer on low, add the cubed butter, a few tablespoons at a time then the vanilla. Once incorporated, turn up the mixer speed to medium-high and beat until the buttercream is silky smooth, 3 to 5 minutes.
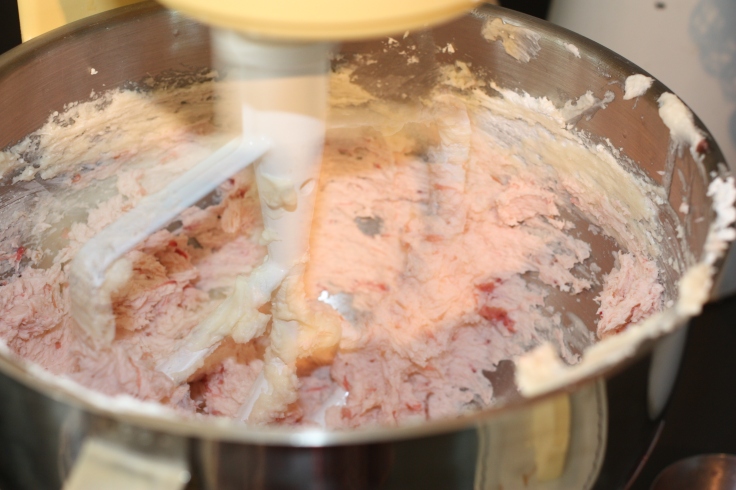
Making the rhubarb buttercream
Two more quick steps and you are ready to assemble the masterpiece.
Make the rhubarb buttercream by mixing two cups of the buttercream with 1/2 cup of the cooled rhubarb compote and mix on medium with the paddle attachment in a stand-mixer until combined. Remove from mixer and set aside in a bowl.
Add a few drops of pink gel food colouring to the remaining butter cream and mix until combined.
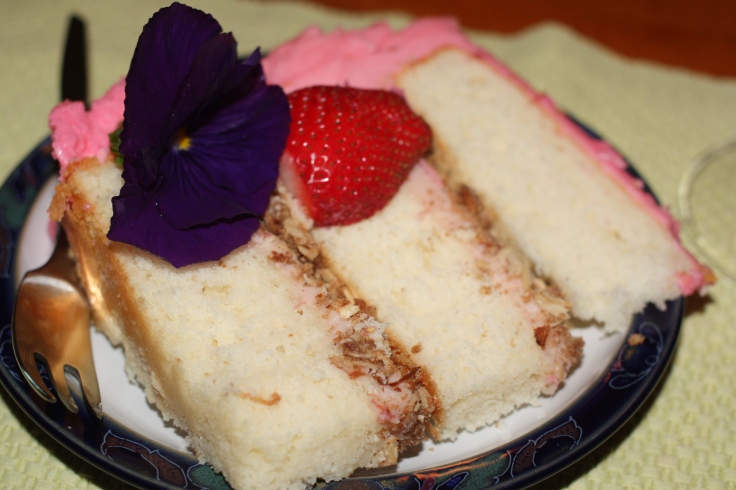
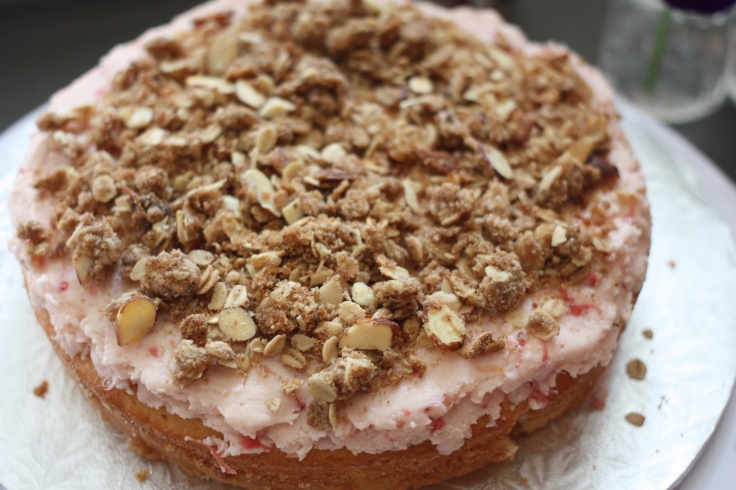
To assemble, level the cakes by removing any domes with a serrated knife run parallel to your work surface. Choose a sturdy layer for the bottom. Place it on a cake plate or board and spread 1 cup or half of the rhubarb buttercream with an offset spatula. Sprinkle with half of the oat crumble mixture. Top the next layer of the cake and repeat with the rhubarb buttercream and crumble. Finish with the final layer.
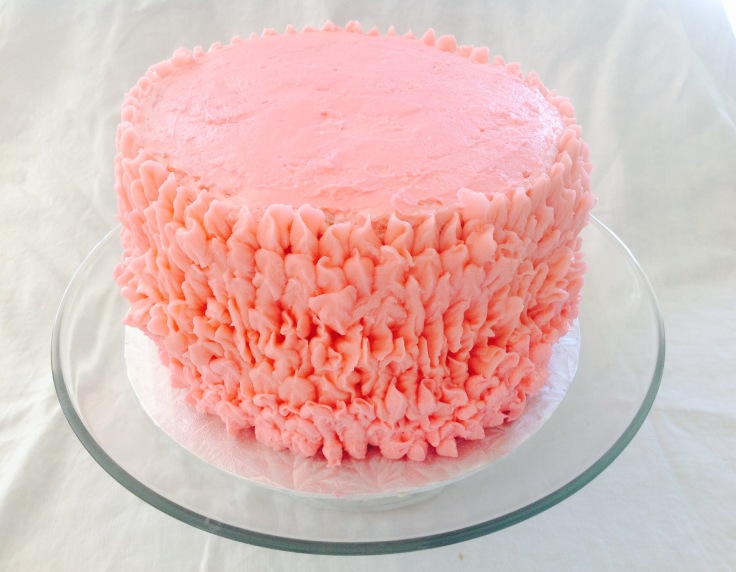
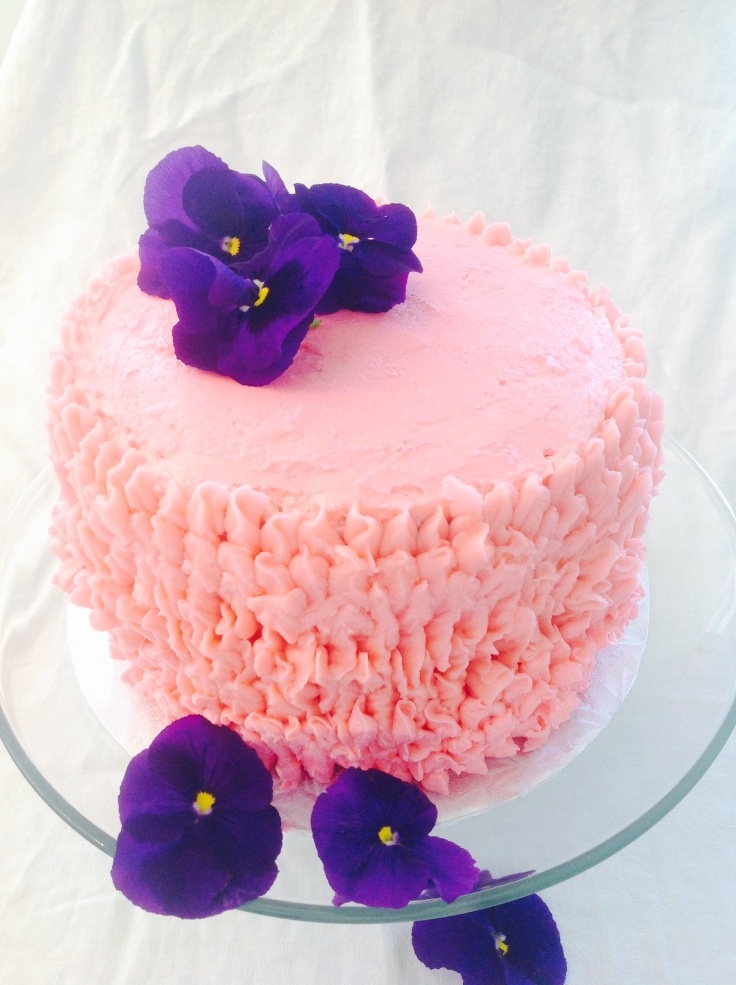
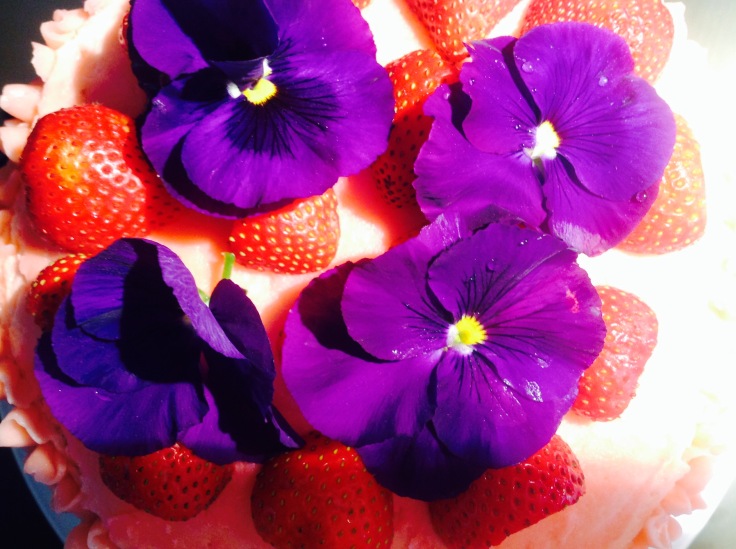
Frost the top and sides with the pink buttercream. Place in the refrigerator for 15 minutes and then add another layer of icing to the top of the cake and using a petal tip, fill a pastry bag with buttercream. Starting at the top of the cake, pipe rows of ruffle swags by keeping the narrow end of the petal tip facing upward.
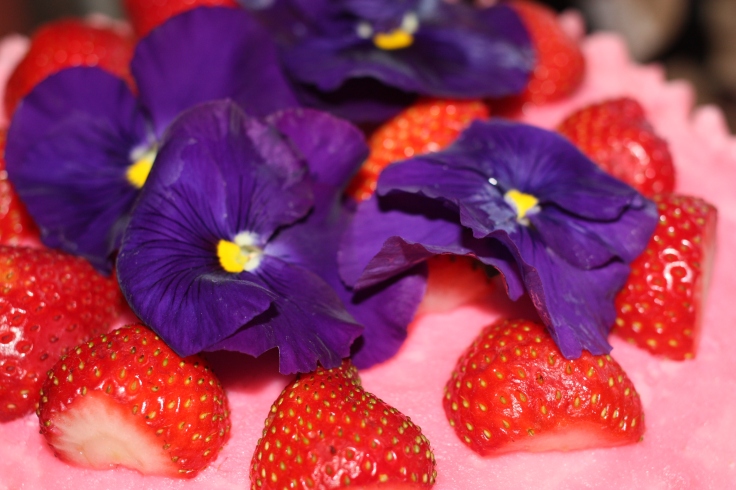
I added some strawberries and pansies (remove the flowers before serving)This cake was in the adventurous cake section of Layered. Perfect my adventurous friend.Voila. Happy Birthday lovely Charlie. We celebrated with four members of our English Channel swim relay team. Carb loading. That water will be cold right?
“But how will I eat cake if my head is over there, and my hands are over here?” Marie Antoinette


 Pastry
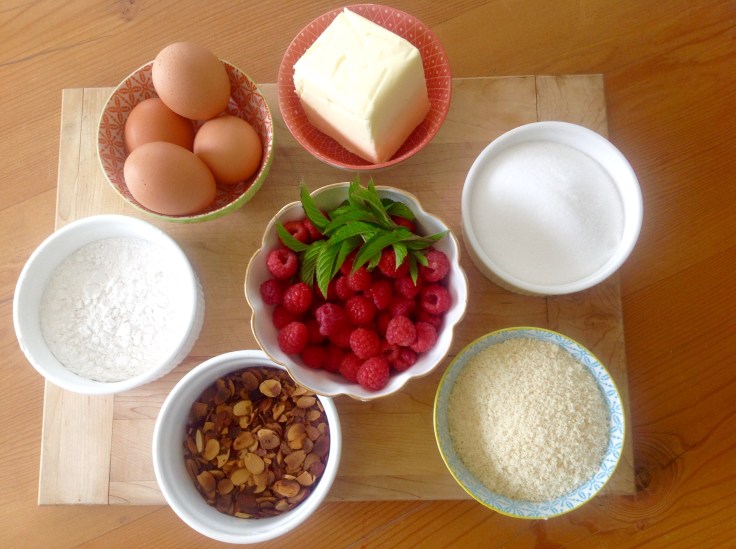 Almond filling


 Top with the next layer of cake and repeat. Place the reserved strawberries on top of the last layer to decorate.
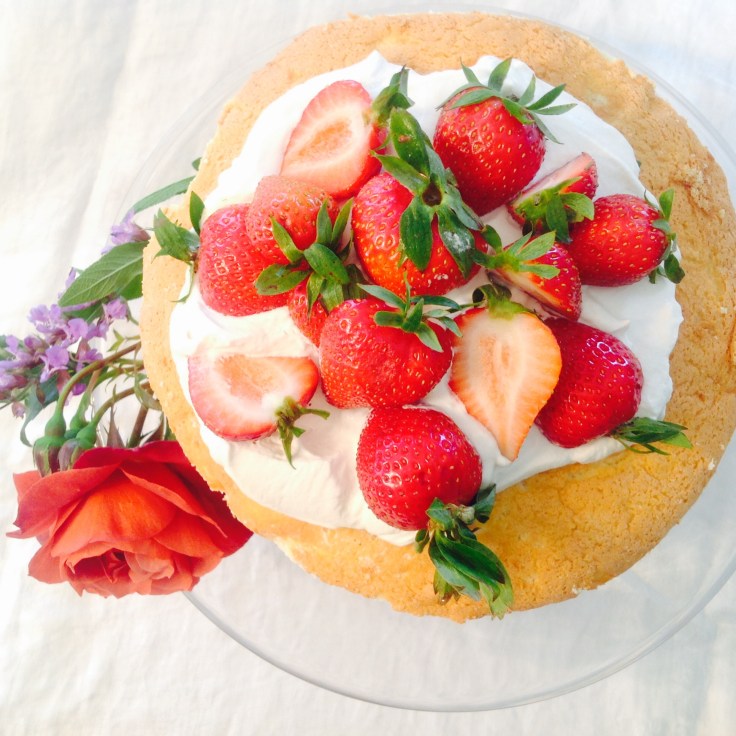


 Combine the strawberries, rhubarb, sugar and lemon juice in a saucepan and cook over medium-high head, stirring occasionally with a wooden spoon, until the juices start to bubble. Reduce the heat and simmer for 8 to 10 minutes. Remove from the pan and let cool.
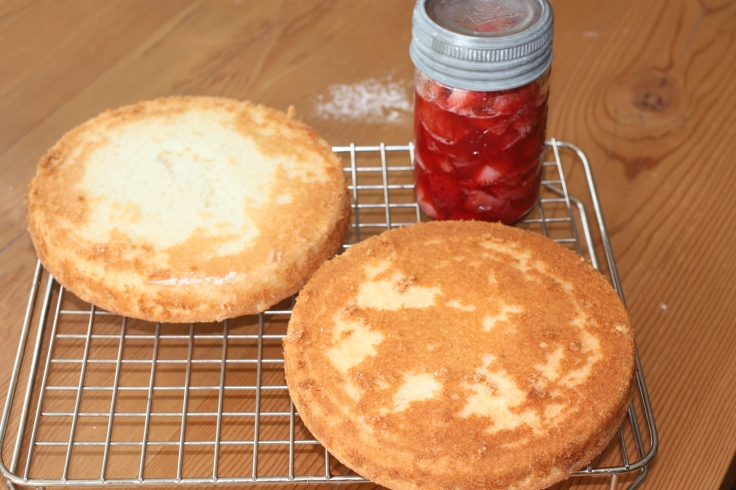
 To assemble, level the cakes by removing any domes with a serrated knife run parallel to your work surface. Choose a sturdy layer for the bottom. Place it on a cake plate or board and spread 1 cup or half of the rhubarb buttercream with an offset spatula. Sprinkle with half of the oat crumble mixture. Top the next layer of the cake and repeat with the rhubarb buttercream and crumble. Finish with the final layer.