Search

naramata-blend

Life in a slow place that quickly steals your heart.

Category

Naramata life

The Butcher, the Baker, the Wine & Cheese Maker in the Okanagan

Jenn portrait with book take 2
Award-winning cookbook author Jennifer Schell at the launch of her new book, The Butcher, the Baker, the Wine & Cheese Maker in the Okanagan, at Bench 1775 Winery on the  Naramata Bench overlooking Okanagan Lake. Photo: David McIlvride, Spatula Media

Within five minutes of dipping into Jennifer Schell’s new collection of recipes, the stories of the chefs who crafted them and the artisans who provided the amazing local ingredients and the libations to accompany them, I knew she was preaching to the choir. And I say hallelujah. To anyone who delves into this beautifully written and designed cookbook who isn’t yet in the I-love-the-Okanagan-choir, your robes await.

Jennifer has the enviable good fortune of being raised on an orchard in Kelowna and has marinated herself in the area’s rich and growing artisanal food culture. She describes the book perfectly as, “A love letter to the Okanagan and to all those who have created, grown, and nurtured our special valley on this earth. They are a delightful confluence of old and new world, blending their international influence and flavours with our local bounty, establishing a cuisine that is distinctly Okanagan. Through their recipes and stories, I am pleased to introduce you to these gifted people who bring this local food to your table every day.” I love her love letter. Here’s why…

IMG_9186
I whipped up a batch of Bean Scene’s best-ever ginger cookies from the Brunchie Lunchie section to fuel a cover-to-cover read. They were the best-ever.

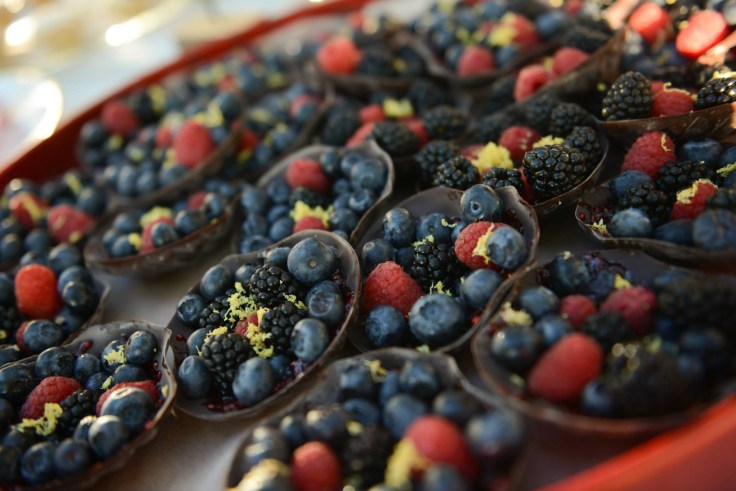
During my first flip through The Butcher, the Baker, the Wine & Cheese Maker in the Okanagan, I was captivated by the photos, most taken by Jennifer herself. The photos are professional in quality but somehow capture the warmth of her subjects and the beauty of the dishes without that slick over-styled look so common in magazines and cookbooks today. I’m not sure what secret sauce went into the picture-taking, editing, lay-out process in this TouchWood Editions book but it worked.

On a second pass through I began virtually cooking and baking, selecting recipes that caught my eye and looked easy or doable and even ones that I could see taking on as a challenge like Chef Bernard’s “twisted” carrot cake and Cheffrey’s wild boar ragu. How cool would it be to serve up Wild Moon Organics Berkshire pork meatballs in tomato sauce or, cedar-roasted chicken with spruce and sumac or, pan-roasted arctic char with braised beluga lentils and smoked heirloom tomato-peach gastrique and blow the socks off my guests on our deck?

IMG_2531
Summer dining Okanagan style at my nieces’ wedding at Gods Mountain catered by one of the chef’s featured in the cookbook, Dana Ewart of Joy Road Catering, Penticton. Photo: Jarusha Brown

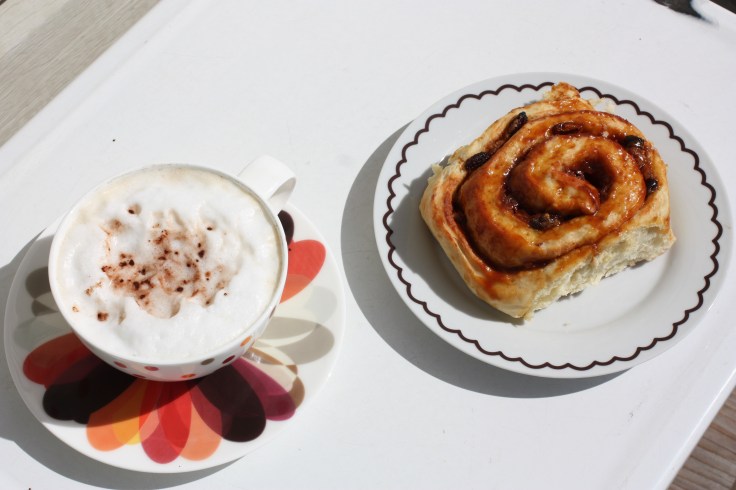
I then began spotting familiar faces of many chefs, farmers and others from my Naramata hood, the Penticton Farmer’s Market or restaurants we frequent and I had to check out their recipes and stories…Chefs like Dana Ewart, one half of the Joy Road Catering team (Cameron Smith is the other half). We look forward to her cinnamon buns every Saturday at the farmer’s market and have been guests at the best wedding feast I’ve ever attended that they catered. This is a bit of a digression…but here are a few photos of that wedding banquet all taken by Jarusha Brown and catered by Joy Road…

IMG_2530IMG_2528IMG_2529
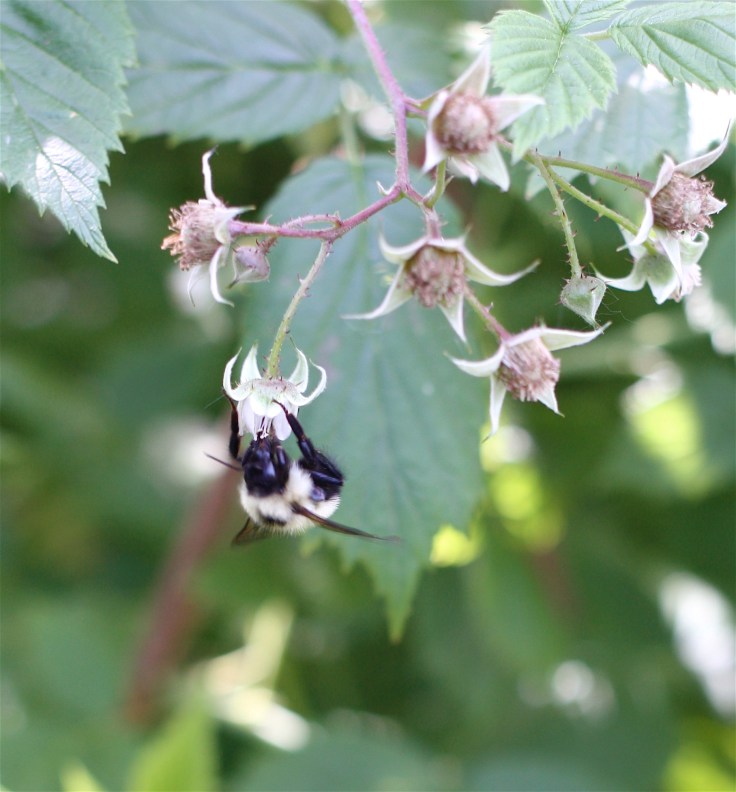
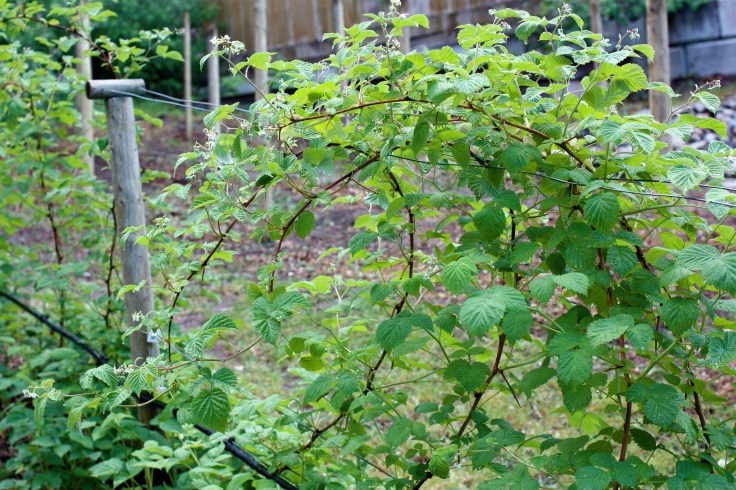
On my list of for-sure-recipes to make very soon with the first of our Carpe Diem raspberry crop is The Bench raspberry almond tarts. I plan on taking my cookbook over when we stop for lunch at The Bench and go over the recipe with Chef Stewart Glynes. He has been my go-to guy for pastry and baking questions for sometime now. To say we are Bench regulars is a bit of an understatement…The Handyman has a custom sandwich called The Fussy Chicken there. It was fun to see Stewart sourcing his berries from my neighbour James Young who has crammed acres of production into his 0.39-acre property. James was a great help when I first got my greenhouse. I’m hoping Stewart will be a key customer for our raspberries.

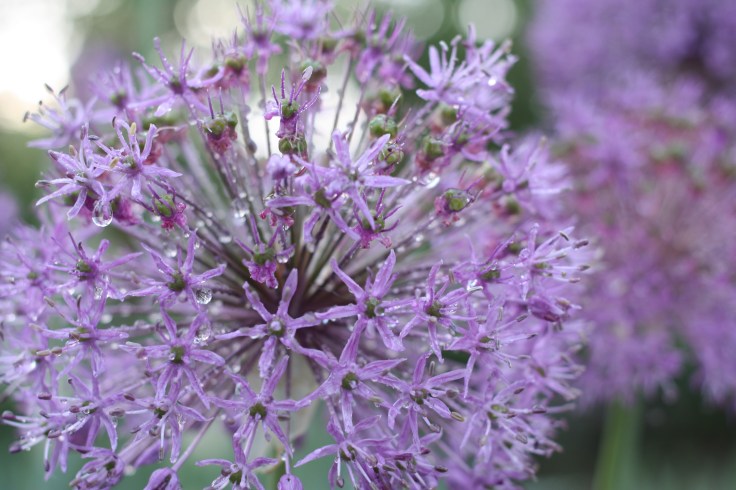
I was also delighted to see my pal Karolina Born-Tschümperlin of Forest Green Man Lavender Farm (previous blog post) in a magical pairing with Legend Distilling, just a stumble from my  house (previous blog post), to create the Legendary Green Man Lavender Martini recipe. Yes please.

No self-respecting cookbook reviewer can do a proper job without actually getting some flour on that book and cracking the spine a bit. (Although I must say that I would buy this book even if I didn’t intend to bake or cook a single thing from it. The photos and the stories of the valley artisans are fun just to browse through and I plan to leave a copy in my guest room.)

Jennifer has kindly agreed to let me share a few recipes I’ve made in upcoming blog posts. The instructions were clear, the recipes produced delicious results and I’m in the enviable place to source the actual ingredients used. I’m sure you can seek out the artisans in your hood to provide you with top-quality, lovingly produced, sustainable ingredients that will at least come close.

IMG_9082.JPG
The view from Bench 1775 Winery, labelled The Best Patio in the Word, the venue for the book launch. Its winemaker Val Tait is featured in the cookbook with a Bench 1775 Blissful Mojito recipe.

Here is a brief Q & A session with Jennifer:

How long does it take to put together a book like this, what were the biggest challenges and the most enjoyable part of the project for you?

I set a rather ambitious schedule for myself. The current cookbook took five months. The biggest challenge is the cookbook creation process, but also the most enjoyable part for me, is the photography. There is a lot of scheduling and driving around, but I truly love visiting with the people, old friends and new, and being able to visit their farms or restaurants, see what they are working on and catch up with their news. These people never fail to inspire me. Each has such passion for their craft and community, and after each and every meeting, I am super charged and can’t wait to share their faces and their stories with my readers.

What recipe should I make first and why?

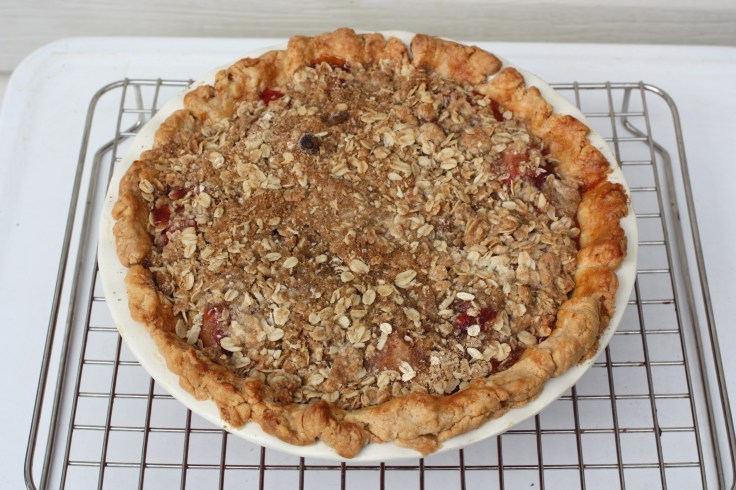
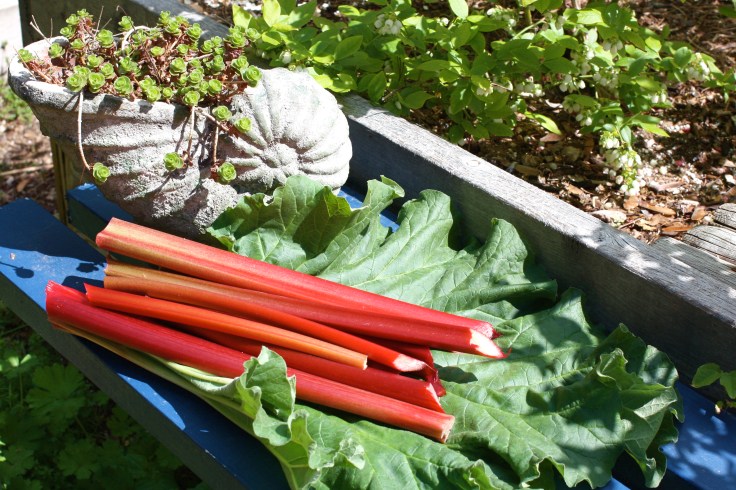
It is hard for me to pick a favourite recipe so maybe if we go with what is in season. If there is still rhubarb out there (yup…some left in my garden), I would suggest my mom’s rhubarb pie. I also love the simplicity of the Apple Cake on Wheels and local apples are always available in the cold storage of BC Tree Fruits. Potatoes should be ready soon and the Sunshine Farm Heritage Potato Flan is a winner. OK, that was three instead of one. Sorry, every recipe is  wonderful!

(Throw down accepted…I’ve already made the Apple Cake on Wheels…excellent…)

What’s next in the works for you?

I swore I would take a break after this last book — but, I can’t stop now! Too many stories to share and new farmers and drink makers and butchers and bakers to meet! I am working on the outline of the next book now.

(Hallelujah)

Banishing blueberry eating birds to make blueberry tarts

IMG_0422
Blueberry tart wouldn’t be possible without good bird netting.

The birds know a good thing when they see it. The very minute blueberries are ripe and ready to eat they are on it. If you want to find your thrill on blueberry hill you need some pre-planning. Our berries in our first producing patch are just blueing up nicely so it’s time for The Handyman to work his magic.

IMG_8873.JPG

The Handyman used 3/4″ PVC with some t-joints and PVC glue to make the structure, spending about $50 on materials. He measured the width of the blueberry bed and the height. Our box was 8 feet wide and he used two 10-foot sections of PVC to give us a 7-foot clearance at the apex of the hoop. He says you could also add some rebar inside the PVC to make the structure sturdier which he plans to do in the future when we enclose the much larger commercial patch for the berry farm. If you need to make the structure more freestanding, ie. you don’t have a wooden box as your bed to staple the PVC too, you will need to insert a section of rebar into the ends of the PVC to allow you to dig the PVC into the ground. The bird netting was a lucky drive-by find found at the side of the road with a “free” sign on it. Of course, you can purchase netting…

IMG_8842.JPG

FullSizeRender
We heaped lovely soil with lots of peat moss into this raised box and I top with a mulch of pine needles to keep these acid-loving berries happy.
IMG_8885
Here is a side view…we have left one end up so the bees can finish up their last bit of pollination for us. We will secure this opening when the berries are ripe and weigh down the bottom with a few rocks we can remove to lift the flap when harvesting.
IMG_8875
Here is a look at the roof structure. The nets are secured with zip ties.
IMG_8876.JPG
Blueberries are safe as houses from the birds but easily accessible for picking.
FullSizeRender
Jacquy Pfieiffer’s blueberry tart is a pretty good pay-back for The Handyman’s work.

Blueberry Tart

Day one:

Sweet Dough (makes enough for two 9-inch crusts)

  • 168 grams or 6 ounces of unsalted butter
  • 1.4 grams or 1/4 teaspoon of salt
  • 112 grams or 1 cup confectioners’ sugar
  • 39 grams or 1/3 cup of almond flour
  • 7 grams or 1 1/2 teaspoons vanilla extract
  • 1 extra large egg plus 1 to 2 teaspoons
  • 315 grams or 2 7/8 cup sifted cake flour

In a stand mixer fitted with the paddle attachment cream the butter and sea salt on medium speed for about 1 minute. Scrape down the bowl and add the confectioners’ sugar and combine with the butter at low speed. Scrape down the bowl and then add almond flour and vanilla and combine at low speed. Add the eggs, one at a time and about a quarter of the cake flour and beat on low until just incorporated. Stop the machine and scrape down the bowl. Gradually add the remaining flour and mix just until the dough comes together. Don’t over mix. Press the dough into a 1/2″ thick rectangle block, wrap in plastic and refrigerate overnight or for at least two to three hours.

You could also make the streusel (see below) on day one and or the blueberry filling and refrigerate until ready to assemble and bake.

Day two:

After it has chilled, remove the dough from the refrigerator, cut it into two equal portions and roll one out in a 1/4 ” thick circle and line a 9-inch tart pan, ring, or heart.

IMG_0412

Using a fork, perforate the bottom of the shell making rows of little holes. Place in the refrigerator uncovered for at least an hour. (Freeze the second portion of dough for a future use). Pre-bake the shell in a 325F oven. To do this, line the shell with parchment and add rice, dried beans or pie weights. Bake with this “faux” filling for 15 minutes and then remove the parchment and rice, beans or weights and return the tart shell to the oven for another 5 to 15 minutes until it is golden brown and evenly coloured. Brush with an egg wash (1 beaten egg with 1 tablespoon of water) and return to the oven for five more minutes. Remove from the oven and allow to cool completely before filling.

Blueberry filling

  • 280 grams or 2 1/4 cups blueberries. If using frozen, choose wild blueberries
  • 51.5 grams or 1/4 cup granulated sugar
  • 6 grams or 1 1/4 teaspoons freshly squeezed lemon juice
  • 6 grams or 1 1/4 teaspoons water
  • 2.5 grams or 1 teaspoon cornstarch
  • 1/2 a vanilla bean
  • 36 grams or 2 yolks plus 1 teaspoon egg yolks
  • 56 grams or 1/4 cup whole milk
  • 56 grams or 1/4 cup heavy cream


In a medium saucepan, combine the blueberries and 1 teaspoon of the sugar and bring to a boil. Turn the heat to low and boil for 2 minutes. Meanwhile, whisk together the lemon juice, water and cornstarch in a medium bowl. Gradually stir the mixture into the berries and simmer 1 minute until thickened. If the mixture is too watery, dissolve another 1/2 teaspoon cornstarch into a tablespoon of juice and stir in. Simmer until thickened and then remove from heat.

Using a knife, split the vanilla bean in half lengthwise and scrape the seeds into a medium bowl. Add the egg yolk and remaining sugar and beat together with a whisk. Add the milk and cream and beat together until the sugar has dissolved. Stir in the blueberries.

Streusel

  • 60 grams or 4 tablespoons unsalted butter
  • 88 grams or 1/3 cup turbinado sugar
  • 70 grams or 1/2 cup of cake flour
  • 70 grams or 3/4 cup almond flour
  • 1 gram or 1/2 teaspoon ground cinnamon
  • 13 grams or 1 tablespoon Kirschwasser

(This will make more than you need. You can freeze the leftovers and use to make fruit crumbles or top muffins.)

Preheat oven to 325 F and line a baking sheet with parchment. Cut the butter into cubes and place all of the ingredients in the bowl of a mixer and mix on medium for about 2 minutes until crumbly.

Spread on the parchment-lined baking sheet and bake 20 to 25 minutes, stirring occasionally until golden brown and crisp. Allow to cool.

Assembly

Sprinkle 17 grams or 2 tablespoons plus 1 teaspoon of the streusel in an even layer on the bottom of the pre-baked tart shell. Spread the blueberries on top. Place on a sheet pan and bake 30 to 40 minutes until just set. Remove from the oven and cool on a wire rack. Sprinkle with confectioners’ sugar before serving.

IMG_0417.JPG
Sorry birds


Must love bees: It takes hundreds to make berry tarts

IMG_8816
Our raspberry farm is abuzz today.

Each raspberry “flower” has many stamens and styles, each attached to a carpel with two ovules. Because the small individual flowers on each receptacle open over an extended period, bees must visit each plant several times to ensure that enough individual flowers are pollinated to make enough fruit for us to sell.

IMG_8814
We are relying on wild bees to do the work for us.
IMG_8692
The flowers are kind of pretty close-up

We are talking 100 to 125 pistils, per raspberry to which pollen must be transferred to create a mature seed and the tasty red druplet surrounding the seed. If each and every one of these druplets is not pollinated, the overall integrity of the fruit is compromised and the fruit will be misshapen and crumbly.

I feel like I should be bringing out pitchers of iced tea for them or offering them tiny, careful massages.

Some of the many variety of bees I spotted include honey, bumble, carpenter, cuckoo, digger, mason, yellow-faced and mining bees. I would just get them in focus and they would be off before I could capture their photo. These few photos in the post were among about 100 of blurred or vanished bees. They are busy right?

IMG_8798.JPG
You can tell that this guy is a honey bee as you can see the pollen basket on its hind leg (white). The bee moistens the pollen with nectar and packs it in the pollen basket for transport.

During this time of the year it’s important not to water the raspberries too much as the nectar will drip off the immature berry and the pollinators won’t be attracted to them. Pesticides are a concern too but not for us and we don’t use them on our organic berries. Even it the pesticide is not toxic to bees, they often repel them.

IMG_8699
Encore raspberries.
IMG_7501.JPG
We made mason bee houses at a recent Naramata Garden Club meeting. I plan on making more to give the little guys a reason to stick around and help us out.

There are so many recipes that use berries made possible by the work of all those bees. Here’s an easy one that looks and tastes great.

IMG_0626

Easiest ever elegant dessert…part of the dessert table I made for my lovely niece Nicole’s wedding…

Chocolate berry shells

  • Buy pre-made chocolate shells
  • Daub a teaspoon or so of jam onto the shell and spread it around…it will act as “glue” for the berries
  • Decorate with a mix of blueberries, blackberries and raspberries
  • Finish with a grating of lemon peel

“Three may keep a secret, if two of them are dead: So…more “secret” garden

I took my camera out for “a few minutes” in the early morning today for a look-around the secret garden and an hour later had to be dragged away. Here’s a Cole’s Notes look at what held me captivate because sometimes, the biggest secrets you can only tell a stranger.

IMG_8762
Unusual red clematis, Rebecca, launched at the Chelsea Flower show in England. It reads a bit pink in this photo with the sun shining through but is very, very red. The shot below better flaunts its redness.
IMG_8660
Just opening, Rebecca is the newest variety from Raymond Evison and is named after his eldest daughter. It can be grown in any location and holds it colour well in full sun. It can also be grown in a container.
IMG_8739
One more clematis…I’ve forgotten the variety of this purple gem.
IMG_8744.JPG
Mirror, mirror on the wall…

“The best secrets are the most twisted.” Sara Shepard.

IMG_8782
My aquilegia are putting on one final show. It seems strange that two birds as different as the eagle (in Latin, aquila) and the dove (columbus) should both give their name to the same flower — aquilegia or columbine. It is an easy perennial to start from seed and all of mine came from seeds from England germinated in my greenhouse. I’m still collecting.
IMG_8827
I love the ruffles.
IMG_8767
Aquilegias love the dappled shade in the secret garden and are perfect in its cottage garden setting.
IMG_8772.JPG
The bees seem to like them too.

“Photography is all about secrets. The secrets we all have and will never tell.” Kim Edwards, The Memory Keeper’s Daughter.

IMG_8766.JPG
The fine spray of The Handyman’s irrigation also makes it a lovely place to be in the mornings.
IMG_8685.JPG
Hard to believe this allium is part of the onion and garlic family.
IMG_8722.JPG
Quick digression to my potager, that I passed by on the way to the secret garden…These chives are related to the allium as well.
FullSizeRender
…and look lovely in a salad.

“Sometimes since I’ve been in the garden I’ve looked up through the trees at the sky and I have had a strange feeling of being happy as if something was pushing and drawing in my chest and making me breathe fast.” Frances Hodgson Burnett, The Secret Garden.

IMG_8748.JPG

“But some secrets are too delicious not to share.” Suzanne Collins, Mockingjay.

IMG_8788
Maybe flowers are overrated.
IMG_8662
She knows some secrets.
IMG_8750.JPG
Frogs have taken up residence.

“That, my dear, is what makes a character interesting, their secrets.” Kate Morton, The Forgotten Garden.

IMG_8821
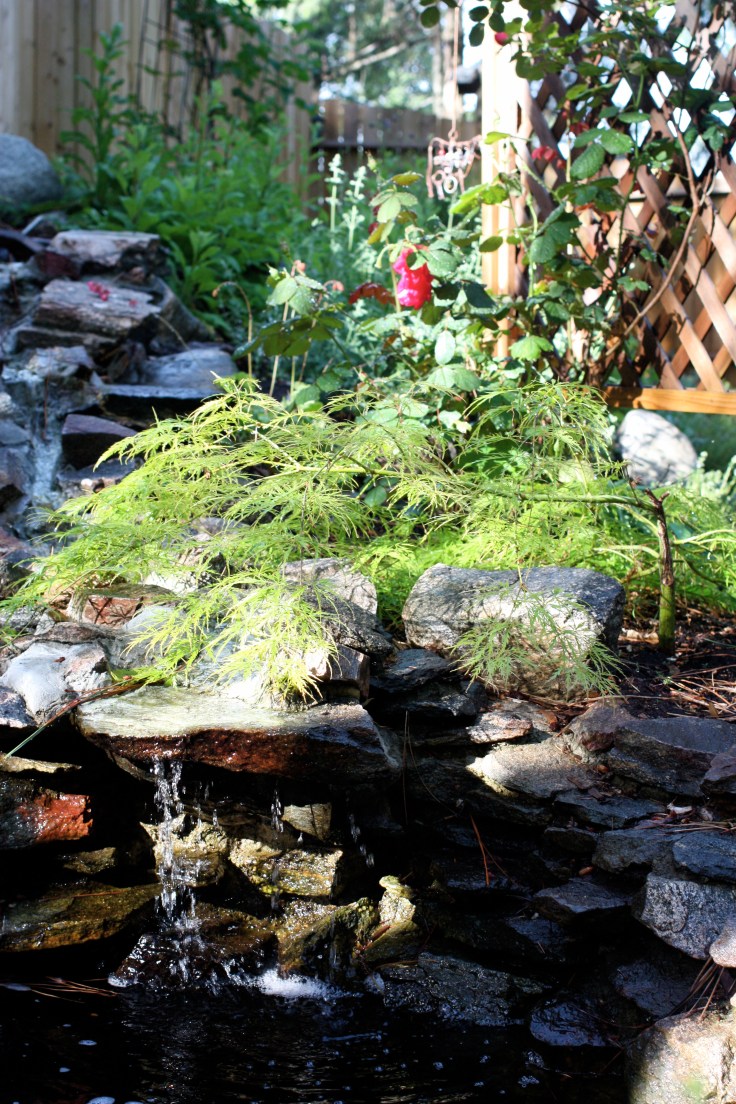
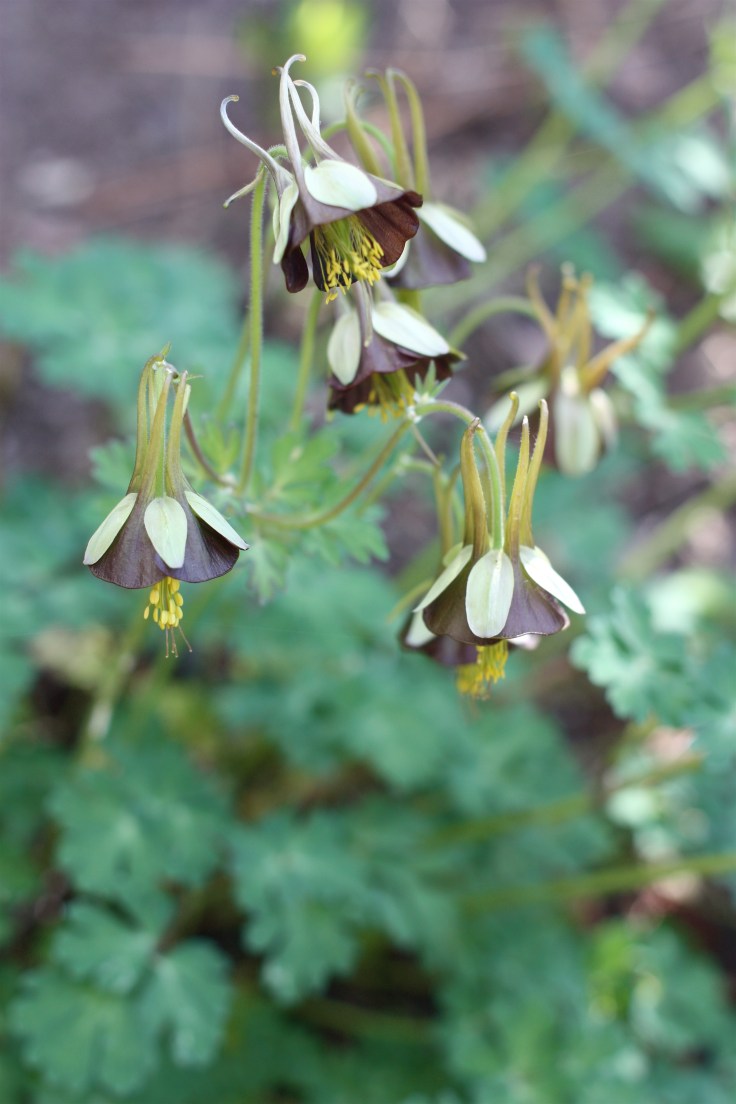
“Secrets are like plants. They can stay buried deep in the earth for a long time, but eventually they’ll send up shoots and give themselves away.” Judy Reene Singer, Still Life with Elephant.

Her heart was a secret garden and the walls were very high

IMG_0559.JPG
“And the secret garden bloomed and bloomed and every morning revealed new miracles.” Frances Hodgson Burnett, The Secret Garden

Just like Mary in her Secret Garden, I like the name and the still more the feeling that when its walls shut me in no one knows where I am. The Handyman built my walls five years ago and I’ve been planting and revising ever since. This sheltered spot is maturing nicely and is being discovered by others who see the merit of a trickling brook, pond and shelter from the wind. It’s becoming a mini bird, bee and frog sanctuary.  A family of racoons and another of skunks also make frequent visits to the pond, mostly at night luckily.

Here are a few of the plants blooming today:

IMG_8228
Highly-scented iris, unknown variety

IMG_8192

Gentiana acaulis

IMG_8217
Aquilegia which I grow from seed in my greenhouse, I no longer can call them Columbines…too sad, reminds me of the poor school kids


IMG_8185
Aquilegia viridiflora ‘Chocolate Soldier’, a rare collector’s item with seeds from Thompson & Morgan. It’s very fragrant.
IMG_8207.JPG
Leopard’s Bane, the earliest-blooming of the daisies brings some colour to my pond.
FullSizeRender.jpg
Two new pink azaleas are planted outside the secret garden round gate. They will be more spectacular next year. 
IMG_7570.JPG
This little guy was was one of the first things we planted. The next photo is what it looks like today.
IMG_8201
Shishigashira Japanese Maple has heavily curved green leaves giving an interesting texture to this compact, shrubby tree. It is spectacular in fall and its highly sculptural form will only improve with age. It will slowly reach about 15 feet tall.
IMG_8224.JPG
Close-up of the Lion’s Head leaves

IMG_8225.JPG

Another ideal small tree, Japanese stewartia, frames the lady’s head. It gives you lovely peeling bark all season, hot fall colour and it blooms with white June-into-July flowers. It’s a distant relative of the tea family.

IMG_7574
Another “before and after”…here is The Handyman installing the edging that will eventually form the garden paths.
IMG_8179.JPG
Here is the same path lined with orange-scented thyme which will soon be in bloom. I grew all these thyme from seed in the greenhouse. A lot of wins here. It’s extremely fragrant with a delicious scent of balsam and oranges. The flowers are long-lasting and very pretty. It’s drought tolerant and easy to care for. On top of that it is one of the most useful herbs for the kitchen. I ordered my seeds from seedaholic.

Like any good secret, my garden is best revealed in instalments. I’ll post more when new blooms arrive.

“If you look the right way, you can see that the whole world is a garden.” Frances Hodgson Burnett, The Secret Garden.

Five best words in the English language: Pie is in the oven…strawberry rhubarb crumble…three other great words

IMG_8100
Now I know it’s spring. Time to whip up a pie for The Handyman to celebrate.
IMG_8143
I’m not the type to read the last chapter of a book first but it’s good to make an informed decision about recipes. This amazingly tart, sweet and beautifully spiced pie recipe comes from Edmonton’s the Duchess Bake Shop cookbook (with some minor modifications).


IMG_8104
My rhubarb plant, like most of the rhubarb in Naramata, is an unknown heritage variety. Almost every garden has a plant that’s likely been there for years and years. I imagine mine has supplied a lot of rhubarb pies in its lifetime. I hope it’s honoured to be blogged about.

Blind-baked pie shell

For pies that have juicy fillings like rhubarb strawberry, you will need to fully bake the shell before filling it.

IMG_8110
In my opinion the best pie crust has half butter and half shortening.
  • 4 cups all-purpose flour
  • 1 cup cubed cold unsalted butter
  • 1 cup cubed cold vegetable shortening
  • 1 tsp. salt
  • 1 cup ice water

Either using a stand mixer fitted with a paddle attachment or a food processor mix or pulse the flour, butter, shortening and salt for 10 or 15 seconds. Add the ice water and mix on medium or pulse until the dough just comes together.

IMG_8119
Don’t overmix. You want some small lumps of fat to remain to make the dough flaky.

Shape the dough into three balls. You will only need one ball for this pie so freeze the other two for future pie baking. Wrap the dough in plastic and place in the refrigerator (and the other two in the freezer) for at least a half hour.

Roll the dough out and place in the pie shell.

IMG_8139
Freeze the shell for at least 15 minutes at this point.

Brush the pie shell with an egg wash (1 egg white whisked with 1 tbsp cream (or milk).

Cut a circle out of parchment and fill the lined shell with dried beans, rice or pie weights.

IMG_8140
Save the rice for your next blind baking session.

Bake the shell at 375F for 30 to 35 minutes until the edges are light golden brown. Take it out of the oven, remove the parchment and rice and poke the shell a few times with a fork. Put it back in the oven for an additional 5 minutes.

Crumble

IMG_8125

  • 1/2 cup rolled oats
  • 1/3 cup all-purpose flour
  • 1/3 cup brown sugar
  • 1/4 tsp cinnamon
  • 1/4 cup unsalted butter at room temperature

Combine all the above in a bowl and using your hands work it all together until clumps form. Set it aside.

Filling

IMG_8128
Cut the rhubarb into 1/2 inch pieces. De-stem and quarter the strawberries.
  • 3 cups rhubarb
  • 3 cups strawberries
  • 1 cup sugar
  • 3 Tbsp cornstarch
  • 1/2 tsp ground cinnamon
  • 1/4 tsp ground nutmeg
  • 1/4 tsp ground cardamom
  • 1 tbsp fresh lemon juice
  • 1/4 tsp orange blossom water
IMG_8135
Use fresh nutmeg if you have it…grating it.

To make the filling, in a saucepan, place the rhubarb, sugar, cornstarch, cinnamon, nutmeg, cardamom and lemon juice. Cook over medium heat for about 15 minutes stirring often so it doesn’t burn. Remove from the heat and stir in the strawberries and orange blossom water.

Fill the shell to the rim and top with the crumb topping. Bake the pie at 375F for 40 to 45 minutes, until the crumb is golden brown and filling is bubbling. I like this pie warm out of the oven but it’s good cold too.

IMG_8151
The six best words in the English language: Pie is out of the oven. The Duchess Bake Shop cookbook is the bomb. Everything I’ve tried from it has turned out beautifully and it’s fun just to browse and drool over the photos.

To market, to market, to be a fat pig

IMG_8033
Joy Road makes joyous cinnamon buns

It’s summer. The Penticton Farmer’s Market opened two weeks early this year and I hope it closes two weeks later. It was named “2015 Market of the Year” by the British Columbia Association of Farmers’ Markets for a reason, lots of reasons really. Here is a look at opening day of its 26th season.

IMG_8042
Shrooms
IMG_8049
Tunes
IMG_8051
Pups
IMG_8062
Faces in the crowd
IMG_8053
Arriving in style
IMG_8064
I’ll take two please
IMG_8066
Hundreds of peeps shopped for kale, tomato plants, asparagus and pickles
IMG_8058
Wine tasting…and buying
IMG_8045
Stumped?
IMG_8037.JPG
In a pickle?
IMG_8028
Sunshine and carbs at Joy Road
IMG_8039
The market is up and running from 8:30 a.m. to 1 p.m. on Saturdays
IMG_8069
Home again, home again
IMG_8072.JPG
Jiggety-jig

The most expensive raspberries in the world: Cane planting primer

FullSizeRender
To produce these…
IMG_7956
…you need some great detergent

With every shovel of dirt came rocks and my future pints of raspberries went up another 10 cents. “That will be $50 please…” My revelation for the week was a reminder of just how hard farming is and how much it should really be worth.

IMG_7932
It’s not that big a box right. How hard will this be? All planted in an hour right? It turned out to be 10 hours with two more days to add additional compost and mulch. The box contains 100 Prelude raspberry  canes from an Ontario grower. In behind, in the early morning rays, are some of our blueberry bushes in raised beds.

In a backwards fashion we are adding to our symphony with a second 100 raspberry canes for our Carpe Diem berry farm. Last year we planted Encore raspberries, this year Prelude. Our Encores are doing great and establishing well. We will get a medium-sized harvest this year and a much bigger one next year as they mature.

IMG_7979
The berries on the Encore raspberries planted last year are forming up nicely.
IMG_8006.JPG
Taken from the tree fort balcony, here is a look at part of last year’s planting.

We chose Prelude and Encore raspberries to offer our customers early and late season berries while our competitors have the more commonly harvested supply. Prelude and Encore were developed by Cornell University at the New York State Experiment Station in Geneva, New York. Prelude matures a high percentage of its fruit in late June and early July while Encore is harvested from late July to early August. Like picking paint colours, I have to admit I was also swayed by the musical names.

Raspberry cane planting primer

  • Site selection is key. Pick a sunny and sheltered location with well-drained soil with no chance of waterlogging or flooding, as on a slope or in raised rows. Our location is on gentle slope. Raspberries don’t like wet feet but they also have a shallow root system so must not be allowed to dry out either.
  • Prepare your planting holes about two feet apart in rows about six feet apart.
IMG_7934.JPG
75 of our 100 will be planted here. Each of those 75 holes were dug by The Handyman with a pick-axe and shovel. Because we are a small operation we aren’t too mechanized.
  •  Plant certified disease-free stock in early spring. Ours came from Strawberry Thyme Farm in Ontario and was sent to us by refrigerated courier. I tried to find a British Columbia source that could beat their price but was unable to. Prelude came early. Last year Strawberry Thyme had let us know that they were shipping the Encores but being Prelude I guess they had to come before we were ready. We had hoped to have the posts, cross bracing, wires and drip irrigation installed but…they will have to follow as the plants must go in the ground as soon as possible after they arrive as their dormancy will break and the roots could dry out.
IMG_7936
I popped the canes into a bucket of water while I worked.


  • Add a shovel-full of compost to the planting hole and water in well.
IMG_7940
Compost is king in our nutrient-poor sandy soil. I will top-dress the planting every spring as well.


  • Plant the crowns at the same depth as in the nursery.
  • Add more compost mixed in with the soil you have dug out of the hole and water in very well.

IMG_8010.JPG

The Handyman supplies me with lots of mulch from his chipper.

  • Add a layer of mulch to keep the weeds at bay and to help conserve moisture. I watered again once the mulch was in place.
  • In a week or so I will add some Alaska Fish Fertilizer and will continue hand-watering until the canes are well established and showing signs of life or The Handyman has had time to install all the posts, wires and drip irrigation. This should wait until he runs his marathon next week as post pounding does not equal taper.
IMG_7965.JPG
Rocks and more rocks…how much can we charge for a pint?
IMG_7971
View of the tree fort with the last year’s Encore planting and this year’s Prelude
IMG_7998
I will plant a drought-tolerant grass seed in between the rows to help keep the canes in their rows. The lawnmower will trim off the suckers in the grassy strips.

Prelude produces attractive, high quality, firm fruit that will taste amazing. I can’t wait although now that all the canes are in I’m starting to think about the hours of picking ahead and price of those pints.

IMG_0473.JPG
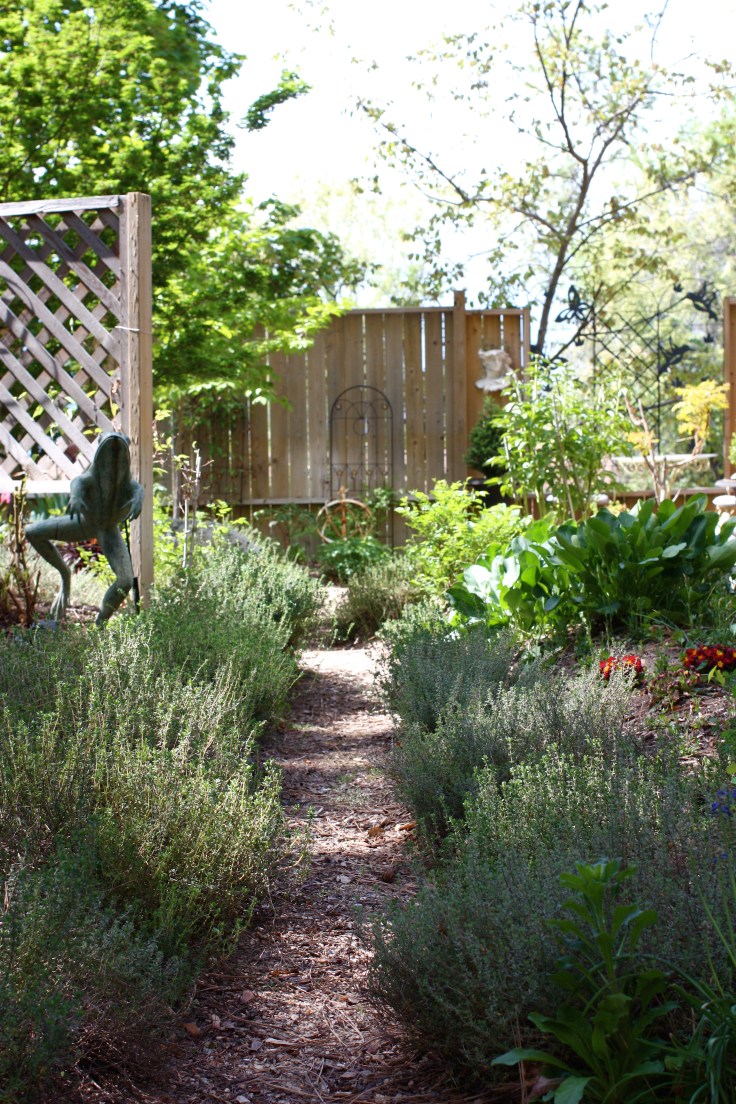
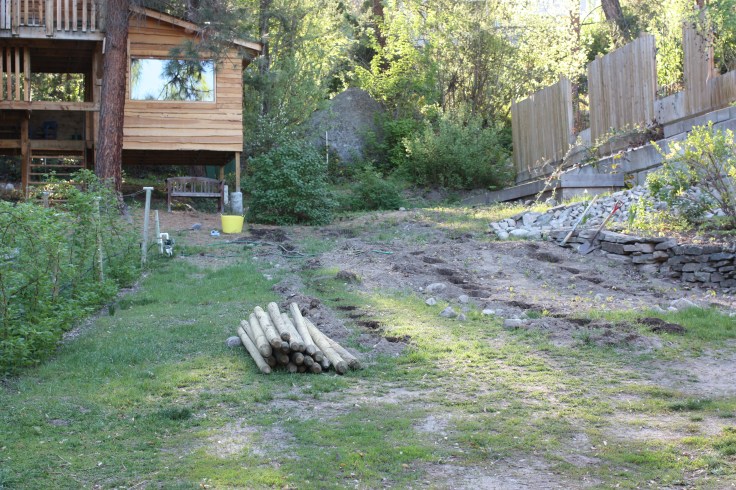
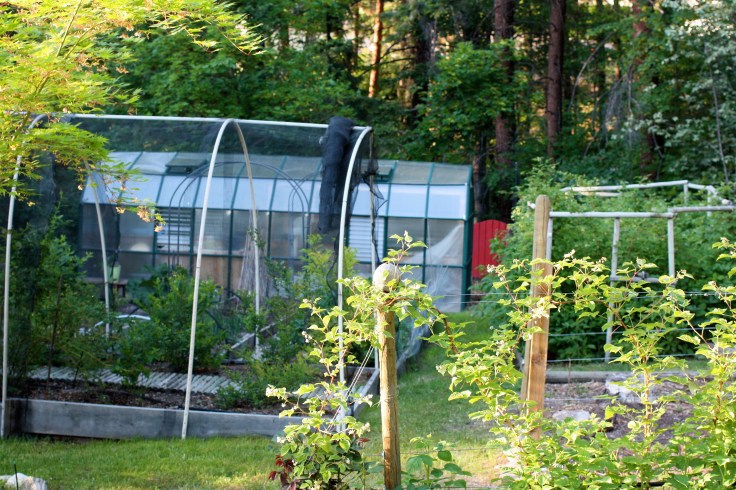
Next up is the addition of 50 more blueberry bushes and a netting structure to protect the blueberries from the birds.

“Naramatafied”: the symbiosis of an artist and a Village

The painter needs all the talent of the poet, plus hand-eye coordination.  — Robert Brault

IMG_7832
This scene is familiar to anyone taking a drive on North Naramata Road, only “betterfied”by artist Dennis Evans.

The best description of Naramata landscape artist and potter Dennis Evans‘ painting style comes from his wife, poet and writer Patricia Evans: “The landscape has a soul and it comes right out from the canvas, to touch the viewer. Dennis uses colour, usually pastel, sometimes monochrome and at other times, complementary, sometimes large format, or sometimes small, always trying to capture the essence of the landscape. He takes a pastoral image and transforms it into a heroic one through his choice of colour. Images come easily; their sources are all around him.”

IMG_7834
Unlike many local painters who choose bold colours, Dennis chooses to interpret “the haze of an August day feeling” using gentler pastel colours.

I paint for myself. I don’t know how to do anything else anyway. Also I have to earn my living, and occupy myself.  — Francis Bacon

A life-long artist, Dennis has the good fortune or as he would interpret it, fate, to end up in a place that speaks to him. Having moved from Calgary to Naramata a decade ago, he says,” I am much more connected to the landscape here. Pretty much all my landscapes are within walking distance of the studio. I have enough inspiration in Naramata to last a lifetime.”

What’s special about Naramata? “We didn’t really know how amazing it really is until we landed here,” says Dennis. “It has an aura about it. I don’t know if it is because it’s isolated being at the end of the road as it is. It was also special to the First Nations people. They didn’t live here but came to the area for their ceremonies. It’s also home to a proportionally large number of artists, which must be for a reason, and home to an incredible concentration of unique individuals.”

IMG_2246

“When you drive out here along Naramata Road, there is a point on the road just past Apple D’Or (lodge) where you look down toward the lake and I think it is unlike anywhere else in the world. We have done a lot of travelling and it’s the most beautiful place we have ever seen. The landscape is so varied. I see a spirit in the landscape. I now work on bringing that spirit out in my paintings,” says Dennis. I think he has succeeded brilliantly.

Born in Viking, Alberta, Dennis began his art career at the Alberta College of Art (now the Alberta College of Art and Design) in the 1960s and graduated with a major in pottery and ceramics. His first love is still a key part of his artistic life. He was firing pottery out in the garden on the day I visited the studio. “It’s still like Christmas when I open the kiln after the final firing and see what I’ve created.”


He added a Bachelors degree in Fine Arts from the University of Calgary and went onto to complete a Master’s degree from the University of Houston. Dennis turned his love of pottery into a career, becoming the production manager for a major pottery manufacturing company and later opening his own production studio called Nant Mill Pottery.

“Retiring” to Naramata in 2006, he and Patricia built a studio-workshop on Naramata’s main drag, Ronbison Avenue and loving renovated and customized their house and extensive gardens. “Artists never retire and that’s OK with me. There is no other thing I want to do. I would be a bum in the street if I hadn’t found my passion,” Dennis says.

IMG_7862
This photo taken yesterday in early spring doesn’t do the studio and neighbouring house any justice. The garden will soon again be fully in bloom and be a welcoming, beautiful introduction to the Dennis Evans Art Studio.
IMG_7831
Dennis pointing out some grass that stuck to the paints on his Tenth Street Bridge (Calgary) painting completed as a student in 1966. “It was so cold the day I painted this that the paint literally froze on the canvass.” This painting represents his “ah ha”  moment when he and his instructors at the art college realized that painting landscapes outside was his calling versus the closeted still life work that didn’t hold his interest or showcase his blooming talents.

Dennis says he paint for himself and that means painting mainly in large formats to capture the large, sweeping views. “These larger paintings take up to four months to complete so they are relatively expensive for the clients,” he adds.

IMG_2249
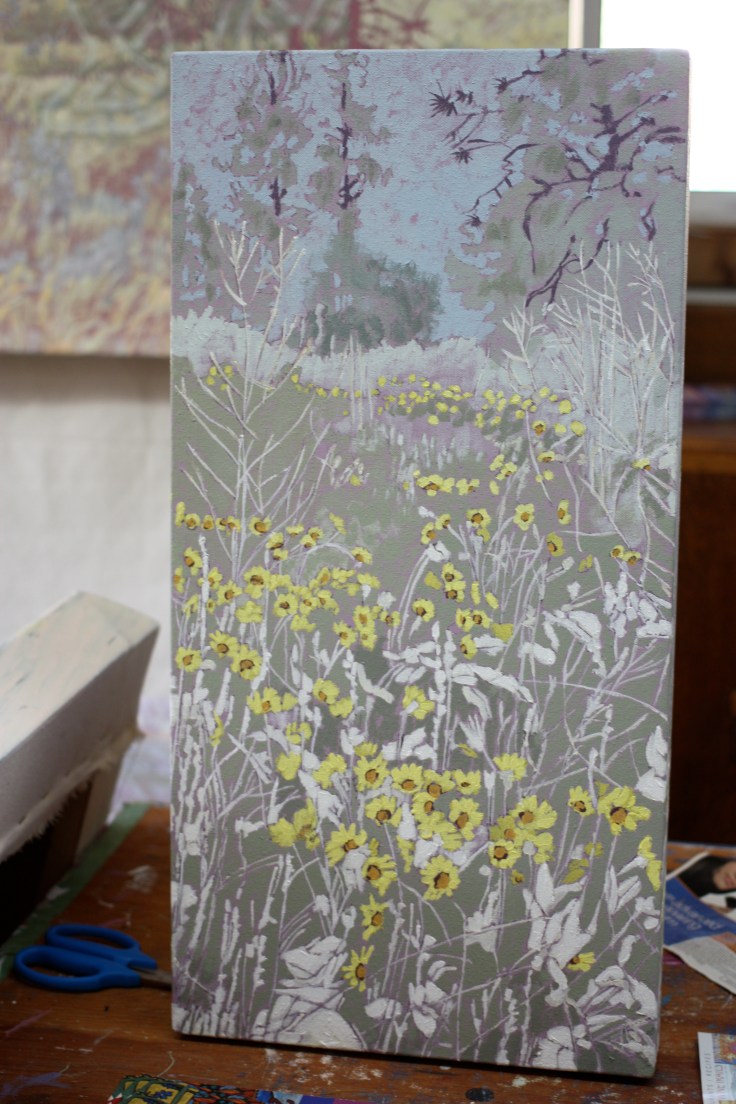
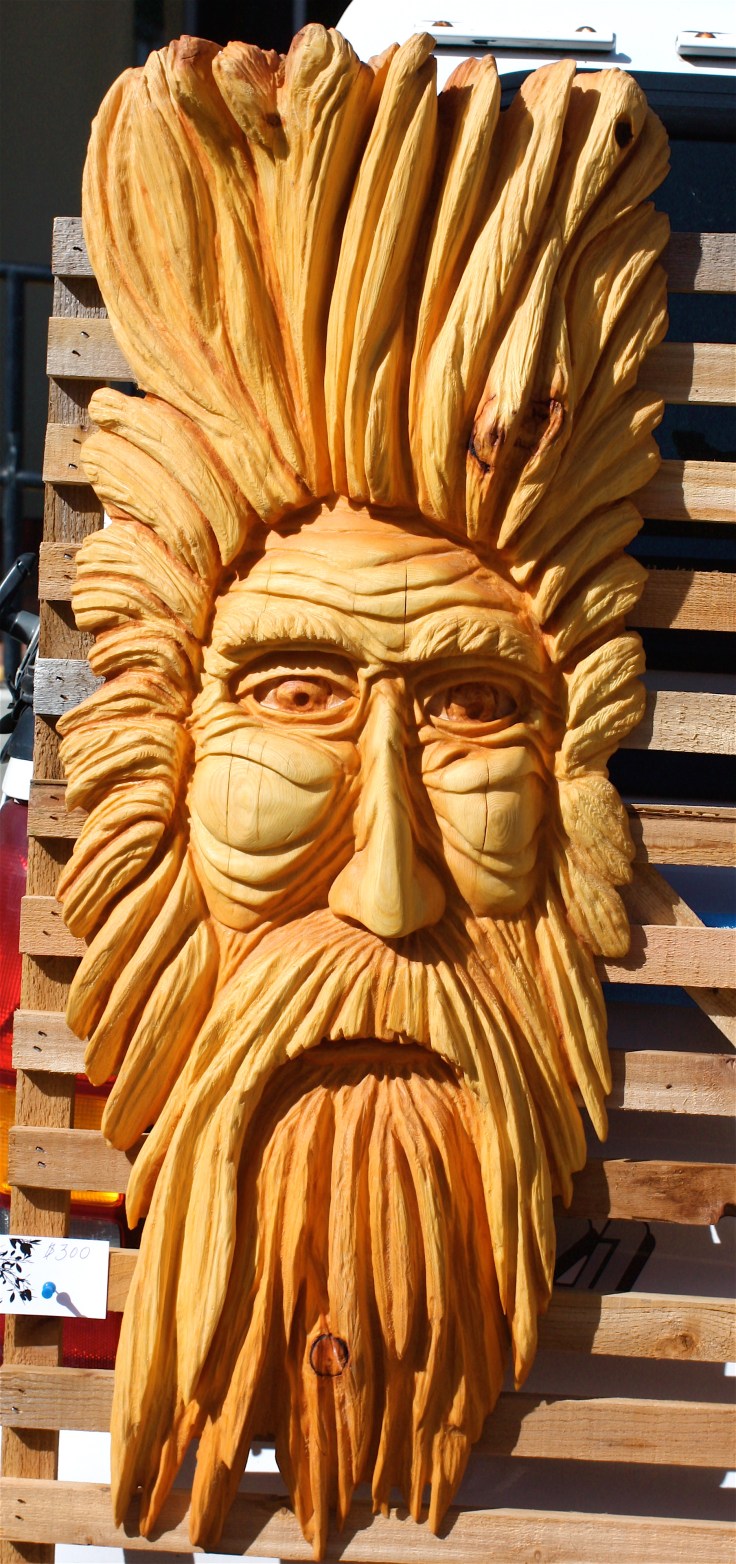
Clients don’t seem to mind. His art is gracing walls in England, Japan, the United States, Ontario, Alberta and British Columbia.

IMG_7842
The smaller canvases are better sellers, Dennis says, like this one featuring Arrowleaf wildflowers from the Sunflower family which are blooming all over the Valley’s hillsides at the moment. I love the contrast of the yellow with the muted greys and pastel colours.
IMG_2245
Self-portrait of the artist, Dennis Evans

Studio Art Tour

The Dennis Evans Art Studios (680 Robinson Avenue) is part of a self-guided driving tour of seven Naramata artists called the Naramata Bench Studio Tour. Other stops on the tour include Cormier’s Studio (art gallery, sculpture garden and B&B at 495 Vancouver Avenue, Penticton), Terry Isaac Studio  (gallery of internationally-renowned wildlife artist at 475 Upper Bench Road, Penticton), Wade Works Studio (Original art made with wine, prints and art cards, jewellery at 940 Aikens Loop), James Hibbert Pottery, (handcrafted pottery at 3015 Naramata Road), Shades of Linen, (see my blog post…50 shades of linen…natural fibre clothing designed by the store’s owner, 156 Robinson Avenue) and Forest Green Man Lavender Farm Shop (see my blog post…Sights and scents that will knock you sideways…Karolina’s vibrant colourful paintings and hand-crafted lavender products at 620 Boothe Road).

Blog at WordPress.com.

Up ↑