Search

naramata-blend

Life in a slow place that quickly steals your heart.

Category

Food and wine

Naramata’s Legend distills our hottest summer on record into a liqueur

Bring on the heat

Our Carpe Diem Farm raspberries fought hard through a heat dome that saw temperatures soar to 45 degrees C as did the jalapeño peppers grown in Naramata at https://www.puzzlegrassfarm.com and https://www.plottwistfarms.com. Our careful watering and tending combined with Legend Distilling’s artful magic has resulted in a spicy warming liqueur. It’s sort of an “out of the frying pan and into the fire” situation for our raspberries and the Naramarta peppers and the result may well become legendary.

We lost about a third of our crop this year due to extreme heat so these sweet survivors deserve their special Legend Distilling boozy end.
“Legend has it…(well actually…science states) that jalapeño peppers contain capsaicin – which when consumed – can make some people feel a sense of euphoria, similar to a ‘runner’s high’.

This 30% alcohol by volume Jalapeño Raspberry Liqueur is the first release in Legenddistilling.com new experimental Day Tripper series. “It allows us to showcase the bounty of our local area in very small batches,” says Legend’s Dawn Lennie. “Each flavour is unique and available just once, or maybe once again. You just never know.”

As the label says, “Life is one big experiment – choose your drinks wisely.” Legend’s distillery location is abundant with fresh ingredients. Our raspberry farm is literally just down the street from Legend and the two farms that provided the peppers just minutes away.

The colour is lovely don’t you think?

The liqueur has a distillate base of Legend handmade vodka made from 100% British Columbia grown wheat and the fruit infusion is our raspberries and the peppers.

The liqueur pairs well with tequila to make a spicy margarita, vodka (think jello shots or a gimlet) Legend’s Black Moon (smoke and spice) or Legend’s Naramaro or other Amaro Liqueurs.

Dawn says it works a great replacer for Fireball if you need a warm sip after a day of skiing, snowboarding or sledding.

Mixers suggestions for fun and easy sippers or if you want to dream up a festive cocktail include mango, cranberry and apple juices, ginger ale, fruit punch, orange, pineapple, raspberry juices or fresh lime or lemon juice.

Try it in shooters for a kick, says Dawn. It also pairs well with melon and banana liqueur, peach schnapps, raspberry sourpuss, framboise, and orange liqueur or coconut rum.

Ready for a first sip.

In 2013, Doug and Dawn Lennie took over the site of the former Naramata doctor’s office and transformed the property into a distillery and tasting room, complete with patio, garden and outdoor restaurant with one of the best lake views in all of Naramata.

Passionate about local ingredients, the Lennies support local farmers, producers and small businesses in the community. “We are able to tell a story through the spirits and provisions we make; a story of this amazing place, it’s history, it’s legends and the incredible people who live here,” says Dawn.

Bottling Summer — Legend Raspberry Jam Recipe


IMG_9891.jpg

Take just picked raspberries from our Naramata berry farm and a craft-distilled slowly infused Farm Berry Vodka from our neighbour Legend Distilling and bottle it. Think toast on a cold January morning in front of a fire slathered with the colours and aromas of a hot summer day – elegant and not oversweet.

This easy jam recipe can be adapted for ingredients you have easy access to if you don’t happen to own a berry farm or live near a distillery. There is no substitute for the Wine Glass Writer pens I used to mark the jars with, however. They are invaluable for canning, as I like to re-use jars and scrubbing sticky labels off is an unnecessary and annoying step.  The writers are fun to use and lets you be creative, jazzing up and customizing your jars.


Adding a soupçon of a summer wine like rosé or a fruit-infused spirit like Legend’s Slowpoke Farm Berry Vodka plays well with the beautifully ripe fruit. Legend’s limited release handmade vodka – slowly infused with the best local fruits, is the distillery’s tribute to those who value the slow and steady – acknowledging that all great things come to those who wait.

The berries in Legend’s Slowpoke come from our farm, which is a cool fact I brag about a lot. I think this makes the jam especially nice. Our berries are hand picked in the mornings and delivered to the distillery that same afternoon. Distiller Doug Lennie does his magic and now I’m adding this infusion into more fresh picked berries with some sugar and a dash of lemon juice. It’s like raspberry essence distilled, given a kick and married with yet more raspberries.


I like using a touch of alcohol in sweet preserves to give them a certain je ne sais quoi. It elevates a nice jam to an extraordinary one. A half cup for the jam, a small glass for me…


Like all cooking and baking, the end results are always, always about using the best quality ingredients you can source. Pick your own raspberries, buy them from a local farmer at the market, buy organic ones from the supermarket or as a last resort, use top quality frozen berries. Choose a hand-crafted spirit or a nice bottle of rosé.

Legend Raspberry Jam Recipe

Makes about 12 small jars (125 ml) of jam or six to eight larger jars.

Ingredients

  • 16 cups raspberries
  • 4 cups sugar
  • Juice from ½ lemon
  • ½  cup Legend Slowpoke Farm Berry Vodka (or another berry-infused spirit, Kirsch or a nice dry rosé)

Directions

1. In a large mixing bowl, combine all ingredients. Using your hands, crush the raspberries until completely broken down.

2. Transfer the raspberry mixture to a large saucepan and bring it to a boil over high heat, stirring often with a wooden spoon. Reduce the heat to medium-high and continue to stir until the jam has thickened, about 12 minutes. During this 12 minutes, I like to ladle about the half the jam mixture through a sieve placed over the boiling jam to remove some of the raspberry seeds.

3. Transfer the jam to a sterile airtight container and let it cool to room temperature. Store in the refrigerator and use within a month.

4. If you wish to store the jam for up to a year as I do, follow these canning instructions.

Tip

To check if the jam has set, place a teaspoon of jam onto a chilled plate and place in the freezer for a few minutes. Using your finger, push through the jam. If it wrinkles, it has set; if not, cook the jam for an additional minute or two.

Canning directions

  1. Fill a canner or stockpot half full with water. Place lid on canner. Heat to a simmer. Keep canning rack to the side until ready to use.
  2. Wash jars, lids and bands in hot, soapy water. Rinse well.
  3. Keep jars warm until ready to use, in order to minimize risk of breakage when filling with hot jam or jelly. Set the jars on a cookie sheet in a 250F degree oven.
  4. Boil some water in a kettle and pour over the lids placed in a heat-proof bowl. Set the bands aside in your work area. Use a canning magnet to easily remove the lids from the hot water with out touching them.

Fill your jars

  1. Ladle hot jam into hot jars, one at a time, leaving 1/4 inch headspace. Wipe any jam or jelly from the rims of the jars. Center lids on jars. Twist on the bands until fingertip tight.
  2. Place six filled jars in the canning rack inside the canner, ensuring jars are covered by 1-2 inches of water. Place lid on canner. Bring water to gentle, steady boil. Repeat until all your jars have been boiled.
  3. Process jars in boiling water for 10 minutes. Remove jars and cool. Check lids for seal after 12 to 24 hours by pressing on centre of cooled lid. If the jar is sealed it will not flex up or down. Store any un-sealed jars in the fridge and use within a month.


Hyper local, hyper fresh, hyper delicious Urtica Eatery at Legend Distilling

Urtica & Legend (36 of 38).JPG
Photo: Cedar Photography

Chef Josh Bender and his new restaurant Urtica Eatery at Legend Distilling in Naramata are taking eating local and sustainable to a whole new level. He grows or forages as many of the vegetables and herbs as he can and sources the rest from neighbouring farms. In addition to lovely local fruit the Valley is known for world-wide, Chef Josh serves only sustainably farmed meats, seafood, dairy and eggs.

After a busy day serving guests at Urtica, Chef Josh unwinds at his Naramata property by tending his 12 garden beds and 100 containers of vegetables and herbs and the containers he has planted at the restaurant itself.

“I cooked as a kid,” he says as he offers me a first dish of roasted beets with cumin yogurt, nettle pesto, pumpkin seeds, orange and wild fennel.

IMG_6969.jpg

Urtica, Chef Josh tells me, is latin for the stinging nettles he used in the most amazing tasting pesto I’ve ever had. “It’s my favourite wild edible and its a super food for plants as well. I ferment tons of it to feed to my vegetables. I love foraging for it.”

1200px-Illustration_Urtica_dioica0.jpg

“My mother had a big part in my cooking,” he says. “She was my first teacher and I was lucky to grow up surrounded by nature. Blackberries lined our two-acre property in Langley where we had a creek you could walk along for miles in the forest.”

Josh, a guy of few words, describes his Urtica menu as comfort food with a twist which is better tasted than explained in any case. Who needs words? The beet cured organic spring salmon with cucumber carpaccio, radishes, whipped goat cheese and olive crumb was as fresh, bright and luxuriously creamy tasting as it looked on the plate. Each bite was a pleasure and the flavours and textures worked beautifully together.

IMG_6977.jpg

Other choices on the ever-changing seasonal menu included a roasted carrot hummus with pita, dandelion honey ricotta, hazelnuts and chili oil, mushroom bruschetta with local cultivated oyster mushroom, herbed ricotta and aged balsamic and a farm kale salad with Upper Bench King Cole cheese, honey walnuts, apple chips, pickled onion and anchovy dressing. A selection of focaccia sandwiches included a buttermilk poached chicken with slab bacon, spring greens, tomato, pickled onion and caramelized onion mayo. A braised beef neck melt and goat cheese & beet were also tempting. The featured entree was a vegetable curry stew served with kale chips, spiced yogurt and pita.

“Urtica is a dream come true for me,” says Josh who put his culinary degree to work for him in various restaurants for the past eight years. “I knew since I was 16 that cooking is the only thing I want to do. I’m coming at this out of a place of love versus building a brand. I want to make good food and be happy with what I do. I’m lucky not to be ‘working for the man’ but able to pursue my passion and learn more and more as I go.

“I am making food that I would be happy to feed my family. Food that is sustainably farmed that is good for you.”

Urtica aligns perfectly with Naramata’s status as an international Cittaslow member town. Cittaslow is an organisation founded in Italy and inspired by the slow food movement. Cittaslow’s goals include improving the quality of life in towns by slowing down its overall pace.

Talking about slow, the view on Legend’s patio makes the dining experience one you want to linger over. I paired my lunch with a refreshing summer cocktail, the new Legendary Cup featuring their just released Amaro.

IMG_6990.jpg

IMG_6982.jpg

Urtica Eatery is serving lunch Tuesday through Sunday 11:30am – 3:30 pm and beginning today dinner service Wednesday through Saturday 5-8 pm.

Urtica & Legend (29 of 38).JPG
Chef Josh Bender, a Naramatian, grows much of his own produce and forages for ingredients such as the nettle his restaurant is named after. Photo: Cedar Photography

Make your own Petit Ecolier French dark chocolate crowned butter cookies

Petit Ecolier…a petite history

One of the Handyman’s favourite varieties of biscuits is the French treat, Petit Ecolier. They have a butter biscuit base and an embossed chocolate top featuring a little schoolboy.
Made by the LU cookie company, their excellent quality cookies dominate the supermarket offering in France. More than 150 years ago, the LU cookie company was begun in the western city of Nantes by the husband and wife team Jean-Romain Lefèvre and Pauline-Isabelle Utile (the first initials in their last names were combined to name the company).

IMG_3913.JPG

At first the company was mostly just a luxury store where people came to buy carefully crafted cookies, served with great show and packaged for gift giving. Over time and as the company’s care was passed from one generation to the next, the company changed over to the industrialized production of cookies.

Their marketing campaigns featured many delightful advertisements created by artists, and the le Petit Ecolier (Little School Boy) painted by Firmin Bouisset became emblematic for the LU company. The company has now been taken over by Kraft but the quality has remained the same.

The Handyman’s go-to Petit Ecolier is now made by Quebec company Leclerc that began making their Celebration version about 15 years ago. The chocolate top features an image of the Chateau Frontenac in Quebec City. This company was formed in 1905.
In a small backroom at his family home on Arago Street in Quebec City, Francois Leclerc baked his very first cookies. These cookies were from  a tried-and-true jelly cookie recipe belonging to his wife, Zelia.

This version, made in Quebec, has a 45% cocoa dark chocolate cookie topper.

IMG_3901.JPG
Another Quebec company gives us the tools to hack the secret of the Petit Ecolier.

Ricardo Cuisine makes a butter cookie cutter and chocolate moulds kit that works beautifully to let you make your own version at home and up the ante by adding no artificial flavours or soya lecithin and increasing the cocoa content of the chocolate.

IMG_3946.jpg
Adding to the fun element…you can create cookies with the chocolate moulds that have French and English versions of a few sayings…such as “home made”, “made with love” and “yum”.

The butter cookies are easy to make although it takes awhile to make all the chocolate tops with the six moulds provided in the kit (which costs under $20).

IMG_3916.jpg

Butter cookie base

Makes about 36 cookies

Ingredients

  • 3 cups (spooned and leveled) all-purpose flour
  • 1 cup confectioners’ sugar
  • 1 cup (2 sticks) cold unsalted butter, cut in pieces
  • 1/2 teaspoon salt
  • 4 large egg yolks
  • 1 teaspoon vanilla extract

IMG_3902.jpg

Directions

Place flour, sugar, butter and salt in the bowl of a food processor; process until mixture is the texture of coarse meal. (You could also do this by hand cutting in the butter.) In a small bowl, lightly beat egg yolks and vanilla; with motor running, add to food processor. Process just until a dough forms. Form into two discs, wrap in plastic and place in the refrigerator for an hour or so to chill.

Pre-heat oven to 350 F degrees.

Roll dough out to a bit less than a 1/4 inch thick on a lightly floured surface and use the Ricardo butter cookie cutter (which works very well by the way…nice sharp edges). Place the cookies on a parchment-lined baking sheet and bake for about 15 minutes, until the edges are golden brown.

IMG_3927.jpgChocolate toppers

Ingredients

  • 2   90 gram 70 per cent dark chocolate bars. (I used Godiva Belgian chocolate.
  • 2   250 gram high-quality dark chocolate chips. (I used Ghirardelli 60 per cent cacao chocolate.)

Directions

Place the chocolate in a non-reactive metal bowl over a pot of simmering water (double boiler) and melt the chocolate stirring occasionally. Once melted carefully pour into the chocolate moulds ensuring the chocolate gets into all the crevices of the mould. Keep the chocolate over the simmering water while you continue to make the six batches you will need. Place the moulds in the refrigerator or in a cool place (I put them outdoors on a winter day) for a few minutes for the chocolate to set up. Carefully unmould the chocolate by loosening the edges. If you break any of the toppers simply put the pieces back into your melted chocolate in the double boiler so you can re-use it.

If you let your cookies cool for just two minutes and then place the chocolate disks on top of them, the chocolate will melt nicely and adhere to the biscuits. (Thanks good folks at Ricardo for this tip.) If like me, you didn’t have all your toppers ready beforehand, you can “glue” them onto the butter cookies with a few dabs of the melted chocolate. (You could also use Nutella.)

IMG_3924 2.jpg

The Handyman’s verdict on these fun to make cookies? “Delicious and they are even bigger than the store-bought ones which is a very good thing.”

Which is better? Tom Hanks: “I have made fire!” or two Okanagan chefs: “We have made chocolate!”?

FullSizeRender 6.jpgThere is nothing better than a friend, unless it is a friend with chocolate.
― Linda Grayson

How sweet it is

When two intrepid Okanagan chefs signed up to head to France to design a bespoke chocolate for Okanagan College‘s Pastry and Culinary Arts programs there was a lot of envy and ribbing of the, “tough job, but somebody’s got to do it,” variety. But renowned Chef Bernard Casavant, Okanagan College’s culinary manager says it required a lot of focus despite jet lag, to keep “your head clear for your palette” and quite a few glasses of water.

IMG_8710.JPG
Chef Danny Capadouca (right) and Chef Bernard Casavant (with the water) at the OrNoirTMII tasting lab of Cacao Barry just outside Paris, France. Photo: Okanagan College

Chef Danny Capdouca, head instructor for the College’s Pastry Arts program did some homework for the trip in Vancouver tasting 26 different types of chocolate to narrow the field before the 2016 trip to France. (Maybe there is a bit of methinks thou doth protest too much…)

Then the hard work of the Paris business trip (again Paris and business…oxymoron?) began. Cacao has seven identified organoleptic notes such as aromatic and fruity and further 20 secondary notes such as spicy and floral dependent on the origins and treatment of the cacao beans. Decisions had to be made on the percentage of cacao in the chocolate as well.

The goal was a dark chocolate that could be eaten in bar form as well as used in baking. Casavant says the chocolates they developed are “intense … but not aggressive.”

“It’s not abusive of your palate like some 89 per cent chocolate,” he said. “We are in wine country, we knew we wanted the dark chocolate to pair well with the wine and fruit of the Okanagan.

“Cacao liquor, the pure essence of chocolate is pretty all encompassing,” says Chef Bernard. “At times it was like the scene in Big with Tom Hanks when he tries caviar and uses a napkin to wipe down his tongue.”


After four intense days tasting, adjusting and refining at the Cacao Barry lab, a chocolate company founded in 1842, the pair narrowed their choices down to three possible dark and three milk chocolates. Computers are also used during the process. “One of our recipes was too close to that of another custom chocolate so we had to reject that one,” says Chef Bernard. “This is how the recipes are protected. In the end, no one else in the whole world will have our exact recipes.”

IMG_8565.JPG
Chef Bernard and Chef Danny in front of the chocolate organ where aromas are played with to blend the chocolate. Photo: Okanagan College

In the end, the Chefs chose to use cocoa from Tanzania, Mexico and Cuba and a cocoa percentage of just under 70.

Et Voila

Named after Valley lakes, Okanagan Noir is a 69.8 per cent smooth dark chocolate with intense cocoa flavor and a fruity finish. Kalamalka Karamel is a solid milk chocolate with a high cocoa content (45.1 per cent) with sweet notes of caramel and a smooth honey finish.

IMG_8545 2.JPG
More sampling… Chef Danny. Photo: Okanagan College

Choc one up for Okanagan College
“Okanagan College is the only college outside of Europe to have its own brand of chocolate and only the second in the world,” says Chef Bernard. “Just before we went to Paris, a Belgium post-secondary institute completed their custom chocolate recipes. These chocolate recipes are trademarked and it’s completely custom and absolutely exquisite chocolate for our students to use in their training.

“This is pretty cool to have our own chocolate,” he says. “This is just one more initiative to help elevate our Pastry Arts and Culinary Arts programs and will give students another reason to come and study with us.”

IMG_3248.jpg

The skinny on why we love chocolate – SPOILER ALERT

It seems that some of chocolate’s ingredients work by affecting the brain’s neurotransmitter or chemical messenger network. Chocolate contains trytophan which causes the brain to make serotonin, high levels of which can produce feelings of elation. Phenylethylamine, also found in chocolate, works by stimulating the brain’s pleasure centres and is believed to induce feelings of giddiness and excitement. And finally anandamide is described as a psychoactive ingredient. Remarkably, this neurotransmitter behaves in the same way as THC, the active ingredient in cannabis. However, many scientists are sceptical that these ingredients can produce mind altering effects because they are present in chocolate in such very small quantities.

IMG_8532.JPG
Okanagan College chocolate…not built in a day. Photo: Okanagan College

For now, the chocolate is only available in limited quantities at the Okanagan College cafeteria on Fridays. Ideas are in the works to partner with a winery to produce chocolate bars incorporating wine macerated local dried fruits. Chef Bernard says a student winner of an annual college competition may also have the chance to travel to France to help design a third custom chocolate.

Check out my Okanagan Noir chocolate sozzled cherry cookie post for my recipe using the special Okanagan College chocolate, local dried cherries from CC Orchards in Naramata macerated in Wild Goose wine.

IMG_3787.jpgYour hand and your mouth agreed many years ago that, as far as chocolate is concerned, there is no need to involve your brain.
― Dave Barry

Okanagan Noir chocolate sozzled cherry cookies

IMG_3435.jpg

I created this recipe to showcase the unveiling of a bespoke Okanagan chocolate. With this trademarked chocolate the Okanagan Valley has put the frosting on its reputation as Canada’s food and wine capital. Chocolate, wine and orchard fruit…yes!

Until you can get your hands on this beautiful chocolate from Okanagan College, the locally-sourced CC Orchards Naramata dried cherries and special Wild Goose Dunkelfelder wine to create the ultimate gooey, chocolatey, tart cookie I will suggest substitutes…

FullSizeRender 3.jpg

Okanagan College is the first post-secondary institution outside of Europe and only the second in the world to create its very own chocolate recipes. The exclusive milk and dark chocolate recipes were created by Chef Danny Capadouca and Chef Bernard Casavant last summer when the pair traveled to Paris to the Or NoirTMII tasting laboratories of Cacao Barry, a chocolate company founded in 1842. More on how you design a chocolate in an upcoming post on the blog with an interview from Chef Bernard…It’s tough work right?

FullSizeRender 4.jpg

Ingredients

  • 1 3/4 cups all-purpose flour
  • 1 1/4 cups unsweetened Dutch-process cocoa powder
  • 2 teaspoons baking soda
  • 1/4 teaspoon salt
  • 1 1/4 cups (2 1/2 sticks) unsalted butter, room temperature
  • 1 1/4 cups granulated sugar
  • 3/4 cup firmly packed dark-brown sugar
  • 2 large eggs
  • 1/4 teaspoon pure vanilla extract
  • 12 ounces Okanagan Noir chocolate (or 70% cocoa dark chocolate), coarsely chopped
  • 1 1/2 cups dried CC Orchards cherries, firmly packed (9 ounces)
  • 1 cup Wild Goose Dunkelfelder (or other fruit-forward red high quality red wine)
  • icing sugar for dusting (optional)
  • further 1/2 cup of Okanagan Noir or other high-quality dark chocolate for drizzling over baked cookies (optional)

IMG_3349.jpg

Directions

The night before you want to make your cookies, macerate (soak) the 1 1/2 cups of dried cherries in one cup of red wine overnight in the refrigerator.

Preheat oven to 350 degrees. Line two baking sheets with parchment paper; set aside. In a medium bowl, sift together the flour, cocoa, baking soda, and salt; set aside. Strain the cherries reserving the wine to drink! Chop the cherries into two or three pieces; set aside. In the bowl of an electric mixer fitted with the paddle attachment, cream the butter and sugars until fluffy. Add eggs and vanilla extract; beat until well combined. Add the flour mixture, and beat on low speed, until just combined. Do not overbeat.

With a wooden spoon, fold in Okanagan Noir chocolate and cherries. (Dough can be frozen at this point, wrapped well in plastic, up to 1 month; thaw completely before baking.)
Form balls of dough, each about 1/4 cup; place balls on baking sheet about 3 inches apart. Bake until puffed and cracked, 9 to 11 minutes. Transfer to a wire rack to cool completely.

Dust with icing sugar and drizzle melted Okanagan Noir over the icing sugar topped cookies for even more chocolatey flavour.

FullSizeRender 5.jpg

IMG_3407.JPG

Store in an airtight container, at room temperature, up to 3 days. Three days? As if that is going to happen…

IMG_3787.jpg

IMG_3429.jpg

Do not leave this cake out in the rain, takes so long to bake it sure but mostly it will make you happy, two slices happy

IMG_3256.jpg“Cake is happiness! If you know the way of the cake, you know the way of happiness! If you have a cake in front of you, you should not look any further for joy!”
― C. JoyBell C.

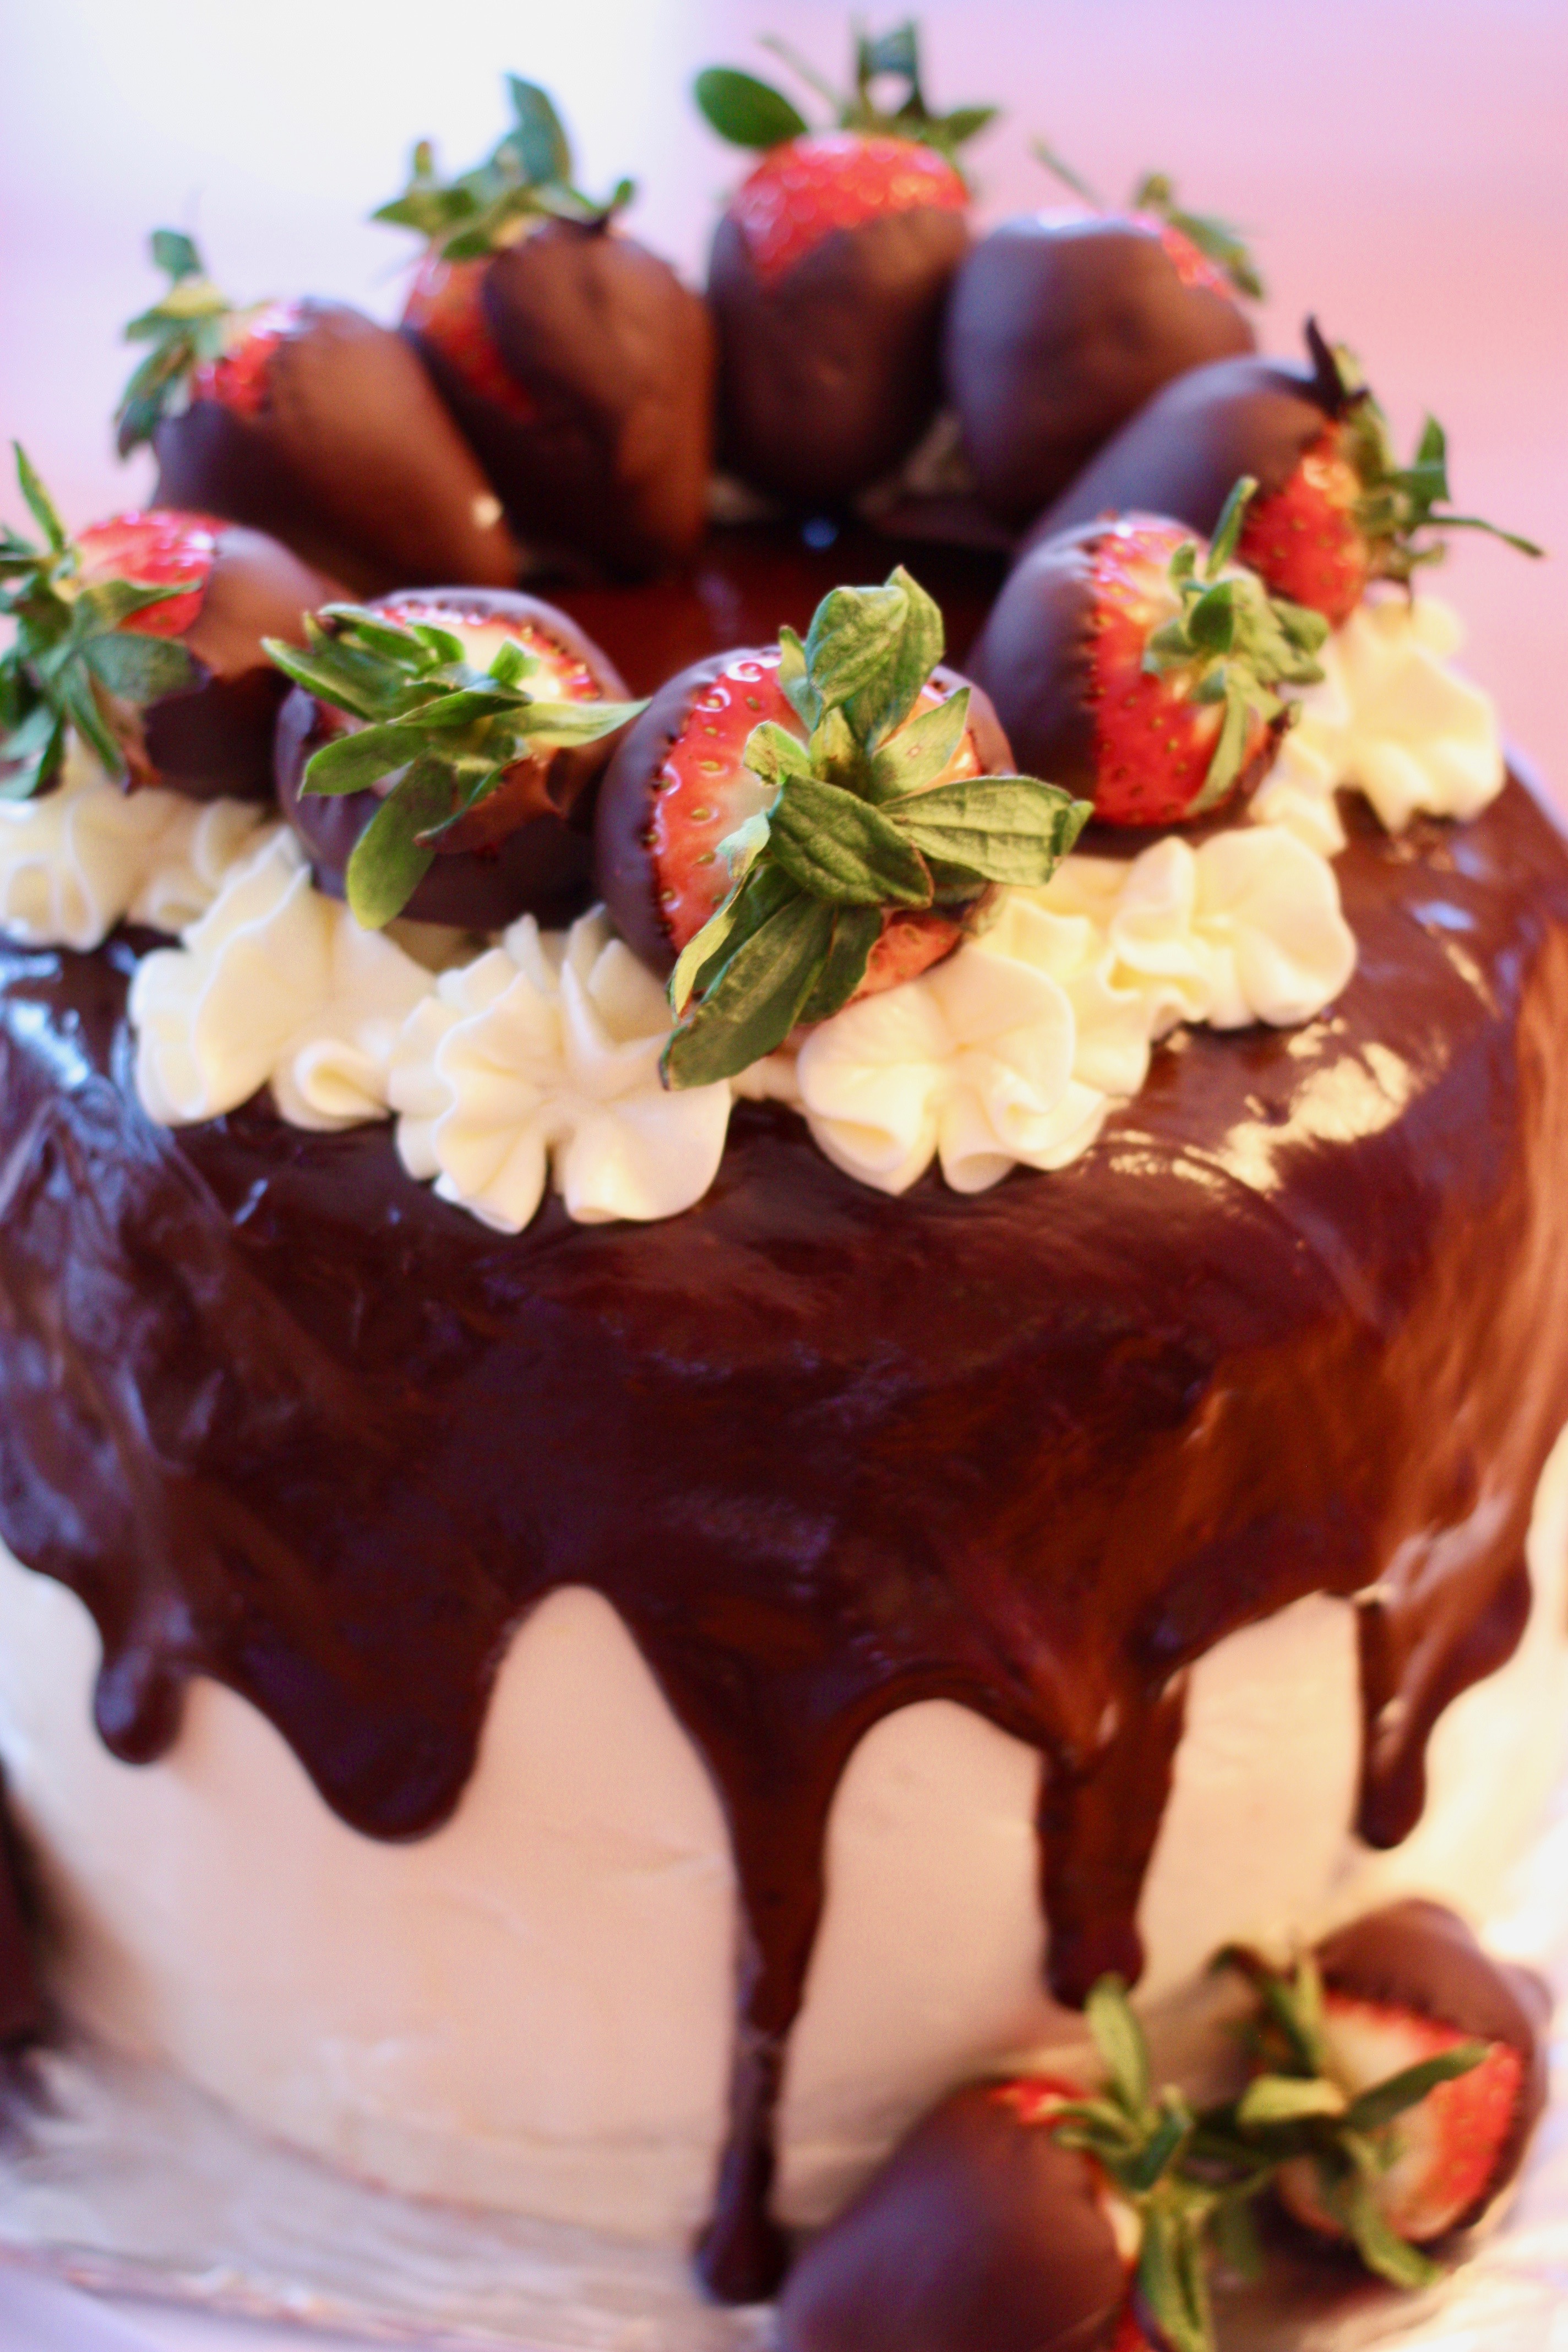
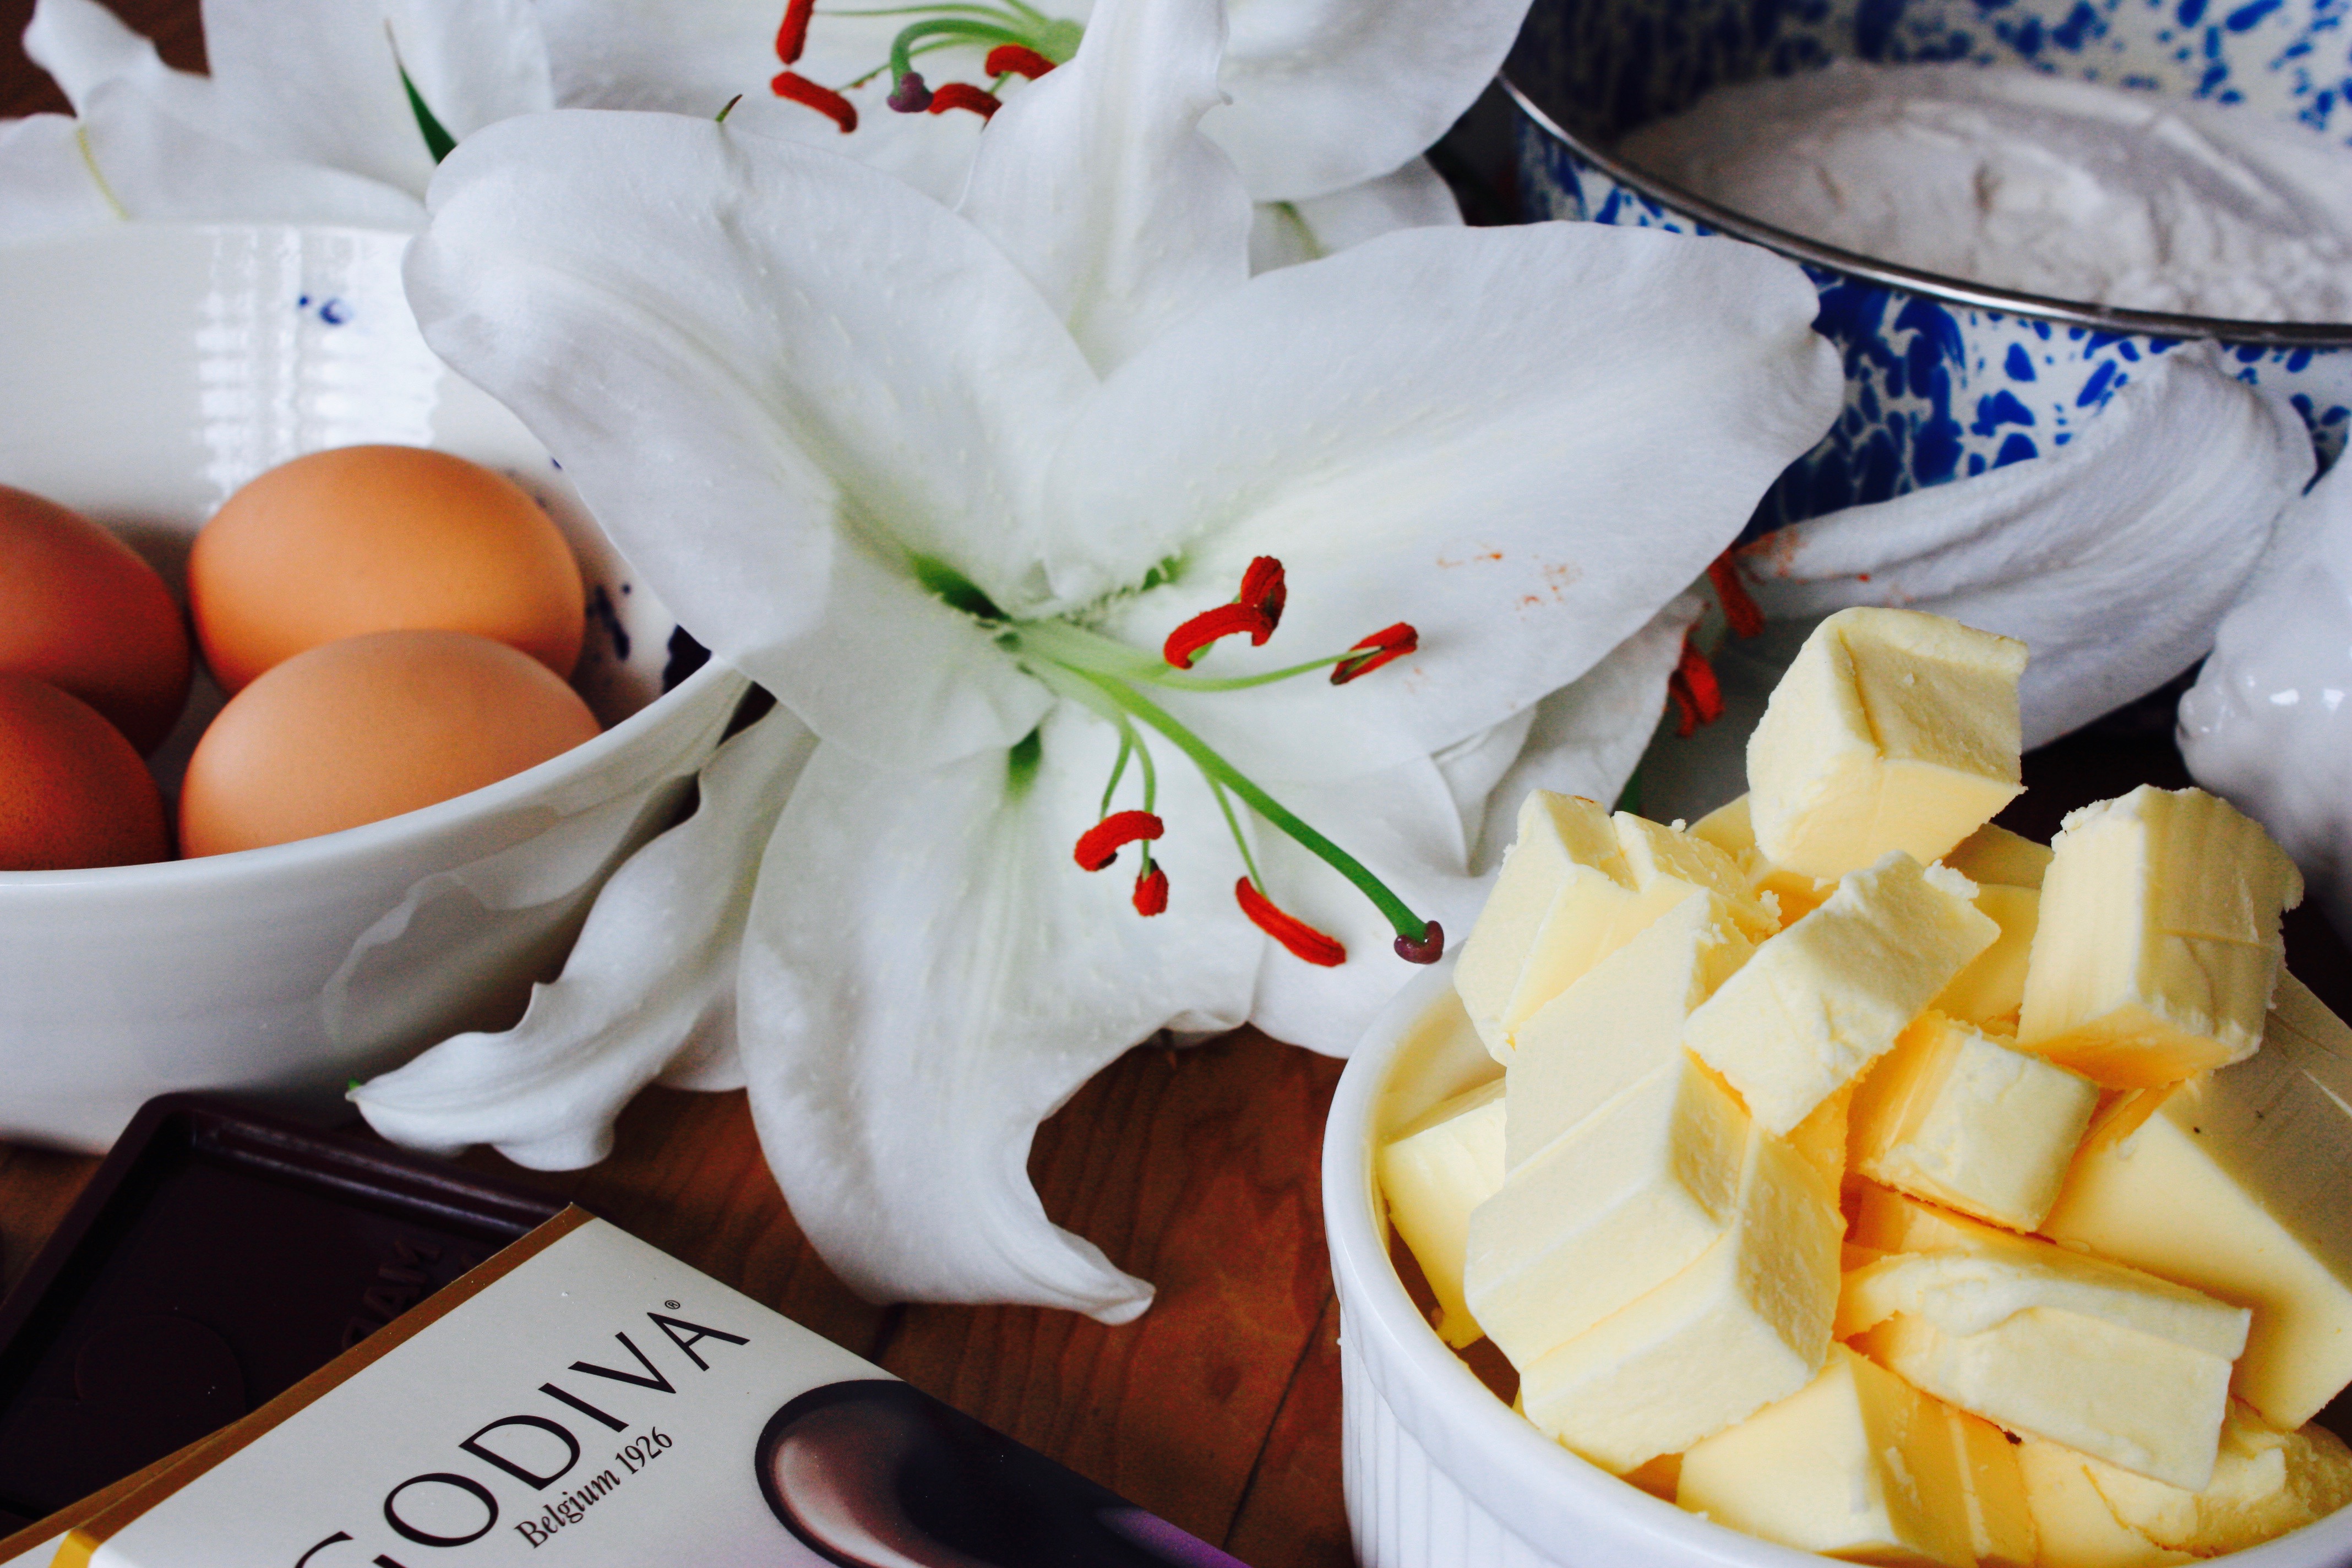
From start to chocolatey towering finish, this velvety white chocolate, rich dark chocolate, strawberry filled, Swiss meringue vanilla buttercream topped, chocolate glazed, chocolate-covered strawberry four-layer Neapolitan Cake took six hours to bake and assemble. I can’t think of a better way to spend six hours can you?

There are a total of five recipes involved including two cake recipes that will give you a pretty dramatic piece of cake when sliced with alternating layers of white chocolate and dark chocolate cake. I can totally picture an evening dress and a tuxedo to celebrate its formal look whereas expanding sweatpants are probably a better option.

IMG_3209.jpg

White Chocolate Cake

  • 5 large egg whites (My eggs came from Bella Wines farm…thanks Jay!)
  • 3/4 cup whole milk
  • 2 3/4 cup (360 g) cake flour
  • 1  1/4 cups (250 g) granulated sugar
  • 1 tablespoon plus 1/2 teaspoon baking powder
  • 1/2 teaspoon salt
  • 3/4 cup (170 g) unsalted room temperature butter
  • 1 1/2 teaspoons pure vanilla extract
  • 6 ounces (170 g) white chocolate, melted and cooled
  • Note — you will also need a jar of (80 ml) strawberry preserves for assembling the cake and 12 strawberries

Directions

Preheat oven to 350F. Grease and flour two 8-inch cake pans.

Stir together the egg whites and 1/4 cup of the milk in a small bowl, set aside. Sift the flour, sugar, baking powder and salt into the bowl of a stand mixer fitted with the paddle attachment. Mix on low until combined. With the mixer on low add the butter, vanilla and the remaining 1/2 cup of milk until the dry ingredients are moistened. Turn the mixer to medium and mix for about a minute until combined. Stop the mixer, scrape down the bowl.

Turn the mixer to medium. Add the egg white mixture in three parts, mixing for about 20 seconds after each addition. Stop the mixer, scrape down. Add the white chocolate and mix until just combined.

Evenly divide the batter between the two prepared pans. Bake for 25 to 28 minutes or until a toothpick inserted into the centre of the cakes comes out clean. Cool on a wire rack for 10 minutes before removing the cakes from their pans.

Yipeee…you have completed one recipe at this point!

IMG_3213.jpg

Chocolate Cake

  • 2 1/2 cups all-purpose flour
  • 1 cup unsweetened high-quality cocoa powder
  • 2 1/2 teaspoons baking powder
  • 1 teaspoon salt
  • 3/4 teaspoon baking soda
  • 1/2 cup plus 2 tablespoons (150 ml) grapeseed oil (could use canola)
  • 2 cups (400 g) granulated sugar
  • 2 large eggs
  • 1 large egg yolk
  • 2 teaspoons pure vanilla extract
  • 1/2 teaspoon pure almond extract
  • 1 1/2 cups whole milk
  • 1 cup hot strong-brewed coffee

Directions

Grease and flour two 8-inch cake pans. Your oven will also be at 350 F for these layers.

Sift together the flour, cocoa powder, baking powder, salt and baking soda, set aside.

In the bowl of a stand mixer fitted with the paddle, beat together the oil and sugar on medium for 2 minutes. Add the eggs, egg yolk, vanilla and almond extract. Stop the mixer and scrape bowl.

Turn the mixer to low and add the flour mixture in three batches, alternating with the milk, beginning and ending with the flour mixture. Stop the mixer and scrape bowl. With the mixer on low, stream the coffee. Mix on medium-low for no more than 30 seconds or until combined.

Evenly divide the batter between the prepared pans and bake in a 350 F oven for 25 to 28 minutes or until a toothpick inserted into the centre of the cakes comes out clean. Let them cool on a wire rack for 10 to 15 minutes before removing the cakes from the pans.

IMG_3230.jpgChocolate-dipped strawberries

  • 1 1/3 cups (8 ounces/ 226 g) chopped semisweet chocolate
  • 12 medium strawberries, washed and dried well

Directions

Melt the chocolate in the top portion of a double boiler. Line a baking sheet with parchment paper. Remove the chocolate from the heat and dip each strawberry into the chocolate one at a time and set it on the parchment paper to dry and harden.

IMG_3224.jpg

Vanilla swiss meringue buttercream

  • 1/2 cup plus 2 tablespoons egg whites
  • 1 1/4 cups granulated sugar
  • 2 cups unsalted butter (very important that it be at room temperature or it won’t combine properly) cubed
  • 2 teaspoons pure vanilla extract
  • Note…you may end up making two batches to fully cover your cake and have enough left over for the rosettes…

Directions
Place the egg whites and sugar in the bowl of a stand-mixer. Whisk them together by hand to combine. Make a double boiler by filling a medium pot filled with water over medium-high heat. Place the mixer bowl on top of the pot. The bottom of the pot should not touch the water.

Whisk intermittently and heat the egg mixture to 160F (candy thermometer) or until it is hot to the touch. Carefully fit the mixer bowl onto the stand mixer and whip with the wire attachment on high speed for 8 to 10 minutes, until it holds medium-stiff peaks. The bowl should be back to room temperature at this point. Stop the mixer and swap out the whisk attachment for the paddle.

With the mixer on low, add the cubed butter, a few tablespoons at a time then the vanilla. Once incorporated, turn up the mixer speed to medium-high and beat until the buttercream is silky smooth, 3 to 5 minutes.

Some Assembly Required

Once the cakes are cool, level them and choose which layer will be at the bottom. Place it on a cake plate. Spread on about 1/3 cup of strawberry preserves. Place the second layer of cake on top, alternating between the white and dark chocolate cakes and repeat. Smoothly frost the cake with the buttercream and refrigerate it, uncovered until firm.

Chocolate Glaze

  • 2/3 cup (4 ounces/115 g) chopped semisweet chocolate
  • 1/2 cup (120 ml) heavy cream
  • 1/4 cup light corn syrup
  • 1 teaspoon pure vanilla extract
  • 1/8 teaspoon salt

Directions

Place the chocolate, cream and corn syrup in a small saucepan. Heat over medium-low until the cream begins to steam and the chocolate starts to melt. Remove from the heat and stir in the vanilla and salt until combined. Cool to room temperature, about 10 minutes.

More Assembly

Starting with about 1/2 cup at a time, pour the chocolate glaze into the centre of the frosted cake and use an offset spatula to spread it around the top allowing it to drip over the edges. Add more glaze until you like the way it looks.

IMG_3238.jpg

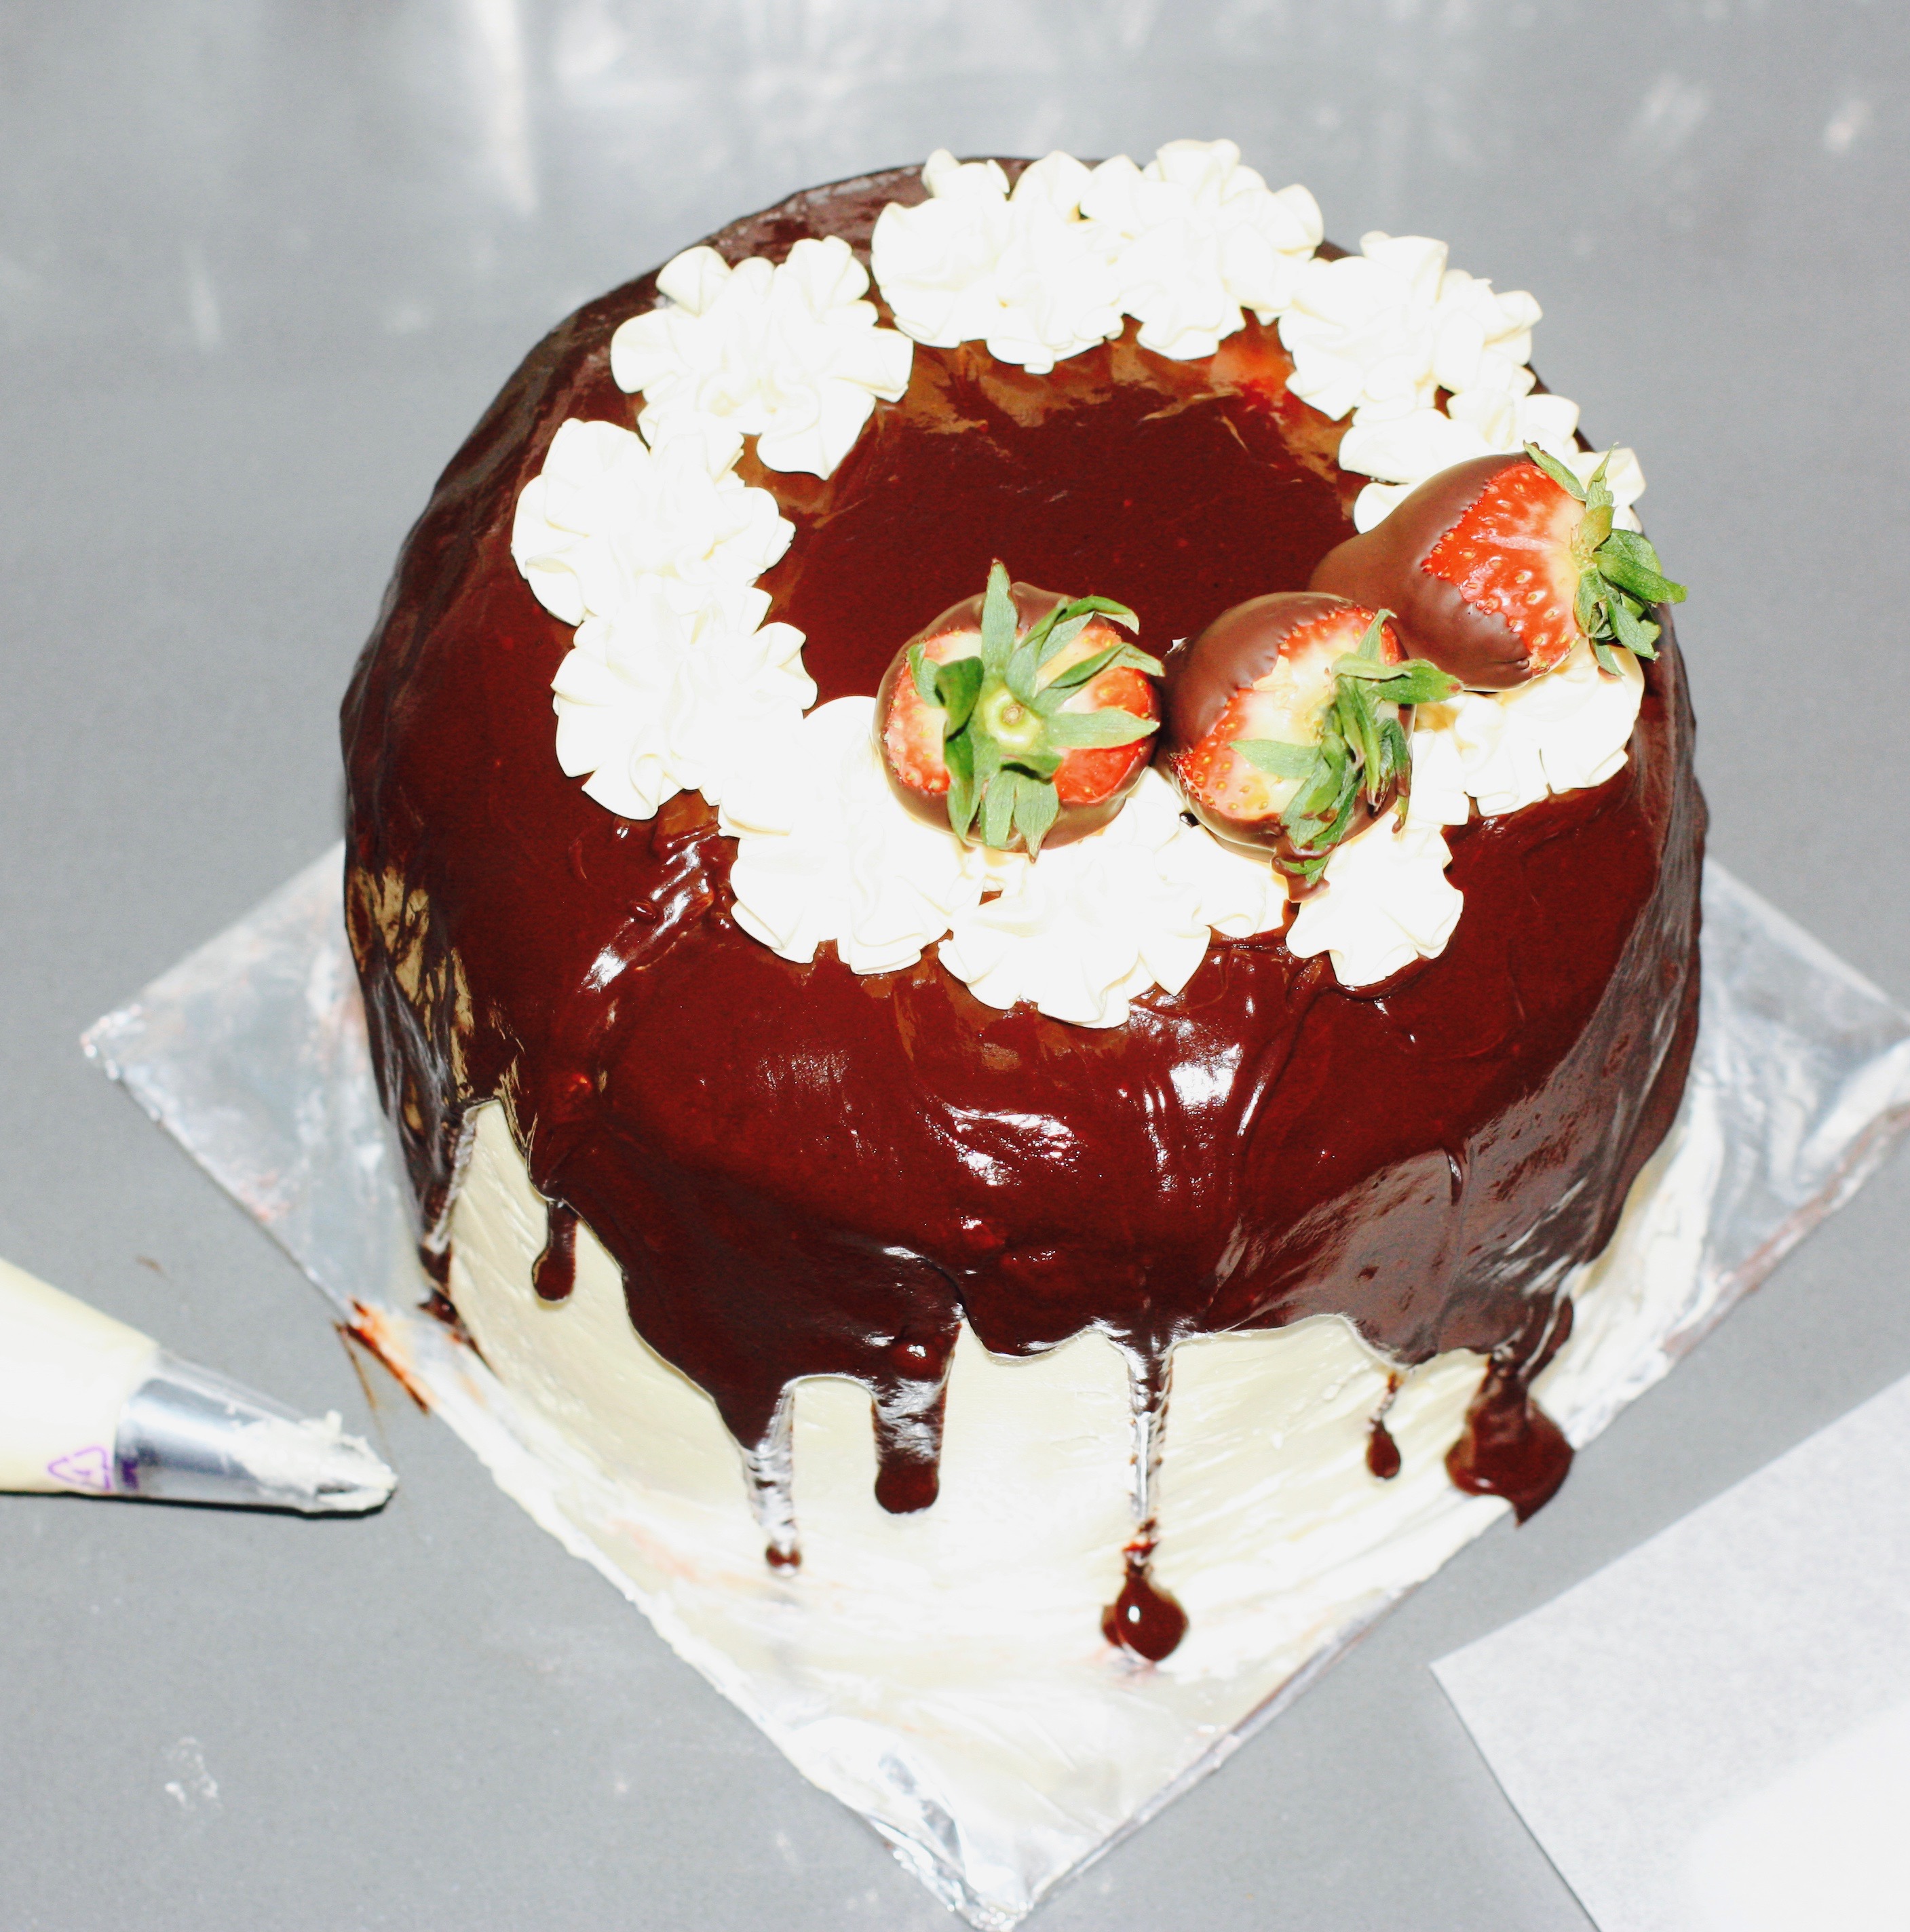
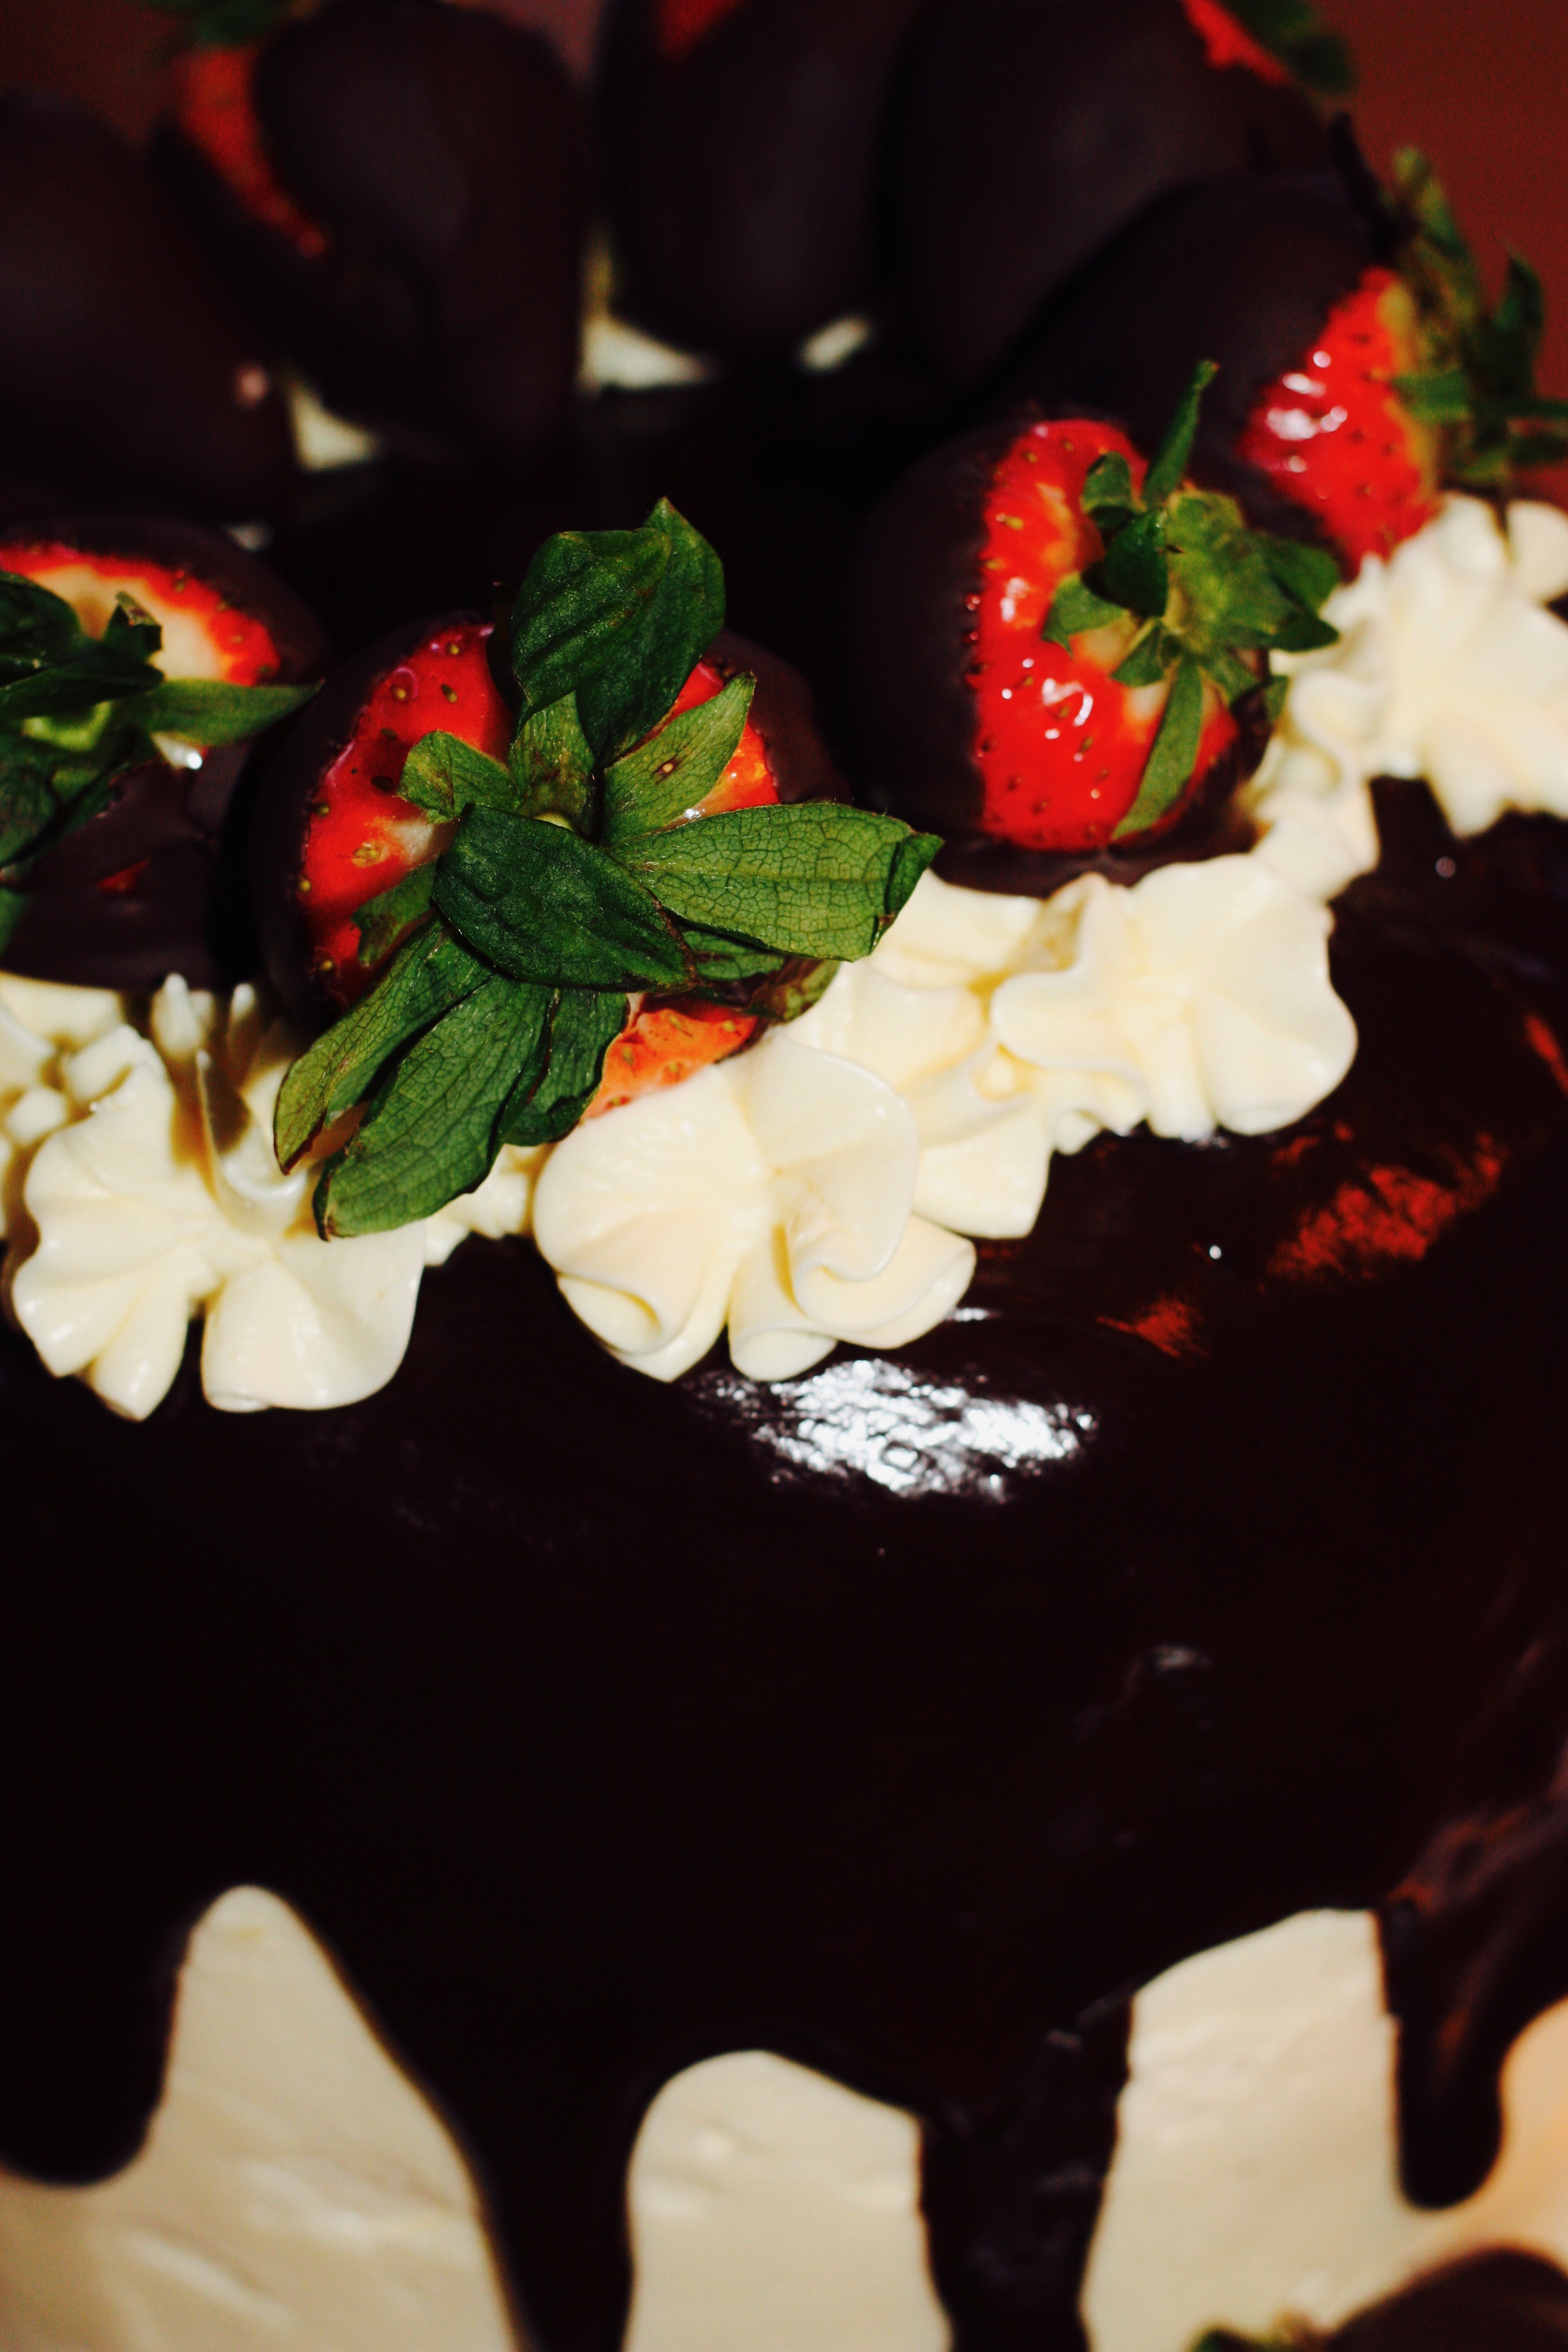
Fill a pastry bag with a star tip with the remaining buttercream. After the glaze has set, pipe rosettes around the top edge of the cake. Place the chocolate-dipped strawberries on the rosettes.

Voila!

IMG_3264.jpg

“Your good friend has just taken a piece of cake out of the garbage and eaten it. You will probably need this information when you check me into the Betty Crocker Clinic.” Cynthia Nixon

IMG_3248.jpg


Naramata Candied Chestnut and Dried Plum Brioche – Original recipe to kick-off Naramata-Blend cooking class series

IMG_2931.jpg
Chef Dana Ewart cutting into a loaf of cocoa cherry brioche.


Brioche! How hard can that be?

With ‘go big or go home’ thinking the first Naramata-Blend cooking class tackled the most delicious and some would argue, trickiest to make of the bread family – brioche. This rich, buttery egg French dough is versatile and Dana Ewart, Chef and Proprietor of Joy Road Catering helped our class of 20 make no less than five variations on this buttery theme including: herb with chives and tarragon, cocoa and dried cherry (CC Orchards cherries), plain, jelly donuts and the crowning achievement – Naramata Candied Chestnut and Dried Plum Loaf filled with local fruit and nuts.

Candied chestnuts

You can buy candied chestnuts or marrons glacé but what would be the fun in that? Making your own is easy but takes a few days as you wait for all the sugar to absorb into your lovely locally-sourced chestnuts. Here’s how: (This recipe makes twice as much as you will need for your Naramata Loaf but since it takes so long, you may as well make enough for two batches…)

1. Blanch 500g fresh chestnuts in boiling water for 4 minutes, drain, then peel while still warm.

2. Bring 300g sugar and 300ml water to the boil in a heavy-based pan to make a syrup. Simmer for 10 minutes, then add the chestnuts and simmer for 7-8 minutes.Take off the heat and leave to stand overnight in the syrup.

3. The next day, bring the chestnuts/syrup back to the boil, cook for 1 minute, then remove from the heat and cool. Repeat the boiling and cooling process 2 or 3 times over the next couple of days until all the syrup is absorbed.

4. Preheat the oven to around 150°F, spread the candied chestnuts on a tray covered with baking paper, then pop into the oven. Prop open the door and leave for 2 hours or until firm.


Brioche master recipe


Ingredient Amount Notes
PRE-FERMENT
Flour (white all purpose or bread flour) 188g
sugar 7g
Fresh yeast 30g
milk 137ml
MAIN DOUGH
Flour (white all purpose or bread flour) 563g Naramata Candied Chestnut and Dried Plum  Brioche
Eggs 10 whole Add 125g chestnuts & 125g prunes
sugar 70g
Fresh yeast 30g
salt 18g
Unsalted butter 454g/1lb Yield: 3-4 loaves

This recipe can be halved. Any left-over brioche dough can be frozen. Wrap tightly in plastic as the dough will continue to expand in your freezer. Your baked brioche can also be frozen if for some unknown reason you can’t eat it all in one or two days…

Method:

PRE-FERMENT

In a bowl or Tupperware that will hold about 3 cups, weigh the flour and sugar. Gently warm the milk until it is about body temperature or slightly warm to the touch. Crumble the fresh yeast and pour the warmed milk into the flour mixture. Mix & knead until all of the flour is hydrated and the dough is homogeneous.

Rest the pre-ferment a minimum of 4 hours out of the fridge or overnight in the fridge.

The following day, or 4 hours later- Pull the butter and eggs out of the fridge to temper.

Mix together by hand or in a kitchen aid with a dough hook attachment the flour, sugar, yeast and eggs. Mix until the flour is all hydrated- scraping down the sides of the bowl and underneath the hook occasionally to ensure that there are no lumps of dry flour.

When the dough is homogenous, stop the mixing and allow to rest for 15 minutes (this is called an autolyse).

Add the salt and the pre-ferment on top of the dough, pulled in to fist-sized chunks.

Mix again for a few minutes until the pre-ferment and the salt is mixed in. During this mix, plasticize the butter, by cutting it into pieces & beating it with a rolling pin inside a garbage bag or between layers of parchment paper.

Begin adding 1 tablespoon-sized pieces of the plasticized butter- in increments until all of the butter is incorporated. Now is the time to add the candied chestnuts and dried fruit.

Once the butter is incorporated, mist a tray or bin with neutral oil to put the dough in – cover & rest in the fridge. After 30 mins-1hr, fold the dough or punch it down. Rest for 4 hours- overnight in the fridge.

Punch down the dough, and lightly mist oil- or butter and flour your brioche pans. Weigh the dough into desired portions, shape & place in the molds or pans (making sure the dough fills only 1/3 of the pan) Proof in a warm draft- free area for approximately 40 minutes or until the dough has doubled in bulk. Brush with egg wash, and bake at 400 F for 10 minutes, then 375F for 15-20 minutes or until golden. Remove from the pan & cool on rack.

IMG_2847.jpg
We made him wear this apron. Good sport eh?

Dana’s brioche tips and tricks

Equipment

  • You can make brioche by hand but it’s super tricky to incorporate all that butter in without warming it too much with your hands. If you want to do serious baking you need to invest in a stand mixer. Christmas gift list item?
  • To take your baking to the next level, you will also need a scale. This relatively inexpensive purchase will allow you to be accurate and ensure more consistent results.
  • A dough scraper will cost a couple of bucks and is invaluable when you are working with this sticky dough.

Ingredients

  • Buy the best local ingredients you can find. The better the ingredients the more flavourful results. Shop your farmer’s markets, seek out local farmers…
  • Neutral oils include grapeseed, vegetable and canola oil.
  • Fresh yeast trumps dried yeast and it can be purchased at most grocery stores. Ask at the bakery counter. Fresh yeast can be frozen. If you do use dried yeast in the recipe above substitute the 30 grams of fresh for 15 grams of dried.

Brioche

  • Make sure you mix the brioche dough for the full 15 to 20 minutes. It needs to feel soft, smooth, warm and have good elasticity.


IMG_2866.jpg
Class member slamming some butter. He became the de-facto butter slammer. Plasticize –  Slam the heck out of the butter with a rolling pin to make your cold butter straight from the fridge more malleable. The idea is to make the butter easier to work into your brioche dough with warming it up too much. If you try to use “un-slammed” butter it will be too cold and will tear your dough.


IMG_2855.jpg
Savoury herbed brioche in molds ready to proofing.

General

  • Don’t be worried about over-working your dough. It’s not a cake batter but a bread dough.
  • Don’t skip the egg wash step. It helps keep a crust soft so it can continue to rise and “not be a prisoner in its own crust”. It also makes your brioche shine.

img_2925
Herbed brioche in a traditional boule shape.

IMG_2899 2.jpg
Two star pupils work with Dana to make the most decadent of all brioche creations…jelly-filled donuts.

IMG_2919.jpg
These were the bomb! Using the main brioche recipe, these jam-filled donuts were fried two-minutes per side in hot oil.

IMG_2917.jpg
A variety of brioche made at the cooking class.

IMG_2844.jpg
Question…answered.

IMG_2867.jpg
The room was full of laughter and good conversation as we worked on our creations. The Naramata Centre provided the perfect venue for the event. Some mulled wine made with Naramata Bench Winery Association represented winery Moraine helped with conviviality. 


IMG_2912.jpg
Ta da donuts.

IMG_2933.JPG
Ta da chocolate cherry brioche.


Ready for the Zombi Apocalypse – 72 jars of Concord Grape Jelly and how to make a less apocalyptically-sized batch…

FullSizeRender.jpg
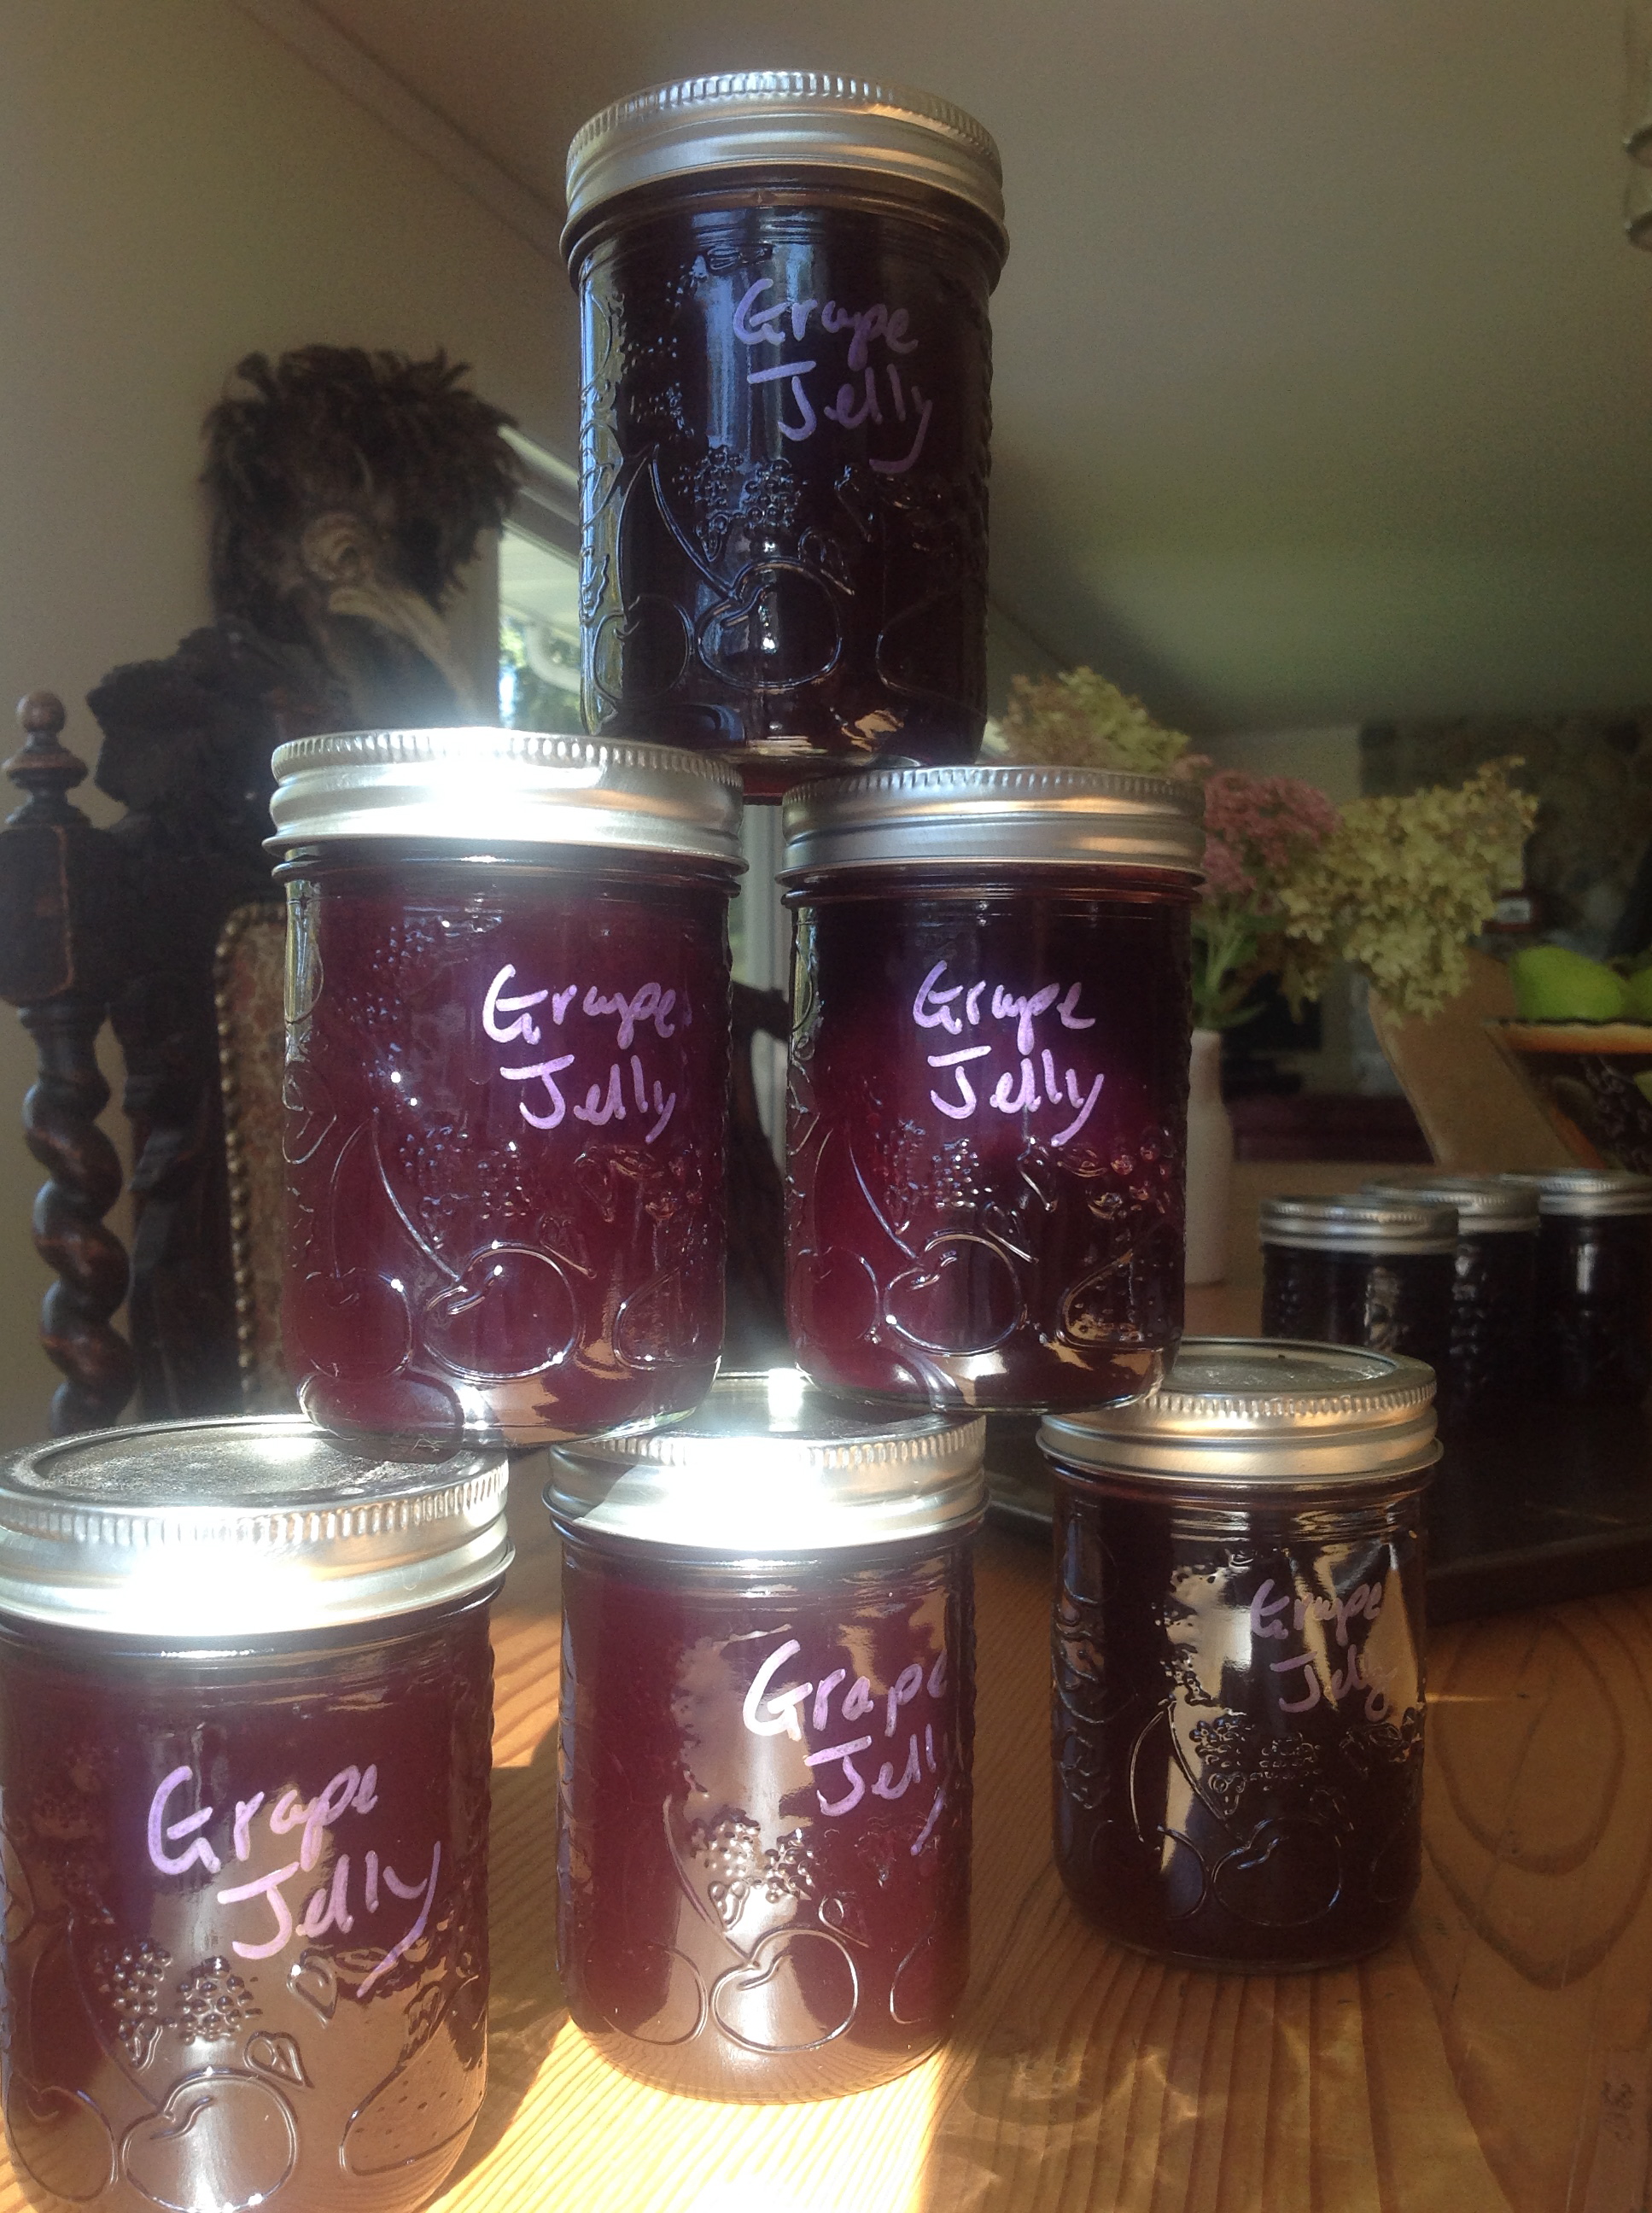
Homemade concord grape jelly tastes nothing like sticky-sweet supermarket grape jelly. It has a deep, concentrated grape flavour and is equally tart and sweet. A jar of this jelly will find its way into many, many Christmas stockings this year – a Christmas stocking factory’s worth. It has all the kid-friendly nostalgia you remember, but with lovely floral notes and a thick consistency that comes from using concords at their peak and I love the purple.

Grape Scott!

My pal Linda bought an old farm house that was un-lived in long enough for grape vines to drape all the windows of the charming house – a bonanza of lovely ripe concord grapes planted by a farm family years ago. I picture the farmer’s wife making jars of jelly to fill her preserve cupboard in the house’s basement.

IMG_1853.JPG

Linda described the amount she picked with hand gestures and I determined that adding some farmer’s market purchased grapes to the mix would make a canning session worthwhile. Mistake. Big mistake. Hence the 72 jars, the Grapes of Wrath of canning sessions, zombi apocalypse preparedness, multiple store trips for more jars and two days of purple stained everything. Good thing the jelly is amazing.

IMG_1888.JPG
Just one of the boxes she brought over…

Ingredients

Too make a normal-sized batch you will need:

  • 7.5 lbs concord grapes (Linda’s were perfectly ripe and organic)
  • 1 pkg fruit pectin crystals
  • 5 cups granulated sugar

Method

Rinse grapes; drain well. Remove enough from stems to make 10 cups (2.5 L), discarding any wrinkled or bruised grapes.

IMG_1891.JPG

In 26-cup (6.5 L) pot, crush grapes with potato masher. Add 1 cup (250 mL) water; bring to boil, stirring occasionally. Reduce heat, cover and simmer for 10 minutes.

Scoop cooked grapes and juice into jelly bag suspended over large measuring cup or bowl. Let drip, without squeezing bag, until juice measures 4 cups (1 L), about 2 hours. (Or place in colander lined with triple thickness of damp cheesecloth. Bring up sides and tie top with string to form bag. Tie bag to cupboard handle or support bar over large measuring cup or bowl. Let drip, without squeezing bag, until juice measures 4 cups/1 L, about 2 hours.)

IMG_1893.JPG
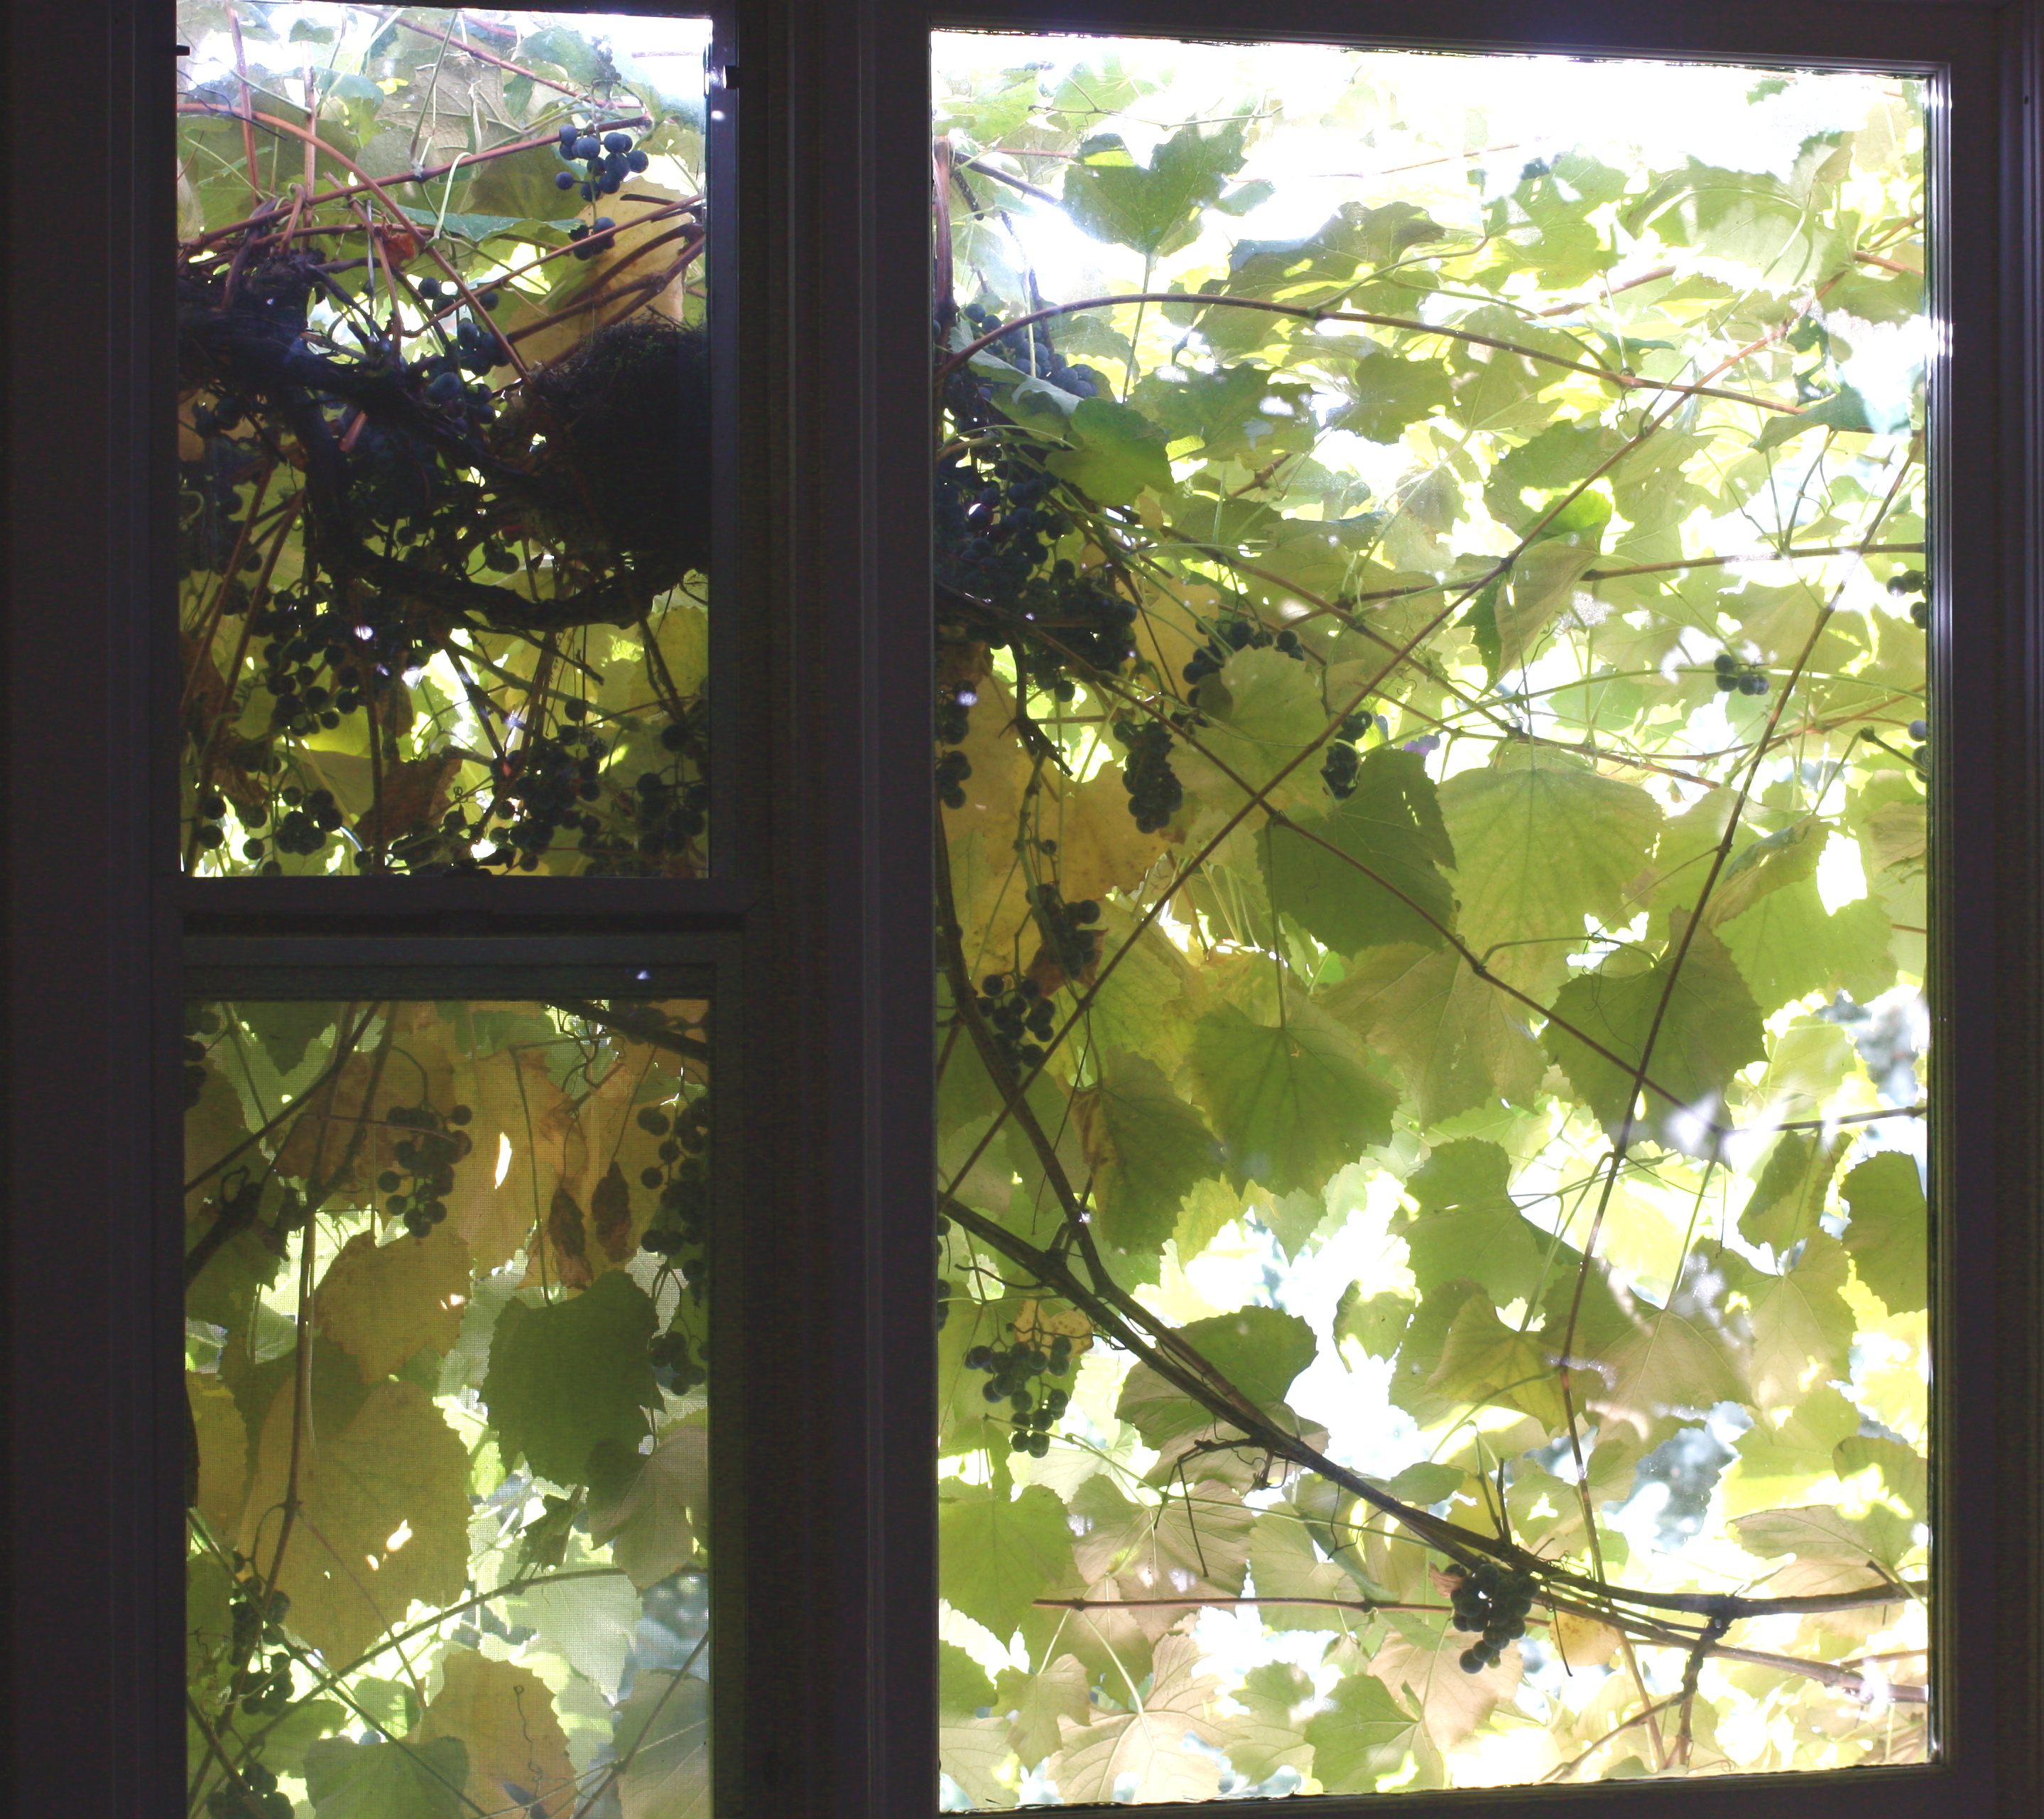
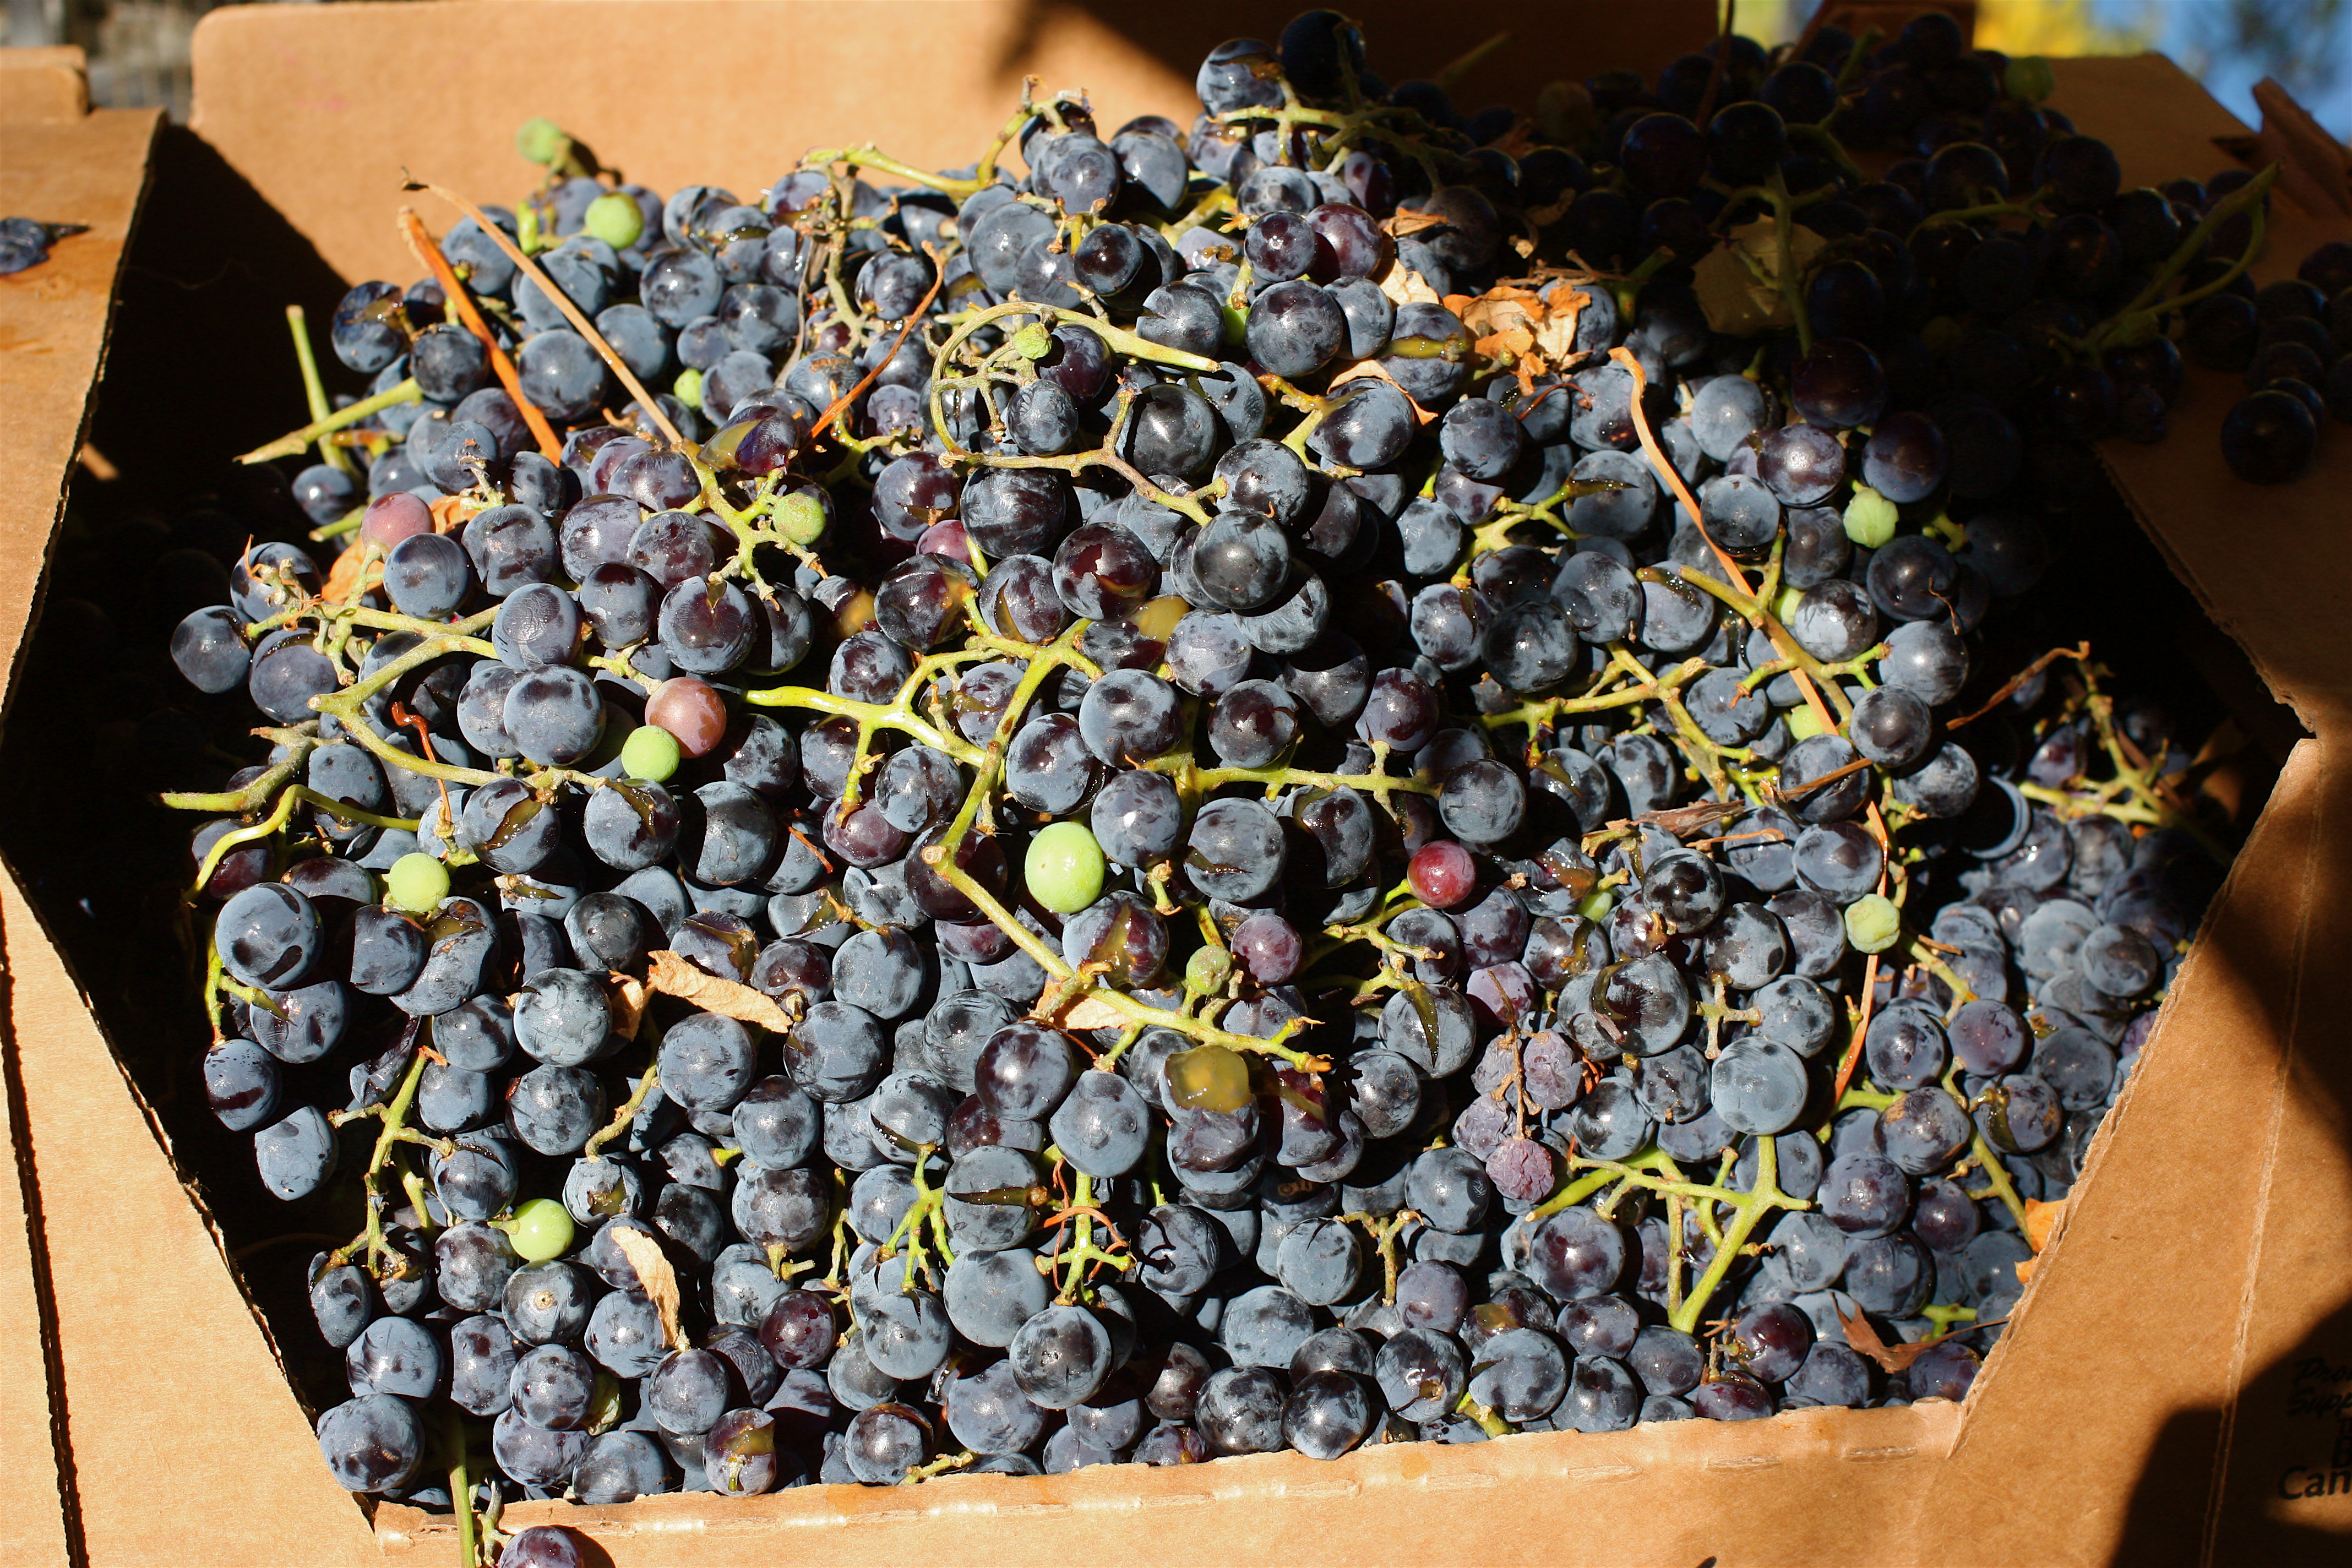
In large pot, bring juice and pectin to boil. Stir in sugar; bring to full rolling boil, stirring constantly with wooden spoon. Boil vigorously, stirring, for 1 minute. Remove from heat. Skim off any foam.

IMG_1905.JPG
Purple!

Using sterilized metal funnel and 1/2-cup (125 mL) measure, pour into hot sterilized 1-cup (250 mL) canning jars, leaving 1/4-inch (5 mm) headspace. If necessary, wipe rims. Cover with prepared lids (boiling water poured over them in a bowl to sterilize); screw on bands fingertip tight.

IMG_3341.JPG
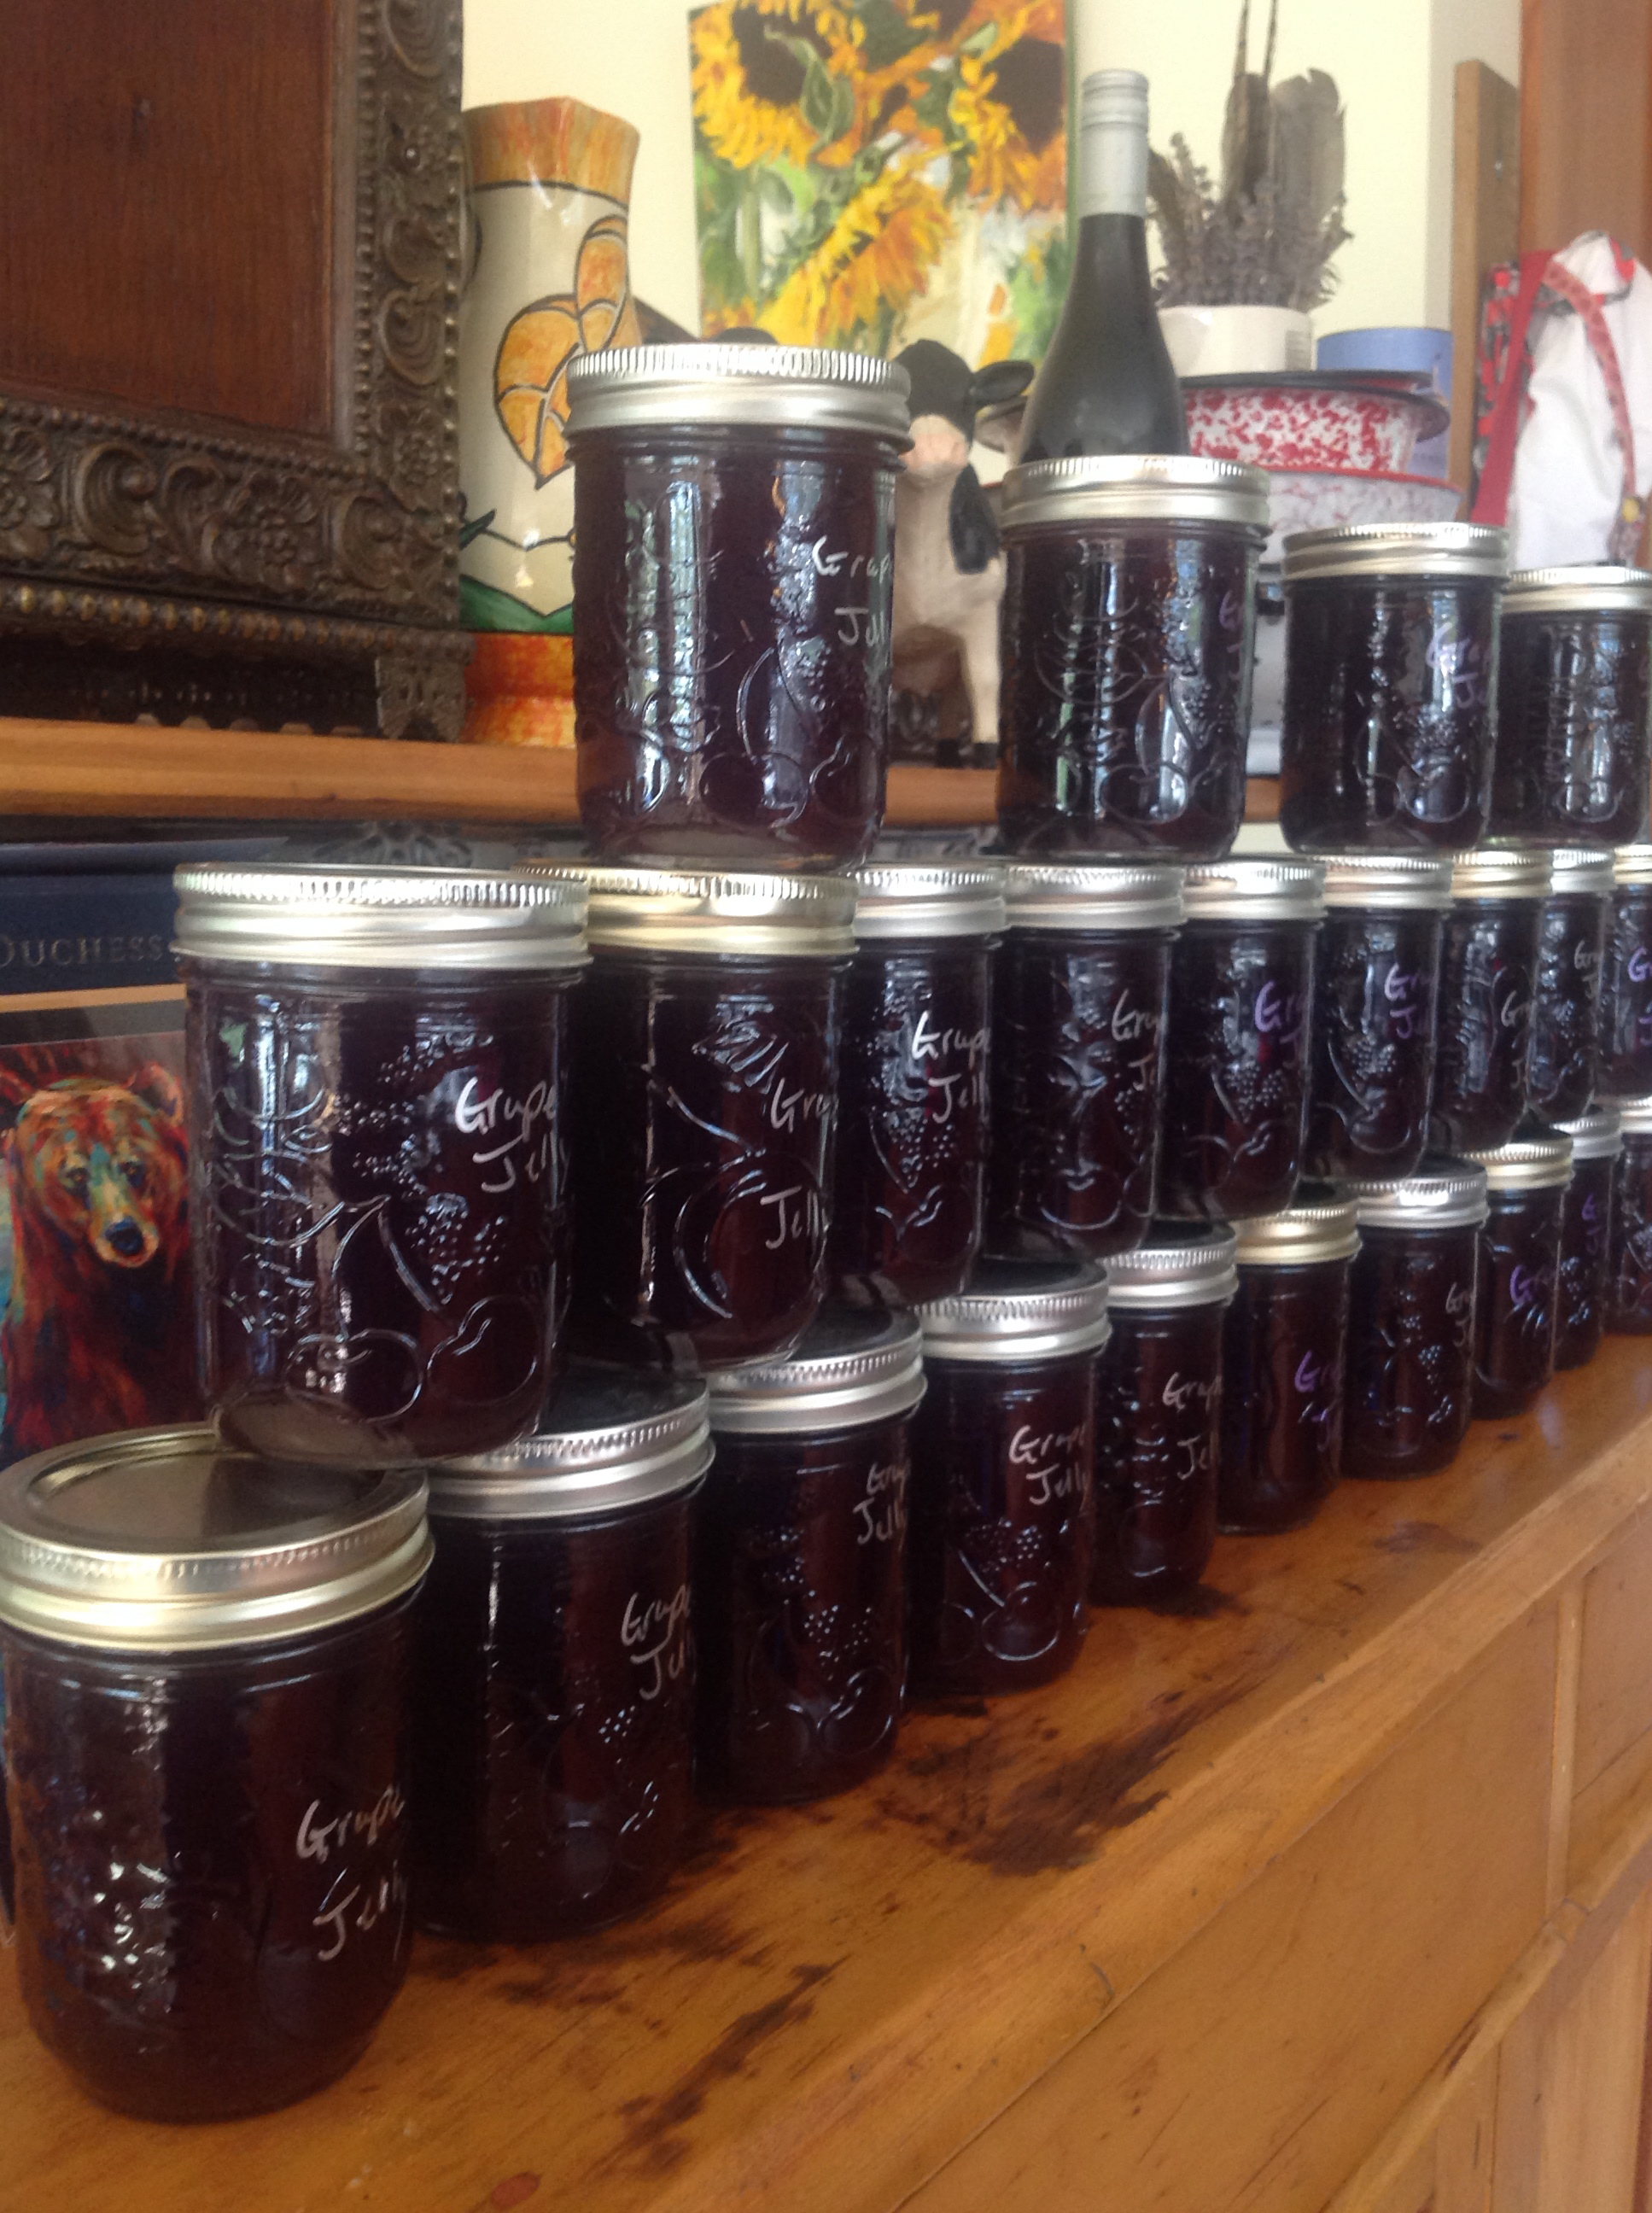
Process in boiling water canner for 10 minutes. Transfer jars to rack; let cool, undisturbed, for 24 hours. Unlike other jams, it takes that long for grape jelly to set up so it’s hard to determine if it will gel. Check for seal, ensuring that lids curve downward. If for some reason your jelly is too runny…this may have happened with one or two of our batches…it’s possible to empty the jars back out into the big pot, add some more pectin, re-boil and go through the entire canning process again. What’s eating Gilbert Grape? Doing things twice always ranks up there but the result is worth it. (Use full amount of pectin the recipe calls for.)

img_3325
I love using Wine Glass Writer pens to mark my preserves. When my jar of jam is all eaten, the writing washes right off with soap and water and I’m not left with sticky label gunk to deal with.


Blog at WordPress.com.

Up ↑