A Naramata sun sets in this lovely Rosemary Swizzle at Legend Distilling.
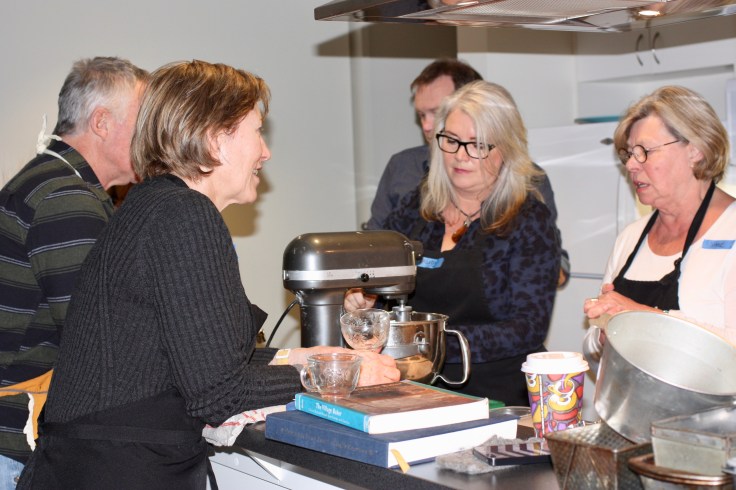
Students of the latest Naramata Blend cooking class, (or as a participant dubbed us Naramata Blenders) completed Mixology 101 by learning to make a Rosemary Swizzle. Once made, our final exam was to sip and enjoy this refreshing, aromatic cocktail made with local hand-crafted spirits and wine. We passed.
Rosemary Swizzle
Recipe created by Chris Mason Stearns – Mixologist extraordinaire
Ingredients
1 oz Legend Distilling Doctor’s Orders Gin (You can substitute of course…but it won’t taste as good)
2 oz Elephant Island Crab Apple wine (Again…if you can’t source Elephant Island use another brand of crabapple wine but the taste won’t be as amazing, merely just great)
2 sprigs of rosemary
1 splash fresh lime juice
½ tsp simple syrup (see below)
top with soda water
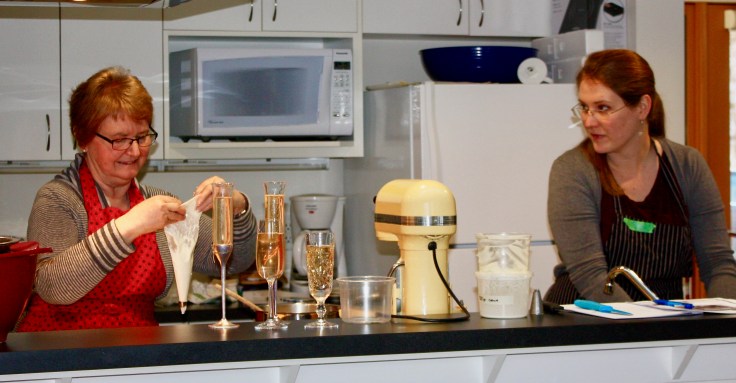
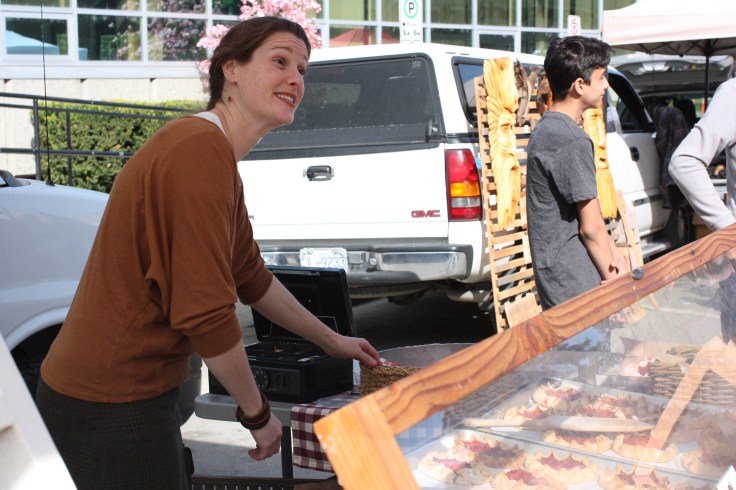
Dawn Lennie (who along with Doug Lennie owns Legend Distilling) was our mixology professor.
Preparation
In a highball glass full of ice, combine all ingredients except soda. Muddle the edge of the glass with the sprig of rosemary. Top up with soda water and garnish with a large rosemary sprig. Serve with a straw.
Dawn’s mixology tips
How to make your own simple syrup
Simple syrup is, as the name implies, very simple to make and it is an essential item to stock in any bar or kitchen. Also called sugar syrup, you will find it in many mixed drinks including the Mojito, Daiquiri, and Hurricane and it can be used for your coffee, tea, and homemade sodas as well.
This sweetener is primarily used as a substitute for cane sugar because the sugar is already dissolved into the syrup. Simple syrup adds a rich volume to drinks and there are a few ways to make it.
Making your own simple syrup is also more economical than buying it at the store. You can make as small or as large a batch as you wish and store it in the refrigerator in a well-sealed bottle for two to three months.
When the only ingredients are sugar and water, there’s really no reason why you shouldn’t be making simple syrup at home.
Boil the kettle and combine equal parts (1:1) sugar and water and stir until the sugar is completely dissolved.
Some cocktail ingredients, such as the fresh rosemary in the Swizzle, are added simply for aroma.
It’s about balance
The cornerstone of cocktail making is in the understanding of the relationships between strong and weak, and sour and sweet. ‘Strong’ refers to the main alcohol component of the drink, such as vodka, rum or the Doctor’s Orders Gin in the Swizzle; ‘weak’ means the lesser alcoholic beverages, such as liqueurs, fortified wines or the Elephant Island Crabapple Wine Dawn used; ‘sour’ mainly means citrus fruits, such as lemon or lime; and ‘sweet’ accounts for sugar and syrups.
The Crab Apple gave the Rosemary Swizzle a lovely colour.
Caramelizing is king… Photo by class participant Patrizzio Dunn
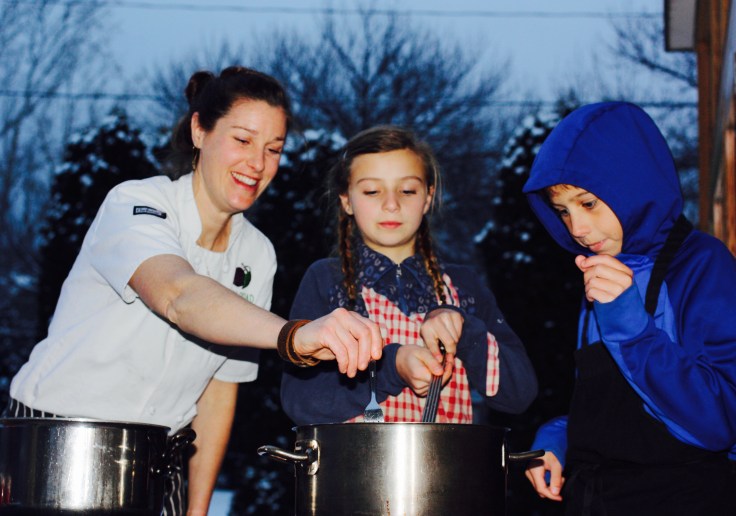
Vegetable stock…how hard can that be to make? Done right, it’s not so much hard as slow, Chef Mike Sonier tells participants of the third Naramata-Blend cooking class, “Cooking done right takes time. You can’t make great food on the fly. There is no cutting corners. Food takes time. Cooking with proper ingredients and from scratch is about flavour and nutrition. If you take one thing away tonight it’s take time to cook for yourself.
“Take a minute to look at the ingredients on a packaged stock from the grocery shelf,” he says. “It’s full of MSG, sodium, food colouring and some things not on the labels like GMO ingredients and pesticides.” In addition to the superior flavours of home made stock, it’s also about what’s not in it, he says.
Chef Mike shares his vegetable stock recipe with us and more importantly his tips to make it well.
Vegetable Stock
Ingredients
Choose organic vegetables if at all possible. On a side note Chef Mike says always choose organic vegetables for juicing as the process will pull out any of the chemicals found in non-organic vegetables, “not doing yourself any favour.” Good quality ingredients makes a night and day difference to your end product, Chef Mike adds.
2 cloves garlic
1 head celery
3 pounds carrots
6 yellow medium onions
Handful of fresh herbs (thyme, rosemary, basil stems, parsley
4 bay leaves
½ tablespoon whole peppercorns
4 tablespoons cold-pressed organic extra virgin olive oil
10-15 litres spring water
Choose organic vegetables and buy local if possible.
Method
Wash celery and carrots thoroughly. Peel very top layer of onions.
Chop celery and carrots into 2” pieces. Chop onions into 6 pieces while leaving shells and ends on.
Place stock pot on burner over medium heat until pot is warm but not hot.
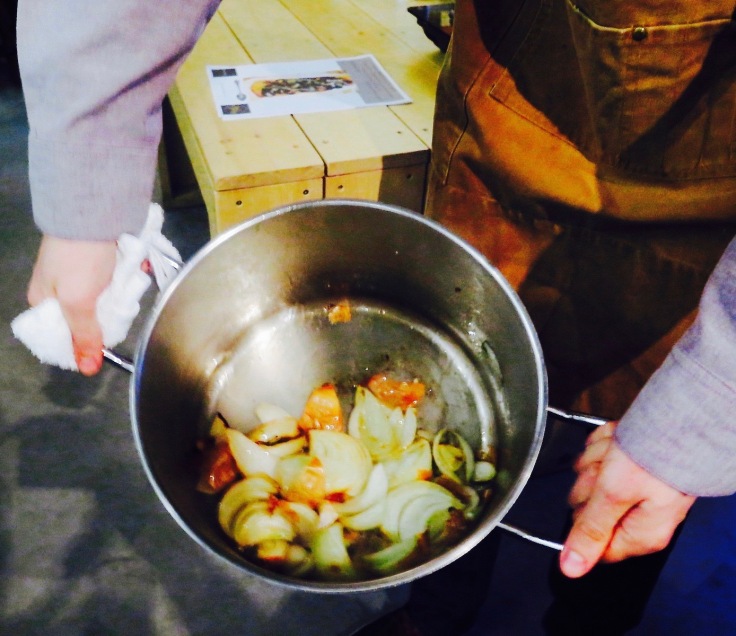
Place onions and olive oil into pot. Reduce temperature to a low heat and caramelize until starting to brown.
Mike says that the onion caramelizing is crucial to making a good stock. The sweet flavour of the caramelized onions will be the main flavour of your stock and sweet makes for a great flavour profile. Some of the onions will stick to the bottom of the pot…this is what you want.
Onions starting to caramelize. Mike says Chefs work by their noses and can tell by the sweet smell when the onions are caramelized to perfection.
Add garlic cloves, celery and carrots. Increase temperature to medium-high heat, stirring frequently and allowing vegetables to stick and brown to pot. (Keep a close eye on temperature as you may need to reduce heat if starting to burn).
The garlic will turn dark brown and some will even turn black which Mike says is “totally fine.” “You want a really dark colour in your stock because that will mean its flavourful.”
Chef Mike shows us the technique of scraping only some areas of the pot at a time incorporating the dark flavourful bits into the mixture.
Once vegetables have fully caramelized (this takes awhile…don’t rush this step) then add in your spring water, herbs, peppercorns and bay leaves. Increase temperature to high heat until boiling.
Once boiling lower your temperature down to a low-simmer and continue to reduce liquids until pot has only ¾ left. This can take from 6 to up to 18 hours depending on how potent or concentrated you want your stock to be. For soup you may only want to reduce by a quarter but for a more intense flavour for a dish like risotto, Mike says to reduce by 3/4 or more.
Taste stock as it’s reducing to achieve desired flavour profile that suits your needs.
Cool down in pot. Once cooled, cover and set in refrigerator to incorporate full-flavourfor a minimum of 24 hours.
Double strain liquids with mesh strainer into sealable containers to keep in the refrigerator or freezer. Discard the vegetables which no longer have any nutritional value.
Will keep in refrigerator for up to 7 days. Freezes in 1 litre containers for up to 6 months.
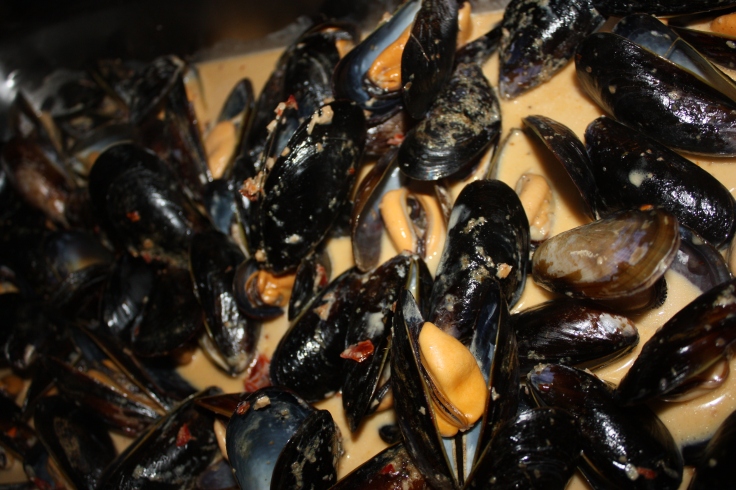
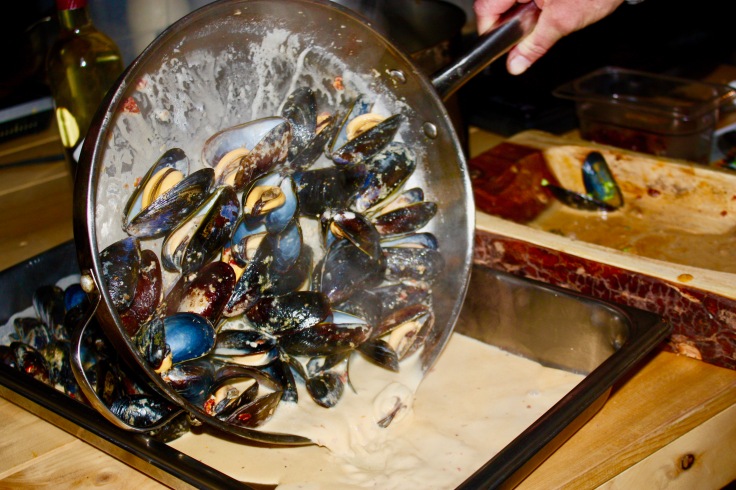
The Naramata-Blend cooking class was a combination of demonstration and hands-on.We also learned how to make Salt Spring Island Mussels in a garlic cream sauce giving some Naramata Blenders their first taste of a mussel.The white wine, garlic, cream sauce was amazing.
Chef Mike Sonier and his business Knotweed is focused on catering events around British Columbia, consulting and finishing up a cookbook that has been in the works for several years. Coming soon, he will be opening a new location that will be geared towards a gastro-styled restaurant on BC’s coast. Knotweed will also be catering, hosting pop up events and workshops in the Okanagan.
“I’m more than stoked to be back on the coast creating coastal dishes that will complete my cookbook, after creating all my land dishes over the years when I’ve been in British Columbia’s interior,” he says. “This journey that I’ve been on out here in B.C has been absolutely incredible and it feels like it has just begun.”
Chef Mike and his Sous Chef and partner Sierra
Next up on the blog, a recipe for Legend Distilling‘s Rosemary Swizzle from the mixology component of the cooking class.
Chef Mike Sonier tells us that making your own cooking stock is not all smoke and mirrors and is worth the effort.
Aromas of the best kitchens
A simmering stock pot filling your kitchen with the rich, deep, complex aromas of chicken beef or vegetable stock flavoured with herbs is reason enough to master this basic cooking art. A conversation with Chef Mike Sonier, owner of Naramata’s KnotweedRestaurant reveals other equally compelling reasons to make your own stock.
Health benefits
“Take a look at the ingredients in store-bought packaged stock,” says Chef Mike. “You will find MSG, salt and a bunch of other preservatives to make it shelf stable. When you make your own stock there are huge health benefits.”
Stock made from bones is packed with minerals from calcium to magnesium, sulphur to silicon, and things like glucosamine. Basically it contains all the stuff we’re told to buy in expensive synthetic mineral supplement form for joints and arthritis, except it’s cheap, natural food and very easily digested.
If simmered long enough, stock is packed with gelatin. Gelatin supports skin and hair health, digestion, cellulite, tightens loose skin and is awesome for joint pain and inflammation.
Cost effective
Stock is the cheapest nutrient-dense food per cup.
Chef Mike says stock is an effective way of using materials that don’t have a direct food use without these items going to waste. Bones, chicken carcasses, limp vegetables and wilted herbs can all be used.
Sustainable cooking practices
In addition to saving money, using the bones, scraps, and less than perfect vegetables reduces food waste. As you cook, save those odd carrot heels, the greens not quite fit for a salad, the stems of mushrooms, ribs of kale and collard greens, and pieces of onion Put all of these things, gradually, as you produce them, into a gallon-sized plastic bag and keep it in the freezer. When it’s full, you make vegetable stock. If you also happen to have the carcass of a roast chicken left over, you make chicken stock.
Quality of food, quality of taste
There are few other flavoring components that have such a dramatic impact on the quality of finished dishes, according to Chef Mike. Stocks are the backbone of quality soups, sauces and braising liquids.
Amp up your cooking skills
An understanding of stocks and sauces will take your cooking to the next level and learning to prepare them will help build fundamental culinary skills.
Stock and Stir
Now that we have the why covered; Chef Mike will teach us the how at the next Naramata Blend cooking class. Mike will team up with Legend Distilling Owner Dawn Lennie to offer a cooking/mixology foundation course that will teach us how to make beautiful rich stocks and sauces and a Rosemary Swizzle cocktail.
Participants will enjoy a serving of Salt Spring Island mussels in a cream sauce paired with the special cocktail using Legend Distilling’s Doctor’s Orders Gin and Elephant Island Crabapple dessert wine and take home a recipe package.
Chef Mike honed his skills in his travels around Canada in the Maritimes, Toronto, Ottawa, Banff and British Columbia destinations such as Whistler, Vancouver and the Kootenays. Working with chefs in restaurants and consulting and catering along the way he compiled dishes and techniques to coax the most flavours out of a wide-range of ingredients before opening Knotweed.
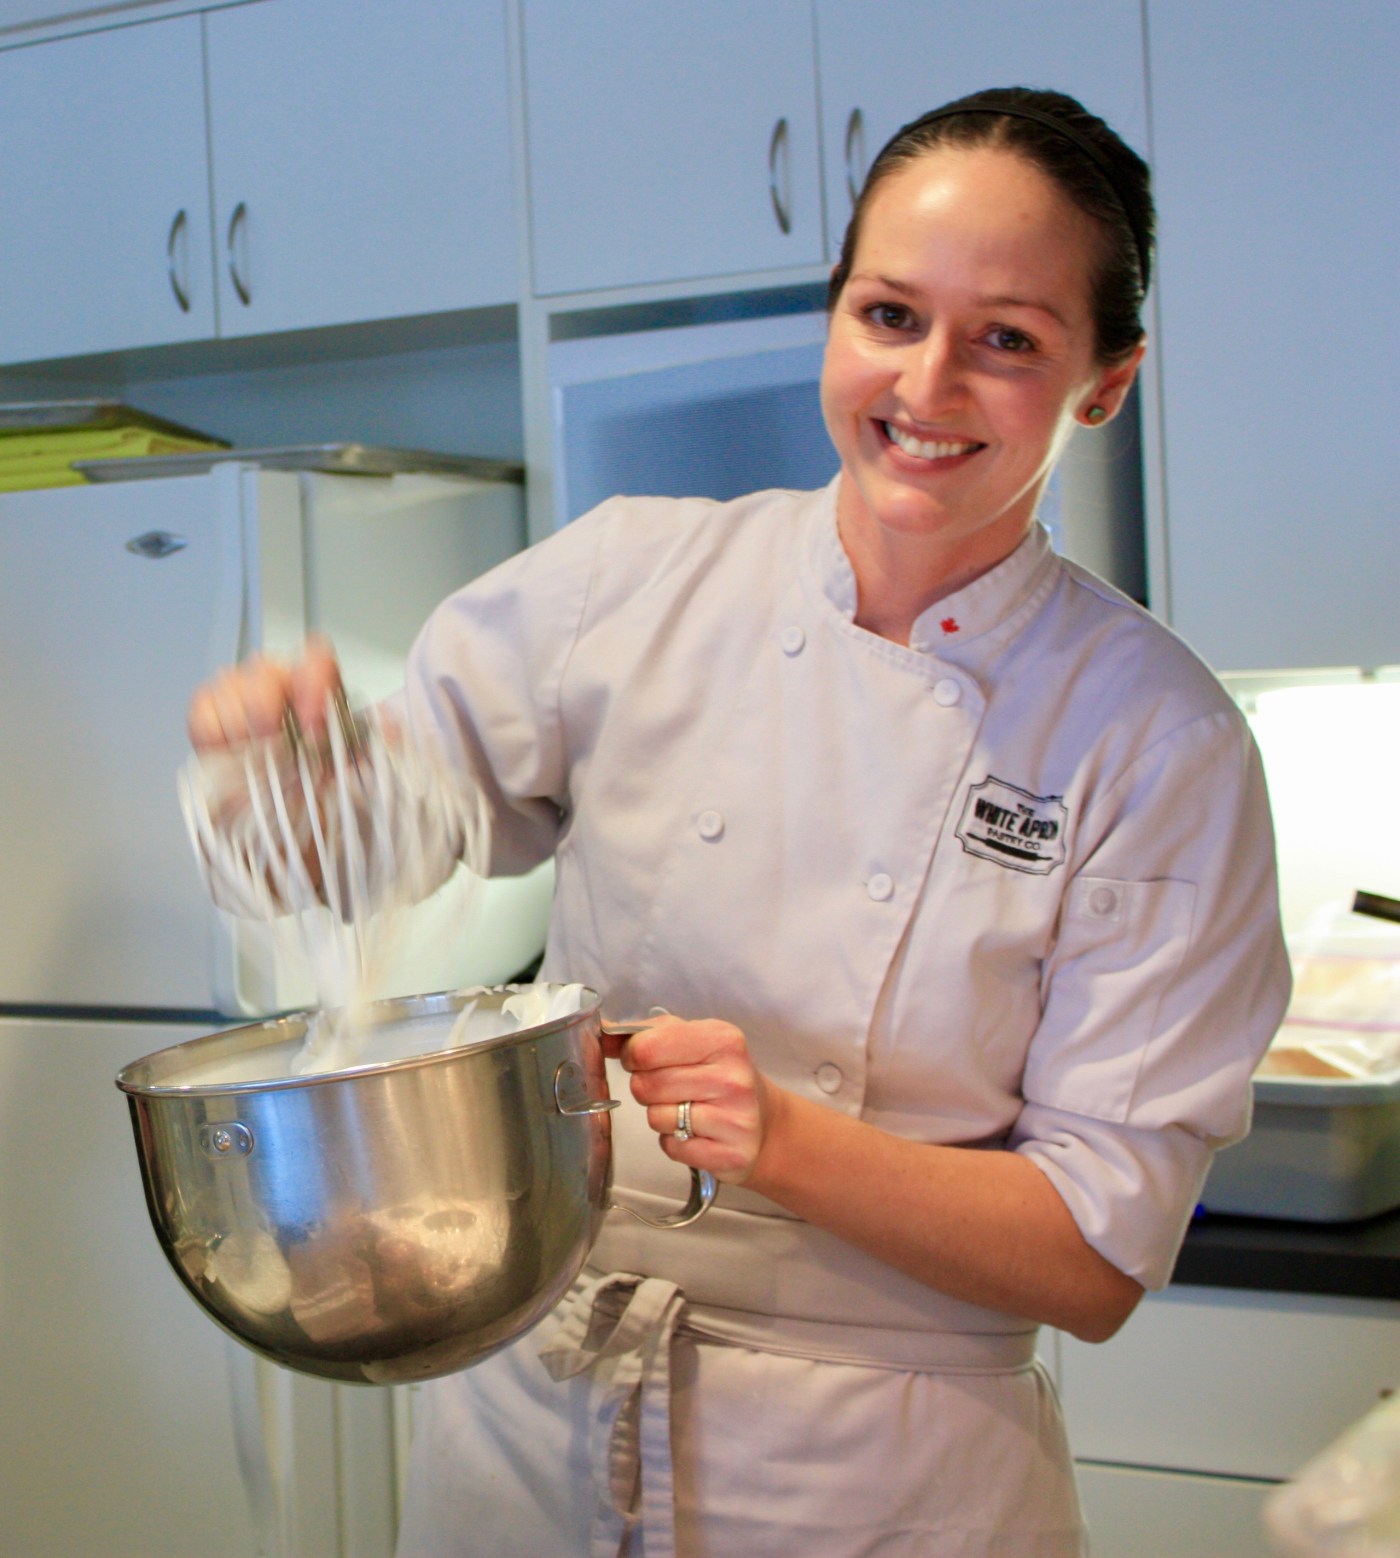
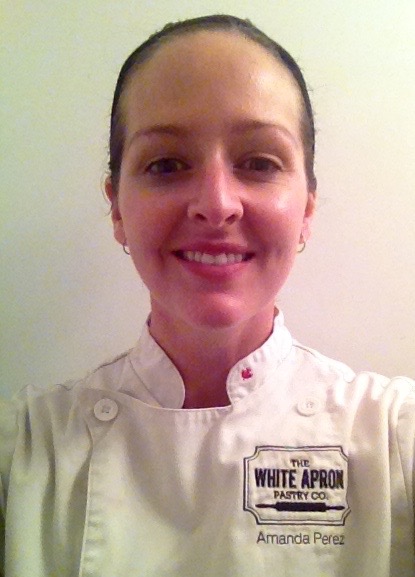
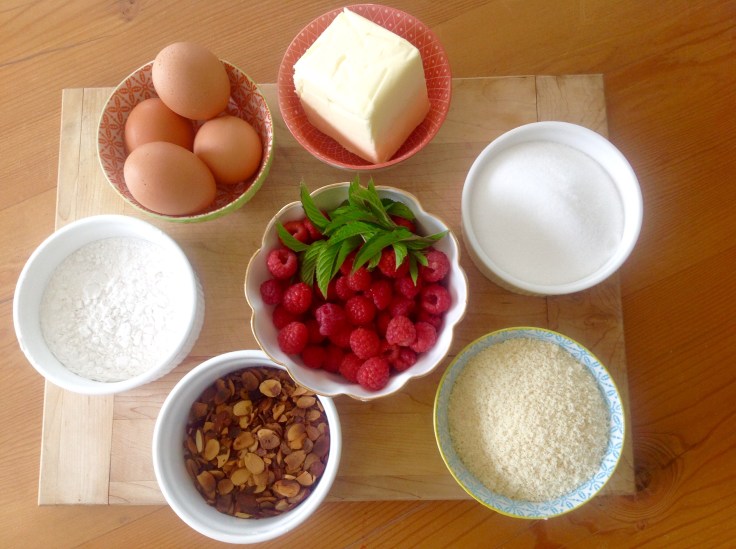
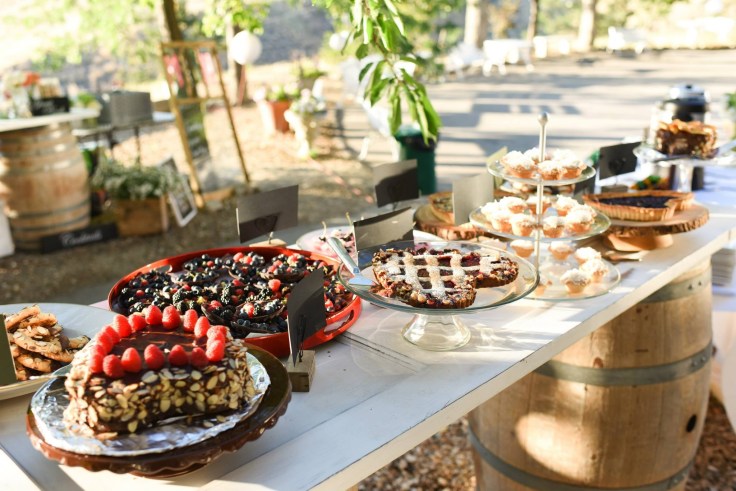
Chef Amanda Perez of The White Apron Pastry Co. in Naramata is a pastry sorceress. She used her magic to teach 20 home cooks of varying skill how to make four different choux pastry creations with fillings and toppings with voluptous names: Pate a choux, vanilla, raspberry and chocolate chantilly cream, chocolate ganache glaze, lemon curd (OK, not sexy but tastes pretty zippy), Swiss meringue and chocolate creme chibout.
The cooking class series was organized under the auspices of the blog and this class was a sweet success participants tell me because of Chef Amanda’s knowledge, organization, and enthusiasm, the fun group of participants and the tasty bubbles from Bella Wines in Naramata.
Charlie goes a bit off piste with her take on the St. Honore.
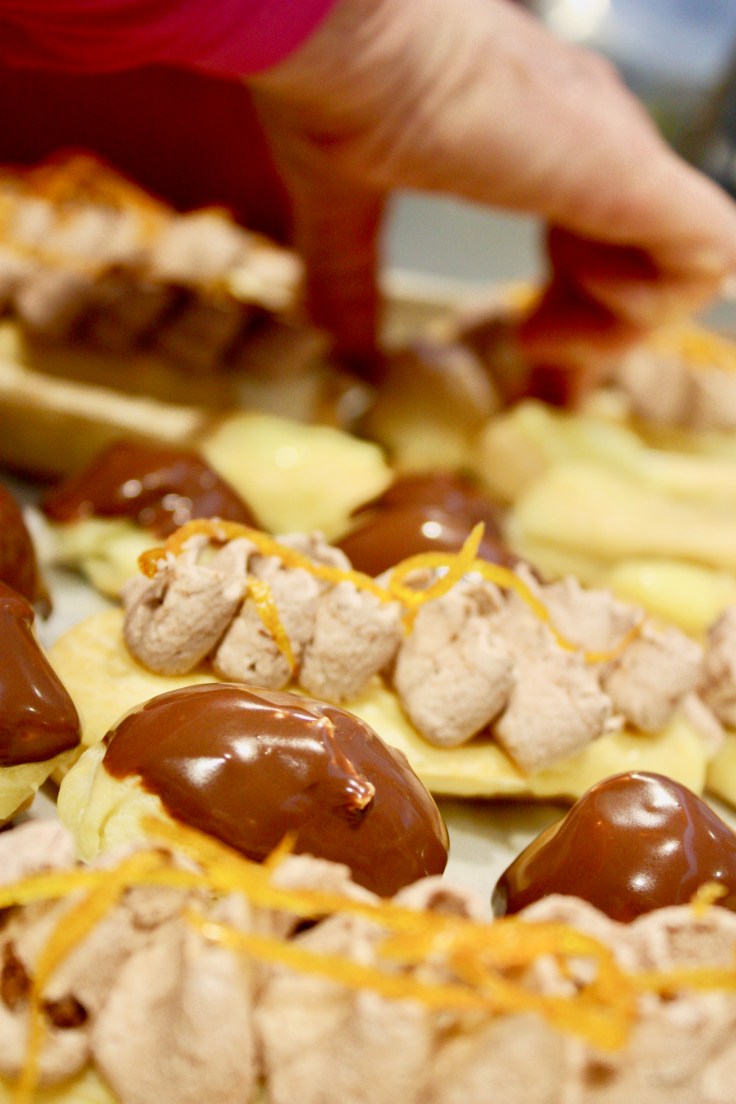
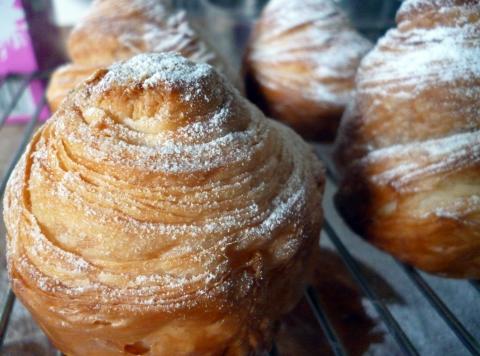
Chef Amanda is happy to share with all you chibouts three of the recipes from the class that miraculously combine to make lemon meringue eclairs.
Pâte à choux
Pâte à choux, or choux paste, is a paste made of flour, water, butter, and eggs — it’s slightly thicker than a batter, but not quite as thick as a dough. It’s pronounced “pat a shoe”. “Pâte” means paste and “choux” means cabbage — the name comes from the resemblance to little cabbages when the puffs come out of the oven.
The paste is thick enough that it can be scooped or piped into almost any shape you can think of, from puffs to éclair shells to thin straws. It contains no yeast or other leavening; instead, as the liquids in the paste evaporate in the oven, they puff up the pastry, creating a hard outer shell and a nearly hollow interior perfect for piping in creamy bursts of flavour.
The goal, according to Chef Amanda, is a light, crispy delicious pastry.
Ingredients
Water 500 ml
Butter 225 g
Salt 5 g
Bread flour 275 g
Large eggs 9
Directions
Cut a sheet of parchment paper to fit a baking sheet. Fit a star-shapped piping tip into a disposable piping bag. Preheat oven to 375 F.
Bring the water, butter and salt to a boil in a medium pot. Once boiling add the flour all at once and stir vigorously to remove all the lumps. The goal here is to cook some of the starch out and remove a good amount of the moisture through steam so the dough won’t result in a soggy pastry. Keep stirring until the paste comes away from the sides of the pot and there is a bit of a film on the pot’s bottom.
Transfer the paste to a stand mixer with the paddle attachment and beat for about 30 seconds or so to release more moisture. (Don’t skip this first step and add the eggs too early or they will scramble in the hot mixture.)
Add the eggs one by one until the paste comes together smoothly.
Fill a pastry bag with the paste and begin by piping four small dots of choux paste on the corners of your baking sheet under the parchment paper to adhere your paper to the tray.
Using the star-shapped piping tip, pipe 4-inch lines of dough onto your parchment paper-lined baking sheet. Wet down a finger in a bowl of water and smooth out the end tip once piped. (Amanda tells us that the pastry tip makes lines that bring more space for the eclairs to rise and open. If you don’t have a star tip…use a fork to make the lines.)
Bake in a 375F oven for about 20 minutes or until the pastry is golden brown. Let cool on a rack while making your lemon curd and Swiss meringue.
Lemon Curd
Lemon curd is similar to pie filling but the texture is smoother and the flavor more intense. Pie filling is thickened with flour or cornstarch while lemon curd uses egg yolks and natural pectin in the zest and juice of the lemon. The secret to the smooth texture in lemon curd is butter unlike the commercial pie fillings.
Chef Amanda gift to us – her super secret lemon curd recipe.
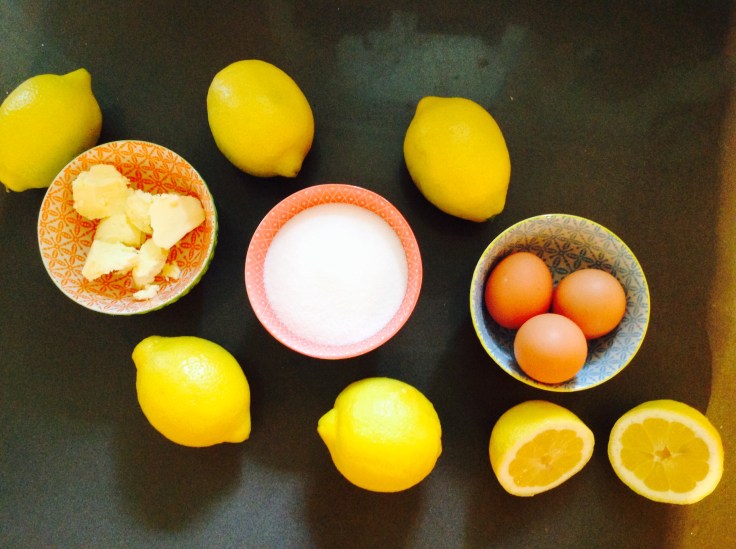
Ingredients
Lemon juice & zest 500 ml (about 9 lemons)
Large eggs 6
Large egg yolks 12
Sugar 400 g
Butter (cold) 340 g
Directions
Combine the lemon juice & zest, eggs, egg yolks and sugar in a bain marie (a non-reactive metal bowl set on top of a pot of gently boiling water or double boiler). Cook until thick and foamy. Remove from heat and add the butter in chunks stirring well until all the butter is incorporated. Strain the curd and chill well before use either over an ice bath or in the fridge.
Locked and loaded…ready for filling.Champagne doesn’t hurt or more precisely, sparkling rose Orchard House Gamay from Bella Wines in Naramata.
Swiss Meringue
Ingredients
Egg white to sugar ratio by weight 1:2
Directions
Whisk over bain marie (double boiler) until sugar is dissolved. Whisk on high with the whisk attachment in a stand mixer until stiff peaks form.
Some assembly required
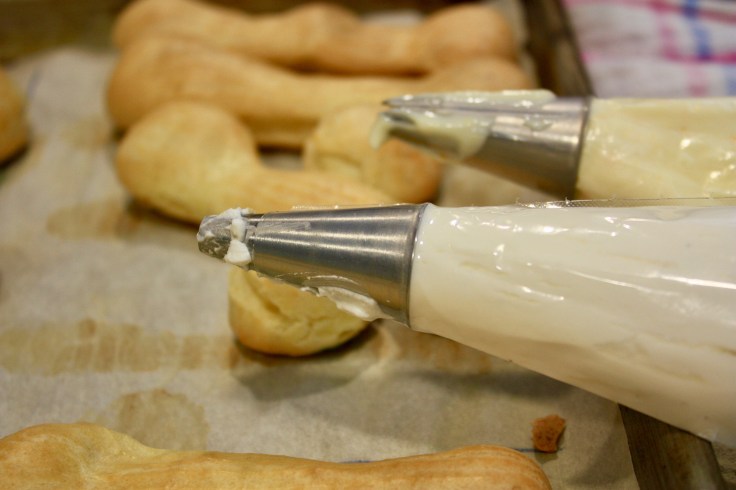
Using a wooden skewer, poke a hole near each end of the top of the eclair.
Fill a pastry bag with a round tip with lemon curd and squeeze the curd into both holes in the eclair moving the bag around to fill as much of the hollow choux pastry eclair as possible. Wipe off any excess on the top of the eclair.
Fire up the torch!
Using a star tip pipe overlapping dollops of the Swiss meringue onto the filled eclairs. Use a kitchen torch to give the meringue its signature caramelized topping.
Some suggested resources from Chef Amanda
Local (Penticton)
Bulk Barn – cake boxes and boards, gel food colourings, bulk Callebaut chocolate,
Wholesale Club – plastic deli cups, large bags of flour and sugar
Vancouver
Gourmet Warehouse – pastry tools and molds galore, some specialty ingredients
Williams Sonoma offset spatulas, Chicago Metallic brand good quality baking sheets, Silpats, the blowtorch that I use
Ming Wo — only the Chinatown location (Vancouver restauranteur secret – the Chinatown Ming Wo has every tool and gadget that a professional chef could need)
Online www.goldaskitchen.ca – Canada’s leading online resource for specialty pastry and decorating tools. www.jbprince.com – the most complete tool catalog for pastry chefs. Every specialty product and tool imaginable can be found here! www.vanillafoodcompany.ca – a great Canadian website for Valrhona and Cacao Barry chocolate, Neilsen Massey extracts, and also quite a good selection of tools.
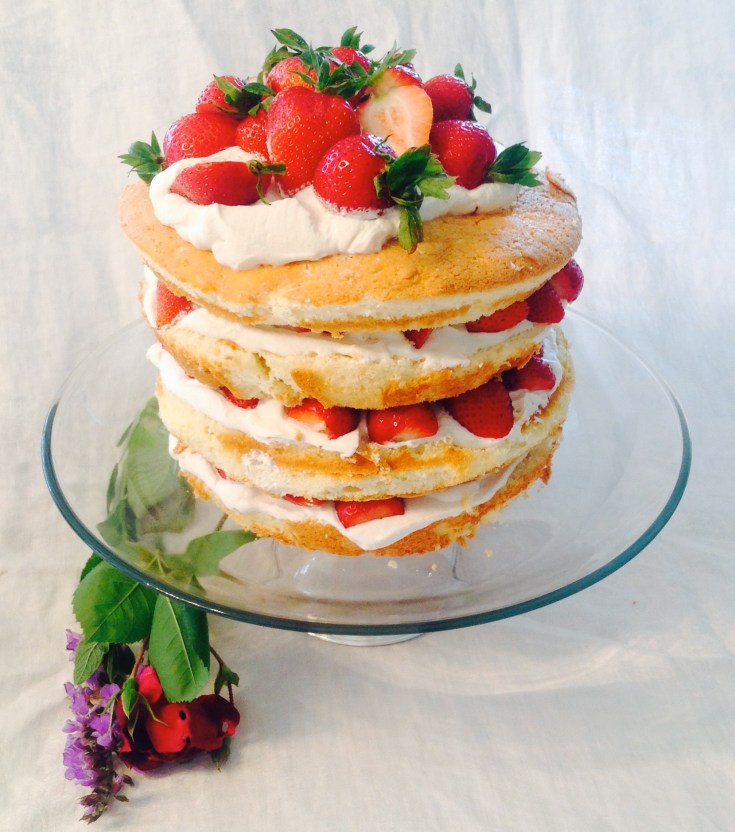
Strawberry shortcake with basil-infused whipping cream.
A house that smells deliciously yeasty of bread baking, or intensely chocolatey from the rich cake in the oven or of cinnamon from the sticky buns baking are the scents that make us the most nostalgic for our childhood. Dr. Alan Hirsch, a neurologist who studies such things tells us that the smells produced by baking have a particularly powerful effect on memory.
Baking is also about celebrating. Any event is made an occasion with a cake. Audrey Hebpburn was onto something when she said, “Let’s face it, a good, creamy chocolate cake does a lot for a lot of people.”
Baking is also about sharing. A four-layer cake with a filling, buttercream frosting, and elaborate decorations is not made to be be eaten solo.
Baking is also about science that seems more like magic when a sloppy cake batter rises in the oven and turns golden. It’s about the comforting rhythm of measuring, mixing and folding. It’s about taking an indulgent amount of your time to give pleasure to someone else. In the end, it’s very little about the eating.
For some like Amanda Perez of Naramata’s The White Apron Pastry Co., baking becomes an avocation for many of these reasons so much so that she delved into as second career.
Work of art right? Photo: The White Apron Pastry Co.
How, why did you end up pursuing your career as a pastry chef?
I came into the culinary world in a roundabout way, as it seems that many chefs do. It wasn’t my first career — I actually already went to Simon Fraser, earned a degree in Communication, and worked in Public Relations/event planning for a number of years. But, I had always harboured a dream of going to pastry school, and I have always found comfort in baking. One day, I realized that although I liked my current job at the time, I wanted to feel passionate about how I spent my work day….and so, the pipe dream of going to pastry school became a reality. Many of the students in my class were career changers as well. After graduating with straight A’s from the grueling but exciting year-long foray into French Pastry, I worked at a number of high-end restaurants in Vancouver, mostly doing 5 pm – 2 am dinner service plating desserts, and then more prep, and eventually, becoming pastry chef for two restaurants in Vancouver.
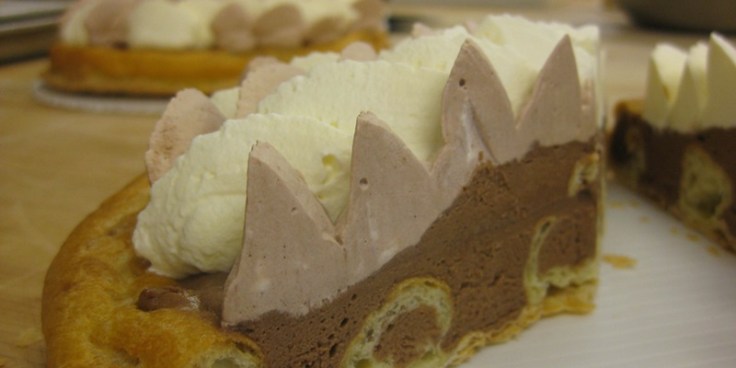
Some of Amanda’s fabulous creations
Upon deciding to leave the coast and move to the Okanagan, I was offered the Pastry Chef role at Burrowing Owl in summer 2011. Instead, I accepted a Pastry Cook position at Mission Hill Family Estate, where I did the majority of the prep for the high end Terrace restaurant, as well as the large number of private functions, celebrity dinners, concert events etc. Every day I made beautiful crisp loaves of sourdough bread, which were served at lunch and dinner, as well as all of the desserts. I returned to Mission Hill in 2012, and that summer, found the little spot on Front Street in Penticton, recognizing it as a great spot for a tiny little pastry shop. The White Apron was born at that time.
What do you like most about having your business?
It feels good to create something. I worked for years in Public Relations, where my days were spent promoting other people’s products, and I felt like something was missing. It feels very satisfying to create something from start to finish. To work in a trade where there is so much creative license. To own my own business where I can have the flexibility to work around my family’s schedule (and our orchard, as well!) is a blessing to me and my family. And…..not having to do night shifts any more is pretty great. Plus, my husband has a pretty flexibly but demanding work schedule (he is a Financial Consultant with Investors Group), so having the flexibility to be able to stay home and raise our children while still working in the field I am passionate about is worth more than anything.
What are your future business plans?
After having my Front Street bakery for two years and recognizing the summers are where the business is at (and winters were too slow to even be financially worth opening), I decided that solely focussing on Farmers Markets and custom orders would be where I wanted to focus. I parted with my Front Street shop, moved our family to a property that is zoned to allow having a commercial kitchen on the premises (our previous home in the village wouldn’t allow one), and after a one year hiatus from orders while raising our Sous Chef #2, Zach, The White Apron is getting ready for business.
Currently, our garage space is being renovated into a commercial kitchen. I am at the electrical upgrade stage, and then the fun work begins. I plan to be open in May, and plan to do the Penticton Farmers Market, and quite likely, the Naramata Market as well. I am also taking wedding and special occasion orders now, and will again have a menu of holiday orders, particularly for Thanksgiving and Christmas. I look forward to possibly partnering up with B&B’s to offer my freshly baked brioche cinnamon rolls to guests and possibly even partnering with a couple wineries in the future as well!
Do you still enjoy baking?
I do! I bake as much as I can (which right now, is generally kid-friendly treats baked while the littlest one naps), and I am counting down the days to having my kitchen ready downstairs so that the real fun can begin! I should note that since selling my Front Street location, I haven’t been taking orders, because producing food that is to be sold from a home kitchen, is not permitted by Interior Health (or insurance companies).
Will you teach your kids to bake?
I already am! Clara helps me bake quite often and she is already learning a lot of valuable skills. Pretty impressive for a three-year-old. She loves scooping muffin batter with a portion scooper, cracking eggs and of course, taste testing.
What do you think is responsible for the increasing popularity of baking and cooking?
The Food Network has been instrumental in increasing the popularity for professional cooking. It is a bit of a double-edged sword though, because as great as it has been for increasing interest in the field, and in bringing attention to the effort and art that properly prepared food takes, it only shows the glamour and glitz and not the true experience and cost to those who choose it as a profession. This new popularity in baking and cooking has brought us a newfound interest in food in general, both in the preparation and consumption of it all.
Five tips for the home baker that will make a big difference to what they make?
1. Get a scale and use recipes that measure by weight rather than by volume. A cup of flour, scooped, can vary by as much as 20%, but 250g of flour will be 250g of flour no matter which way you scoop it.
2. Be confident. It’s just food. If you think a substitution or addition will work, try it. Recipes don’t have to be adhered to 100%. Have fun with it. And don’t bake when you’re rushed or in a foul mood!
3. Clean as you go. My favourite way of doing this is fill the sink with hot soapy water before you start cooking. Toss dirty dishes in the sink as you use them. Washing up is a breeze afterwards, and you’ll find you’ll bake or cook more often when you don’t dread the clean up. Also, start with a clean kitchen, with all your dishes put away.
4. Find a few websites and cookbooks that you trust, and use those when trying out new dishes. My favourites are www.food52.com, www.smittenkitchen.com and for baking/pastry, www.davidlebovitz.com
5. If you want to really go pro, scale out your ingredients in advance. At the very very least, gather all of your ingredients out on the counter before you start, and as you add each ingredient, put it away. I can admit to forgetting key ingredients by not doing this.
Five tools or pieces of equipment that you couldn’t live without?
Kitchen Aid mixer, bench scraper, my stack of glass mixing bowls, lots of rubber spatulas, and parchment paper.
Why should a home baker take a baking class?
Because it is fun! We don’t often get a chance as adults to take a class and learn something new. You’ll leave with a few new recipes, a few new techniques and an enjoyable afternoon out. Why not! I have taken a few classes myself for inspiration and just for fun, and never regret it.
Good advice. Check out the next Naramata-Blendbaking class with Chef Amanda teaching us how to make fancy French pastries.
Mise en place, a French culinary term which means “setting your ingredients in place prior to cooking”. Even before the mise en place, the first task is to read the recipe from start to finish…twice. At our Naramata-Blend cooking class Chef Dana went over the recipes with us explaining terms, discussing ingredients and explaining why the steps are necessary and even some of the chemistry and history behind what we are doing. At home, the mise en place step helps make sure you have all the ingredients and that they are carefully weighed before beginning.
2. Know your ingredients
It sounds obvious but how often do we take time to really know our ingredients? Chef Dana Ewart of Joy Road Catering was passionate and knowledgable about the ingredients we were using, which was very inspiring. She suggested fresh yeast as apposed to dry, organic high-fat content butter, farm fresh eggs, Dutch cocoa powder… It seems like a pretty basic concept but your finished product is made up of your ingredients. Try using margarine instead of butter in a brioche and you will soon learn about the importance of high quality ingredients. It’s like adding vinegar to milk to create a buttermilk substitute…it really is not anywhere near the creamy buttermilk flavour you are really after. Ask your instructor where they source their ingredients.
3. Learn what tools you need and how to use them
A cooking class is the perfect time to try out new tools – dough scrapers, stand mixers, food processors, different types of knives, pastry bags and tips, molds and pans, silplats, zesters, scales, French rolling pins and on it goes. You can then go right to the nearest kitchen store and keep your local economy rolling. Instructors will also give you tips about which gizmos and gadgets you really need, which are nice to have and which will gather dust. I need a bigger kitchen… six brioche molds now added to the collection.
4. Stretch yourself
A baking class is the perfect opportunity to try something you have been too intimidated to try at home. Step-by-step instructions, hands-on practice and help from the Chef will give you the confidence to try more complicated recipes at home. I’m hoping to finally get some help with my sad piping skills at the eclairs and profiteroles class in February.
5. Revel in the age-old joy of cooking together
There is nothing like a baking class to bring a room of people together. As the class progresses notice how the chatter becomes louder and how often you hear people laughing. Maybe it’s because you show up in a room that has the recipe and all the ingredients on hand and organized, the room warms up and starts to smell like a bakery and you leave before the dishes are done.
The next Naramata-Blend cooking class is all about choux pastry and how this light and airy pastry can be turned into a vessel to hold creamy fillings before being dipped in chocolate. Amanda Perez of The White Apron will be teaching us how to make fancy eclairs and profiteroles at the February 11 class just in time for Valentine’s Day. We will drink some bubbly from Bella Winesand chat, laugh and leave the kitchen a big mess.
Come and join us if you live in the area. Tickets are available through eventbritefor the Saturday afternoon class.
Chef Dana Ewart cutting into a loaf of cocoa cherry brioche.
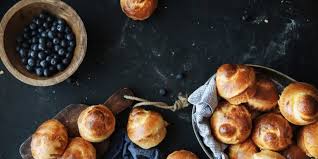
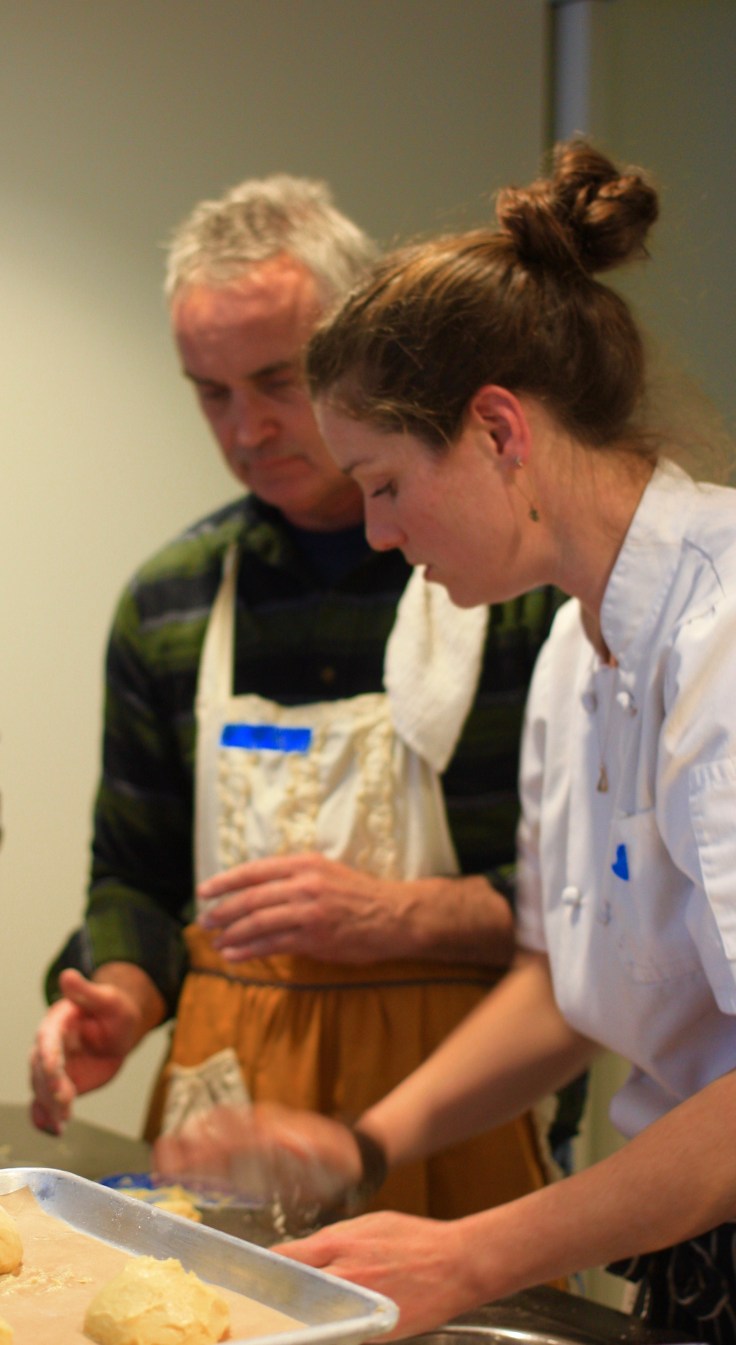
Brioche! How hard can that be?
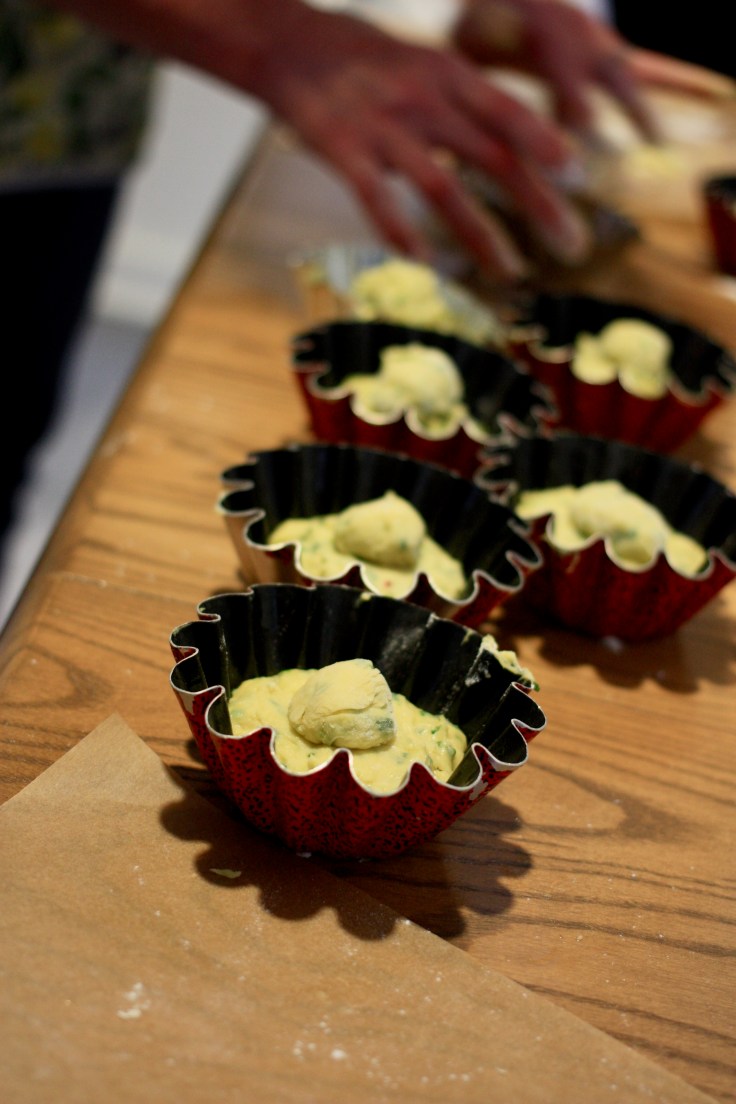
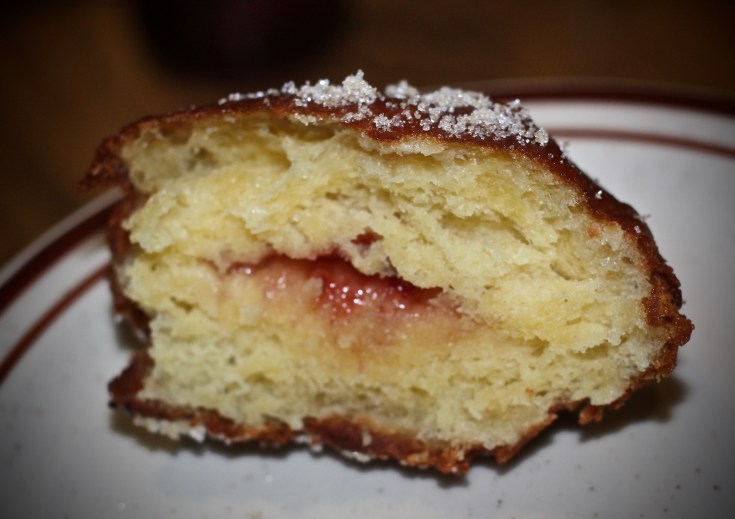
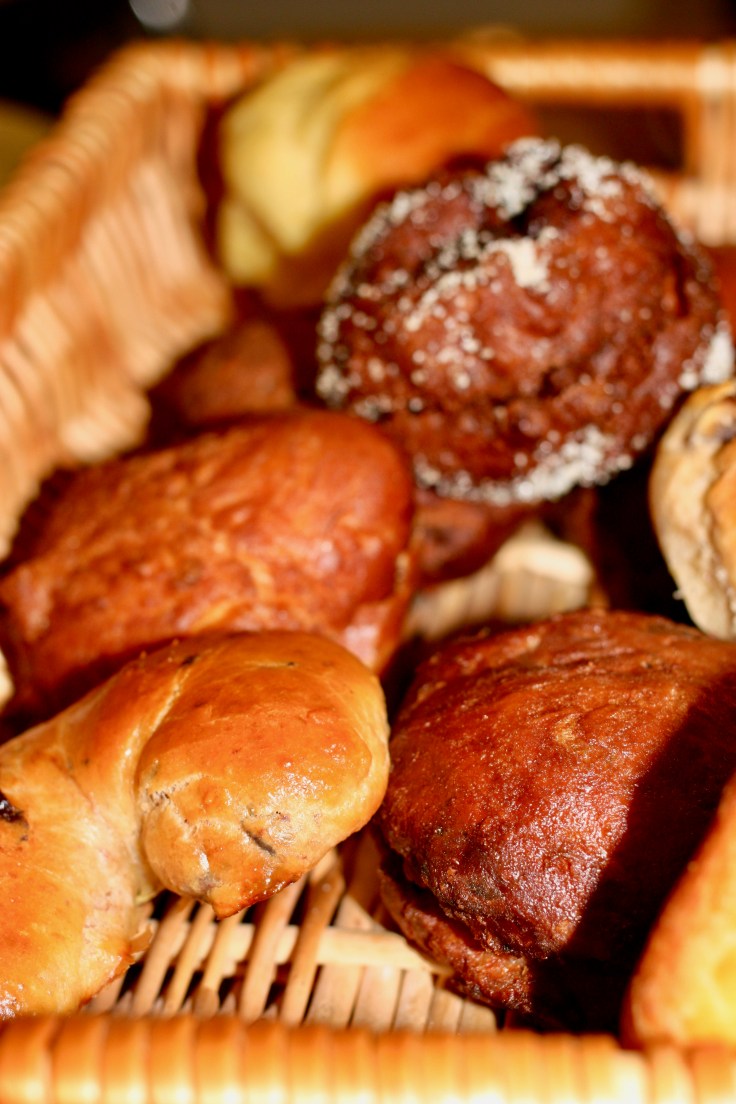
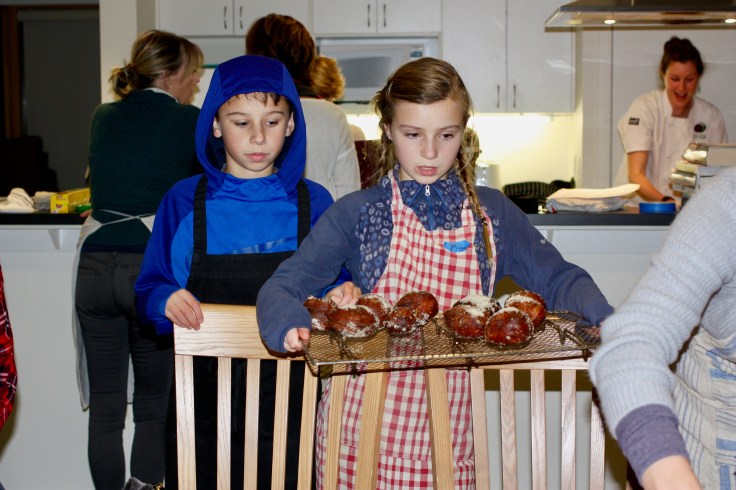
With ‘go big or go home’ thinking the first Naramata-Blend cooking class tackled the most delicious and some would argue, trickiest to make of the bread family – brioche. This rich, buttery egg French dough is versatile and Dana Ewart, Chef and Proprietor of Joy Road Catering helped our class of 20 make no less than five variations on this buttery theme including: herb with chives and tarragon, cocoa and dried cherry (CC Orchardscherries), plain, jelly donuts and the crowning achievement – Naramata Candied Chestnut and Dried Plum Loaf filled with local fruit and nuts.
Candied chestnuts
You can buy candied chestnuts or marrons glacé but what would be the fun in that? Making your own is easy but takes a few days as you wait for all the sugar to absorb into your lovely locally-sourced chestnuts. Here’s how: (This recipe makes twice as much as you will need for your Naramata Loaf but since it takes so long, you may as well make enough for two batches…)
1. Blanch 500g fresh chestnuts in boiling water for 4 minutes, drain, then peel while still warm.
2. Bring 300g sugar and 300ml water to the boil in a heavy-based pan to make a syrup. Simmer for 10 minutes, then add the chestnuts and simmer for 7-8 minutes.Take off the heat and leave to stand overnight in the syrup.
3. The next day, bring the chestnuts/syrup back to the boil, cook for 1 minute, then remove from the heat and cool. Repeat the boiling and cooling process 2 or 3 times over the next couple of days until all the syrup is absorbed.
4. Preheat the oven to around 150°F, spread the candied chestnuts on a tray covered with baking paper, then pop into the oven. Prop open the door and leave for 2 hours or until firm.
Brioche master recipe
Ingredient
Amount
Notes
PRE-FERMENT
Flour (white all purpose or bread flour)
188g
sugar
7g
Fresh yeast
30g
milk
137ml
MAIN DOUGH
Flour (white all purpose or bread flour)
563g
Naramata Candied Chestnut and Dried Plum Brioche
Eggs
10 whole
Add 125g chestnuts & 125g prunes
sugar
70g
Fresh yeast
30g
salt
18g
Unsalted butter
454g/1lb
Yield: 3-4 loaves
This recipe can be halved. Any left-over brioche dough can be frozen. Wrap tightly in plastic as the dough will continue to expand in your freezer. Your baked brioche can also be frozen if for some unknown reason you can’t eat it all in one or two days…
Method:
PRE-FERMENT
In a bowl or Tupperware that will hold about 3 cups, weigh the flour and sugar. Gently warm the milk until it is about body temperature or slightly warm to the touch. Crumble the fresh yeast and pour the warmed milk into the flour mixture. Mix & knead until all of the flour is hydrated and the dough is homogeneous.
Rest the pre-ferment a minimum of 4 hours out of the fridge or overnight in the fridge.
The following day, or 4 hours later- Pull the butter and eggs out of the fridge to temper.
Mix together by hand or in a kitchen aid with a dough hook attachment the flour, sugar, yeast and eggs. Mix until the flour is all hydrated- scraping down the sides of the bowl and underneath the hook occasionally to ensure that there are no lumps of dry flour.
When the dough is homogenous, stop the mixing and allow to rest for 15 minutes (this is called an autolyse).
Add the salt and the pre-ferment on top of the dough, pulled in to fist-sized chunks.
Mix again for a few minutes until the pre-ferment and the salt is mixed in. During this mix, plasticize the butter, by cutting it into pieces & beating it with a rolling pin inside a garbage bag or between layers of parchment paper.
Begin adding 1 tablespoon-sized pieces of the plasticized butter- in increments until all of the butter is incorporated. Now is the time to add the candied chestnuts and dried fruit.
Once the butter is incorporated, mist a tray or bin with neutral oil to put the dough in – cover & rest in the fridge. After 30 mins-1hr, fold the dough or punch it down. Rest for 4 hours- overnight in the fridge.
Punch down the dough, and lightly mist oil- or butter and flour your brioche pans. Weigh the dough into desired portions, shape & place in the molds or pans (making sure the dough fills only 1/3 of the pan) Proof in a warm draft- free area for approximately 40 minutes or until the dough has doubled in bulk. Brush with egg wash, and bake at 400 F for 10 minutes, then 375F for 15-20 minutes or until golden. Remove from the pan & cool on rack.
We made him wear this apron. Good sport eh?
Dana’s brioche tips and tricks
Equipment
You can make brioche by hand but it’s super tricky to incorporate all that butter in without warming it too much with your hands. If you want to do serious baking you need to invest in a stand mixer. Christmas gift list item?
To take your baking to the next level, you will also need a scale. This relatively inexpensive purchase will allow you to be accurate and ensure more consistent results.
A dough scraper will cost a couple of bucks and is invaluable when you are working with this sticky dough.
Ingredients
Buy the best local ingredients you can find. The better the ingredients the more flavourful results. Shop your farmer’s markets, seek out local farmers…
Neutral oils include grapeseed, vegetable and canola oil.
Fresh yeast trumps dried yeast and it can be purchased at most grocery stores. Ask at the bakery counter. Fresh yeast can be frozen. If you do use dried yeast in the recipe above substitute the 30 grams of fresh for 15 grams of dried.
Brioche
Make sure you mix the brioche dough for the full 15 to 20 minutes. It needs to feel soft, smooth, warm and have good elasticity.
Class member slamming some butter. He became the de-facto butter slammer. Plasticize – Slam the heck out of the butter with a rolling pin to make your cold butter straight from the fridge more malleable. The idea is to make the butter easier to work into your brioche dough with warming it up too much. If you try to use “un-slammed” butter it will be too cold and will tear your dough.
Savoury herbed brioche in molds ready to proofing.
General
Don’t be worried about over-working your dough. It’s not a cake batter but a bread dough.
Don’t skip the egg wash step. It helps keep a crust soft so it can continue to rise and “not be a prisoner in its own crust”. It also makes your brioche shine.
Herbed brioche in a traditional boule shape.Two star pupils work with Dana to make the most decadent of all brioche creations…jelly-filled donuts.These were the bomb! Using the main brioche recipe, these jam-filled donuts were fried two-minutes per side in hot oil.A variety of brioche made at the cooking class.Question…answered.The room was full of laughter and good conversation as we worked on our creations. The Naramata Centre provided the perfect venue for the event. Some mulled wine made with Naramata Bench Winery Association represented winery Moraine helped with conviviality.
Terra Madre, slow food, Cittaslow … What’s the deal with all those names?
“It’s all about creating community, about why we all live here in this special place,” says chef and proprietor of Joy Road Catering Dana Ewart when asked to explain Terra Madre, the slow food movement and Naramata’s Cittaslowdesignation. “There are a lot of terms used to describe what we are all about and our philosophy around feeding people with great food but it can be much more approachable and less cerebral. It comes down to people sitting around a table enjoying themselves.
“For me personally, I get the most energy and joy out of creating beautiful food and sharing it with people,” says Dana and she has been doing this for more than 20 years.
Dana at the Penticton Farmer’s Market.
Terra Madre
Saturday December 10 is Terra Madre Day. With its origins in Italy, the land where food is worshipped and quality of life vigorously defended, Terra Madre is a network of food communities of small-scale food producers committed to producing quality food in a responsible and sustainable way. Translated as Mother Earth, the slow food network has biennial conferences bringing together farmers, fishers, food producers and cooks. Dana and her partner Cam Smith have attended two of these conferences. “We have brought back so many ideas about how we can better share and showcase our regional cuisine.”
Terra Madre Day promotes the diversity of food traditions and production. It’s a day to show how our network is using its creativity and knowledge to express our love for the planet and defend the future for next generations. It’s a day to celebrate local eating, agricultural biodiversity and sustainable food production summed up as good, clean and fair food.
Naramataslow
As far at Terra Madre goes in Canada, Naramata gets it.
We get it so much that we are one of only three Canadian communities with a special status as a “slow city” bestowed on us by Cittaslow, an international organization formed in Orvieto Italy in 1999. We join Cowichan Bay and Wolfville as places where the pace of life is a bit more human.
To quote from the charmingly translated Italian on the Cittaslow website, “A Cittaslow place is motivated by curious people of a recovered time, where man is still protagonist of the slow and healthy succession of seasons, respectful of citizens’ health, the authenticity of products and good food, rich of fascinating craft traditions, of valuable works of art, squares, theatres, shops, cafes and restaurants. These are places of the spirit and unspoiled landscapes characterized by spontaneity of religious rites and respect the traditions of the joy of slow and quiet living.”
Terra Madre Day Cooking Class
Slow food or local food of high quality with connection to the local land made into traditional recipes where the community comes together is what it’s all about and this year we are marking Terra Madre day by hosting the first of a series of cooking class. The Naramata-Blend classes bring together Okanagan Valley chefs, local ingredients and people passionate about food who will cook together and eat together.
Brioche!
The Terra Madre Day inaugural class lead by Chef Dana, will focus on brioche in its many wonderful forms including the unveiling of a new Naramata Loaf recipe (recipe will be shared in an upcoming post) featuring local dried fruits and nuts. Mulled wine made from Cliffhanger Red from Naramata Bench Winery Associationfeatured member Moraine Wineryand warm spiced apple and cherry juice from orchardists Amanda Perez and CC Orchards will keep the slow food convivia fuelled as we learn to bake this special buttery egg bread.
“Ten years ago fewer restaurants in the Valley were using local produce in their restaurants,” says Dana. Now a lot of us are using are only using pretty much everything produced here. It takes a lot more effort but the quality of what we have here is amazing and the caliber of the producers and chefs is incredible.”
She says she has made it her mission to spread the word about the Terra Madre principals that were first ingrained at the Stratford Chef School where she learned her craft and to let other young people know that the Okanagan Valley is a great place to set up shop to produce and prepare amazing food.
“We (Dana and her partner Cam Smith and their business Joy Road Catering) have shown that its possible to have a successful business. Our community here is very supportive. We are a product of this great community coupled with our hard work.”
Dana is also passionate about trying to expand our way of thinking about the importance of food and those who produce and prepare it for us.
“Professionals with special skills are appreciated. For example, we hold our doctors, accountants and lawyers in regard and pay them well for our occasional visit or meeting. How often do we eat? Why not offer our farmers that same high regard?”
She has a point.
Thoughts over dessert
Some final thoughts about Terra Madre, slow food, Cittaslow…
Alice Waters, the famous Californian slow foodie, gives us this sweet slow food manifesto:
If there are no cooking classes in your area … you just start one yourself! In what I hope will be win/win/win/win Naramata Blend is launching a series of classes that will:
give our local chefs and food gurus an opportunity to diversify their businesses
meet my needs to learn hands-on from some of the best
offer that opportunity to anyone else with a keen interest in learning how to make magic with what we grow and produce in the Okanagan Valley.
For the first class, Chef/ Proprietor of Joy Road Catering Dana Ewartwill show us why we need brioche in our life – just in time to amp up our holiday baking.
We will learn how to make this buttery rich yeast dough that is so tender that it walks the line between bread and cake. It will be fun to enjoy some mulled wine, sample what we bake and take home the recipes after the afternoon class.
With this amazing French dough as our base Dana will teach us how to make these brioche treats flavoured with:
Cocoa
Candied orange peel
Savoury herbs
This versatile dough will also be made into Joy Road’s famously delicious pull-apart cinnamon buns shaped into loaves and elegant small buns meant for classy desserts like baba au rum.
If you are in my hood and want to buy a ticket go online and learn more at Eventbrite.
I’m talking to chefs and gathering ideas for upcoming classes in the hope that my instinct that cooking classes are a perfect fit for Naramata is on the mark. Send me a comment if you have ideas for other classes… preserves, chocolate, fancy eclairs, bread…


 4. Stretch yourself
 The next Naramata-Blend cooking class is all about choux pastry and how this light and airy pastry can be turned into a vessel to hold creamy fillings before being dipped in chocolate. Amanda Perez of


 This versatile dough will also be made into Joy Road’s famously delicious pull-apart cinnamon buns shaped into loaves and elegant small buns meant for classy desserts like baba au rum.