


A Calgary Highlander plays a mournful lullaby at Legend Distilling on the Naramata Bench.
A Calgary Highlander plays a mournful lullaby at Legend Distilling on the Naramata Bench.

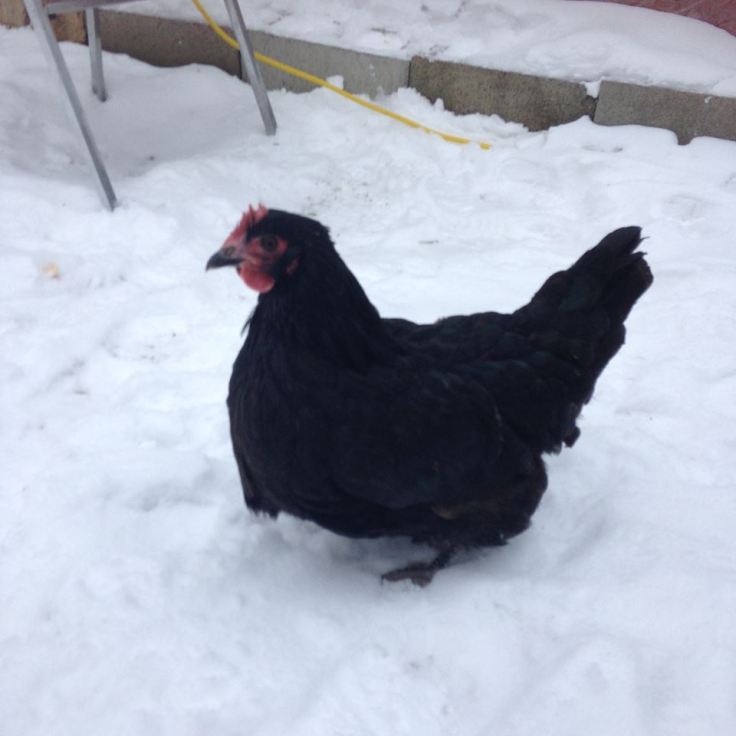
This year’s Christmas present is a pair of laying hens from Marie and Ron McGivern’s farm in Kamloops, a coop, feed and some help getting up and running. My RentTheChicken.com pals will be delivered in May and picked up again in October, unless I get so attached I will need to give them a forever home…
Marie has indulgently agreed to let me choose my hens now and says she will band them and help them get used to their new names… Maria and The Baroness. They are such smart feather-brains that they will come when called or when called and a bowl of feed shaken…same, same.
I can’t seem to stop singing wherever I am. And what’s worse, I can’t seem to stop saying things — anything and everything I think and feel.
It will be interesting to see how the two ladies will get along. They will get a trial run paired up together before being delivered Marie says as, “hen pecked and pecking order” are real things. I may be dooming them from the start with their names but without Rooster Georg in the mix they may be OK with some brown paper packages tied up with string, whiskers on kittens, snowflakes that stay on my nose and my lashes…

Somewhere out there is a lady who I think will never be a nun. Auf Wiedersehen, darling.
Maria may never be a nun but a monk is responsible for her breeding. The Chantecler breed was developed in the early 1900’s by Brother Wilfred Chatalain, a monk who resided and worked at the Oka Agricultural Institute in Quebec, my home province. He was in charge of the poultry yards there, and one day gave his visiting father a tour of the facilities. After viewing the various breeds housed at the Institute, his father remarked that there seemed to be no uniquely Canadian breed. That gave Wilfred the idea to create the first Canadian breed of chicken. He decided it would have all the traits necessary for superior winter laying ability and at the same time be a superior meat bird. He worked on his creation from 1908 until 1918 when the first Chantecler was released to the public.The breed is very suitable for colder climates. They have a super small comb so their head literally doesn’t freeze off in winter. They are very good layers, also in winter months, with an average egg production of 200 a year that weigh around 60 grams. The egg colour is pale brown.
The Partridge Chantecler was developed approximately 30 years after the White Chantecler, by Dr J E Wilkinson of Edmonton Alberta, my other home province. Just as Brother Wilfrid made a series of crosses to come up with his “ideal”, so did Dr Wilkinson. Ultimately he came up with a bird that he called the “Albertan”. It is important to note that they actually had nothing at all to do with Brother Wilfrid’s White Chanteclers and that they were essentially completely different breeds. However when Dr Wilkinson submitted his “Partridge Albertan” birds for recognition by the American Poultry Association, they did accept them but then rather arbitrarily renamed them as a Partridge Chantecler, much to his huge disappointment.
Chantecler, Partridge Albertan… both developed in Canada these breeds almost went the way of the dodo but thanks to farmers like Marie and Ron this Canuck breeds are making a come back. It is a friendly breed that is reliable towards it’s fosterer. I have confidence in sunshine, I have confidence in rain, I have confidence in confidence alone that I can raise chickens… Helps to have a friendly one I imagine.
Oh Georg, if I had known we were going to have a sing along I would have brought my harmonica.
Black Sex-links are cross-bred chickens whose color at hatching is differentiated by sex, making chick sexing easier. Sex-links can be extremely good egg-layers which often produce 300 eggs a year or more depending on the quality of care and feed. The Baroness is going to be an omelette queen. The color of their eggs vary according to the mix of breeds and blue-green eggs are possible. (How cool would that be?)
Blacks are a cross between a Rhode Island Reg or New Hampshire or rooster and a Barred Rock hen.
You know how Sister Berthe always makes me kiss the floor after we’ve had a disagreement? Well, lately I’ve taken to kissing the floor whenever I see her coming, just to save time.
I may be counting my chickens before the hatch anticipating my May Christmas gift but it feels good to put faces to the names. Next…chicken raising research…so I can solve a problem like Maria…
1. Mise en place is a MUST
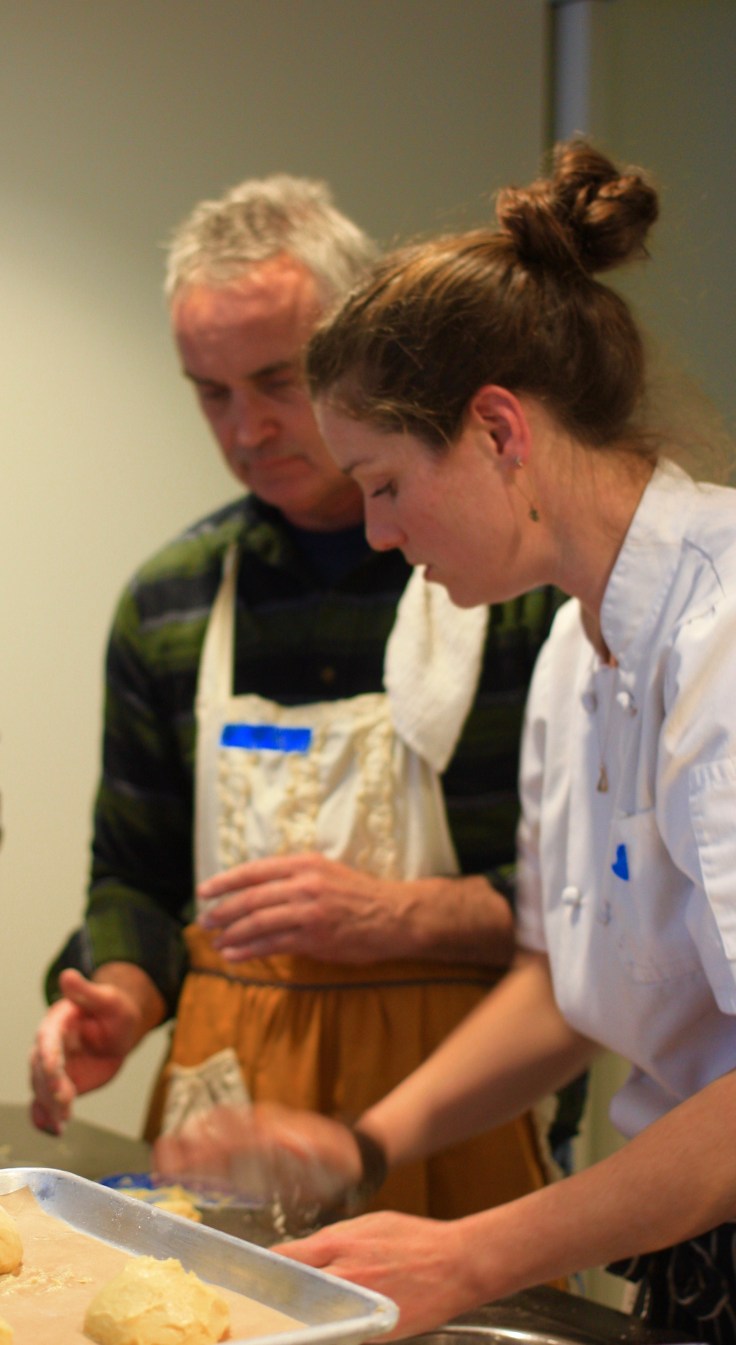
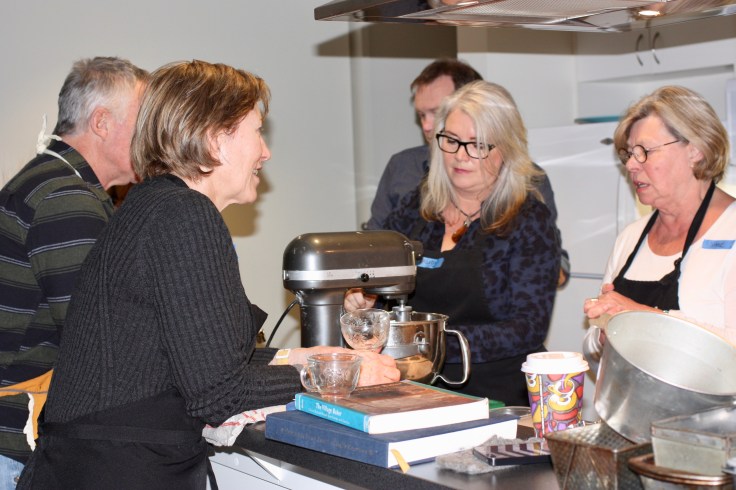
Mise en place, a French culinary term which means “setting your ingredients in place prior to cooking”. Even before the mise en place, the first task is to read the recipe from start to finish…twice. At our Naramata-Blend cooking class Chef Dana went over the recipes with us explaining terms, discussing ingredients and explaining why the steps are necessary and even some of the chemistry and history behind what we are doing. At home, the mise en place step helps make sure you have all the ingredients and that they are carefully weighed before beginning.
2. Know your ingredients
It sounds obvious but how often do we take time to really know our ingredients? Chef Dana Ewart of Joy Road Catering was passionate and knowledgable about the ingredients we were using, which was very inspiring. She suggested fresh yeast as apposed to dry, organic high-fat content butter, farm fresh eggs, Dutch cocoa powder… It seems like a pretty basic concept but your finished product is made up of your ingredients. Try using margarine instead of butter in a brioche and you will soon learn about the importance of high quality ingredients. It’s like adding vinegar to milk to create a buttermilk substitute…it really is not anywhere near the creamy buttermilk flavour you are really after. Ask your instructor where they source their ingredients.

3. Learn what tools you need and how to use them
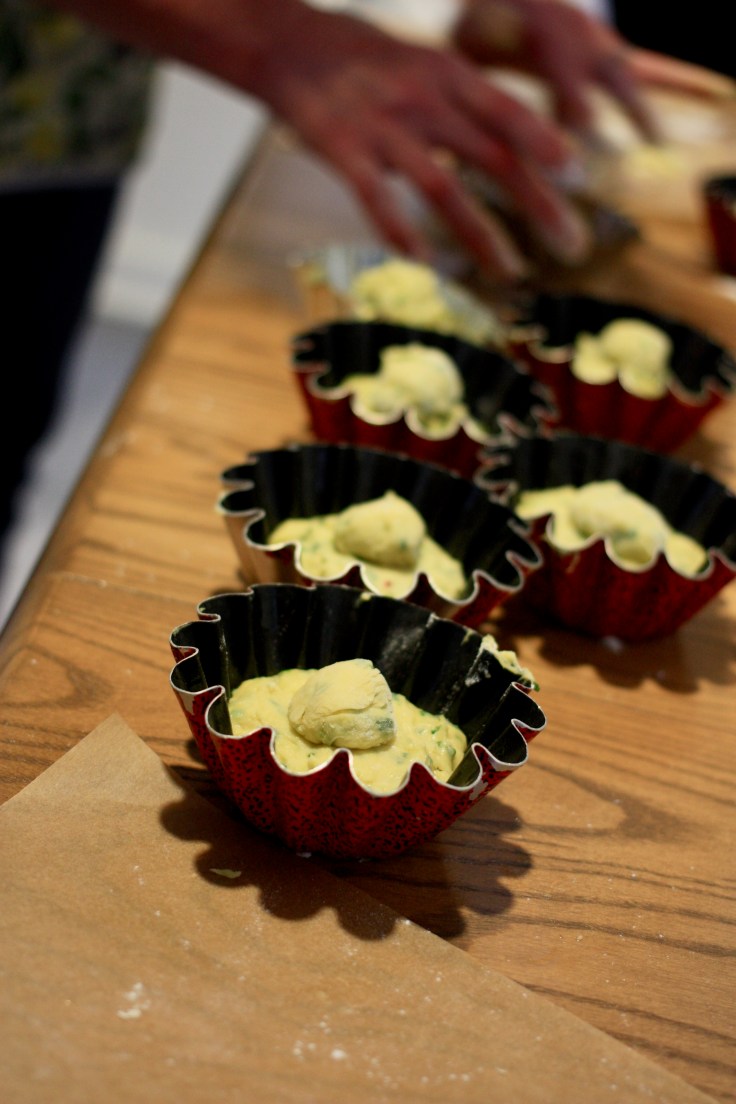
A cooking class is the perfect time to try out new tools – dough scrapers, stand mixers, food processors, different types of knives, pastry bags and tips, molds and pans, silplats, zesters, scales, French rolling pins and on it goes. You can then go right to the nearest kitchen store and keep your local economy rolling. Instructors will also give you tips about which gizmos and gadgets you really need, which are nice to have and which will gather dust. I need a bigger kitchen… six brioche molds now added to the collection.
 4. Stretch yourself
A baking class is the perfect opportunity to try something you have been too intimidated to try at home. Step-by-step instructions, hands-on practice and help from the Chef will give you the confidence to try more complicated recipes at home. I’m hoping to finally get some help with my sad piping skills at the eclairs and profiteroles class in February.
5. Revel in the age-old joy of cooking together
There is nothing like a baking class to bring a room of people together. As the class progresses notice how the chatter becomes louder and how often you hear people laughing. Maybe it’s because you show up in a room that has the recipe and all the ingredients on hand and organized, the room warms up and starts to smell like a bakery and you leave before the dishes are done.

 The next Naramata-Blend cooking class is all about choux pastry and how this light and airy pastry can be turned into a vessel to hold creamy fillings before being dipped in chocolate. Amanda Perez of The White Apron will be teaching us how to make fancy eclairs and profiteroles at the February 11 class just in time for Valentine’s Day. We will drink some bubbly from Bella Wines and chat, laugh and leave the kitchen a big mess.
Come and join us if you live in the area. Tickets are available through eventbrite for the Saturday afternoon class.

Brioche! How hard can that be?
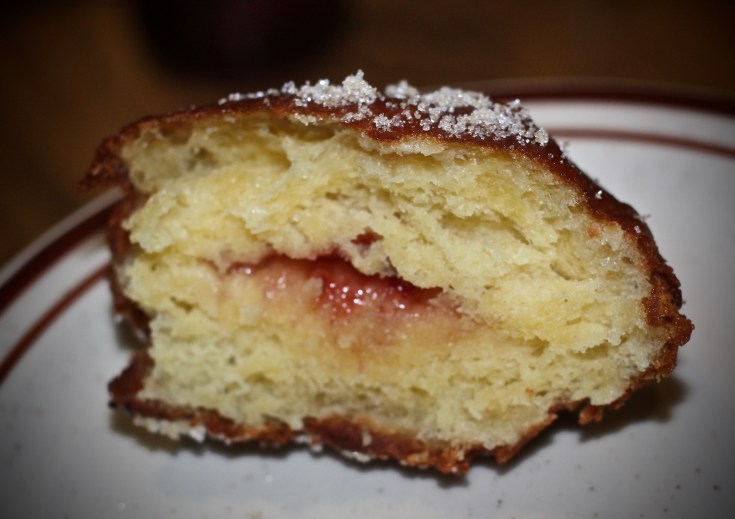
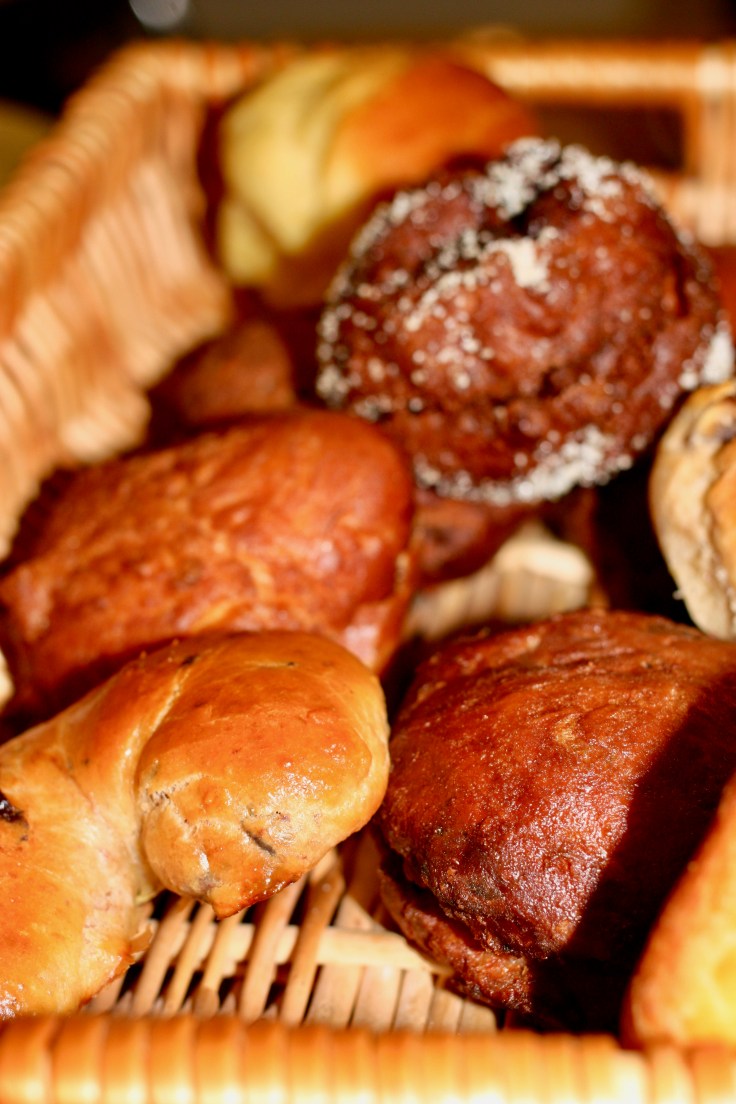
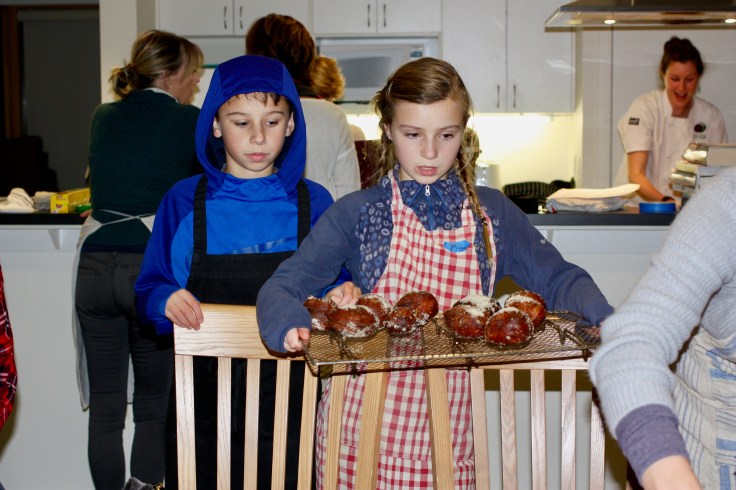
With ‘go big or go home’ thinking the first Naramata-Blend cooking class tackled the most delicious and some would argue, trickiest to make of the bread family – brioche. This rich, buttery egg French dough is versatile and Dana Ewart, Chef and Proprietor of Joy Road Catering helped our class of 20 make no less than five variations on this buttery theme including: herb with chives and tarragon, cocoa and dried cherry (CC Orchards cherries), plain, jelly donuts and the crowning achievement – Naramata Candied Chestnut and Dried Plum Loaf filled with local fruit and nuts.
Candied chestnuts
You can buy candied chestnuts or marrons glacé but what would be the fun in that? Making your own is easy but takes a few days as you wait for all the sugar to absorb into your lovely locally-sourced chestnuts. Here’s how: (This recipe makes twice as much as you will need for your Naramata Loaf but since it takes so long, you may as well make enough for two batches…)
1. Blanch 500g fresh chestnuts in boiling water for 4 minutes, drain, then peel while still warm.
2. Bring 300g sugar and 300ml water to the boil in a heavy-based pan to make a syrup. Simmer for 10 minutes, then add the chestnuts and simmer for 7-8 minutes.Take off the heat and leave to stand overnight in the syrup.
3. The next day, bring the chestnuts/syrup back to the boil, cook for 1 minute, then remove from the heat and cool. Repeat the boiling and cooling process 2 or 3 times over the next couple of days until all the syrup is absorbed.
4. Preheat the oven to around 150°F, spread the candied chestnuts on a tray covered with baking paper, then pop into the oven. Prop open the door and leave for 2 hours or until firm.
Brioche master recipe
| Ingredient | Amount | Notes |
| PRE-FERMENT | ||
| Flour (white all purpose or bread flour) | 188g | |
| sugar | 7g | |
| Fresh yeast | 30g | |
| milk | 137ml | |
| MAIN DOUGH | ||
| Flour (white all purpose or bread flour) | 563g | Naramata Candied Chestnut and Dried Plum Brioche |
| Eggs | 10 whole | Add 125g chestnuts & 125g prunes |
| sugar | 70g | |
| Fresh yeast | 30g | |
| salt | 18g | |
| Unsalted butter | 454g/1lb | Yield: 3-4 loaves |
This recipe can be halved. Any left-over brioche dough can be frozen. Wrap tightly in plastic as the dough will continue to expand in your freezer. Your baked brioche can also be frozen if for some unknown reason you can’t eat it all in one or two days…
Method:
PRE-FERMENT
In a bowl or Tupperware that will hold about 3 cups, weigh the flour and sugar. Gently warm the milk until it is about body temperature or slightly warm to the touch. Crumble the fresh yeast and pour the warmed milk into the flour mixture. Mix & knead until all of the flour is hydrated and the dough is homogeneous.
Rest the pre-ferment a minimum of 4 hours out of the fridge or overnight in the fridge.
The following day, or 4 hours later- Pull the butter and eggs out of the fridge to temper.
Mix together by hand or in a kitchen aid with a dough hook attachment the flour, sugar, yeast and eggs. Mix until the flour is all hydrated- scraping down the sides of the bowl and underneath the hook occasionally to ensure that there are no lumps of dry flour.
When the dough is homogenous, stop the mixing and allow to rest for 15 minutes (this is called an autolyse).
Add the salt and the pre-ferment on top of the dough, pulled in to fist-sized chunks.
Mix again for a few minutes until the pre-ferment and the salt is mixed in. During this mix, plasticize the butter, by cutting it into pieces & beating it with a rolling pin inside a garbage bag or between layers of parchment paper.
Begin adding 1 tablespoon-sized pieces of the plasticized butter- in increments until all of the butter is incorporated. Now is the time to add the candied chestnuts and dried fruit.
Once the butter is incorporated, mist a tray or bin with neutral oil to put the dough in – cover & rest in the fridge. After 30 mins-1hr, fold the dough or punch it down. Rest for 4 hours- overnight in the fridge.
Punch down the dough, and lightly mist oil- or butter and flour your brioche pans. Weigh the dough into desired portions, shape & place in the molds or pans (making sure the dough fills only 1/3 of the pan) Proof in a warm draft- free area for approximately 40 minutes or until the dough has doubled in bulk. Brush with egg wash, and bake at 400 F for 10 minutes, then 375F for 15-20 minutes or until golden. Remove from the pan & cool on rack.
Dana’s brioche tips and tricks
Equipment
Ingredients
Brioche

General


Terra Madre, slow food, Cittaslow … What’s the deal with all those names?
“It’s all about creating community, about why we all live here in this special place,” says chef and proprietor of Joy Road Catering Dana Ewart when asked to explain Terra Madre, the slow food movement and Naramata’s Cittaslow designation. “There are a lot of terms used to describe what we are all about and our philosophy around feeding people with great food but it can be much more approachable and less cerebral. It comes down to people sitting around a table enjoying themselves.
“For me personally, I get the most energy and joy out of creating beautiful food and sharing it with people,” says Dana and she has been doing this for more than 20 years.
Terra Madre
Saturday December 10 is Terra Madre Day. With its origins in Italy, the land where food is worshipped and quality of life vigorously defended, Terra Madre is a network of food communities of small-scale food producers committed to producing quality food in a responsible and sustainable way. Translated as Mother Earth, the slow food network has biennial conferences bringing together farmers, fishers, food producers and cooks. Dana and her partner Cam Smith have attended two of these conferences. “We have brought back so many ideas about how we can better share and showcase our regional cuisine.”
Terra Madre Day promotes the diversity of food traditions and production. It’s a day to show how our network is using its creativity and knowledge to express our love for the planet and defend the future for next generations. It’s a day to celebrate local eating, agricultural biodiversity and sustainable food production summed up as good, clean and fair food.
Naramataslow
As far at Terra Madre goes in Canada, Naramata gets it.
We get it so much that we are one of only three Canadian communities with a special status as a “slow city” bestowed on us by Cittaslow, an international organization formed in Orvieto Italy in 1999. We join Cowichan Bay and Wolfville as places where the pace of life is a bit more human.
To quote from the charmingly translated Italian on the Cittaslow website, “A Cittaslow place is motivated by curious people of a recovered time, where man is still protagonist of the slow and healthy succession of seasons, respectful of citizens’ health, the authenticity of products and good food, rich of fascinating craft traditions, of valuable works of art, squares, theatres, shops, cafes and restaurants. These are places of the spirit and unspoiled landscapes characterized by spontaneity of religious rites and respect the traditions of the joy of slow and quiet living.”

Terra Madre Day Cooking Class
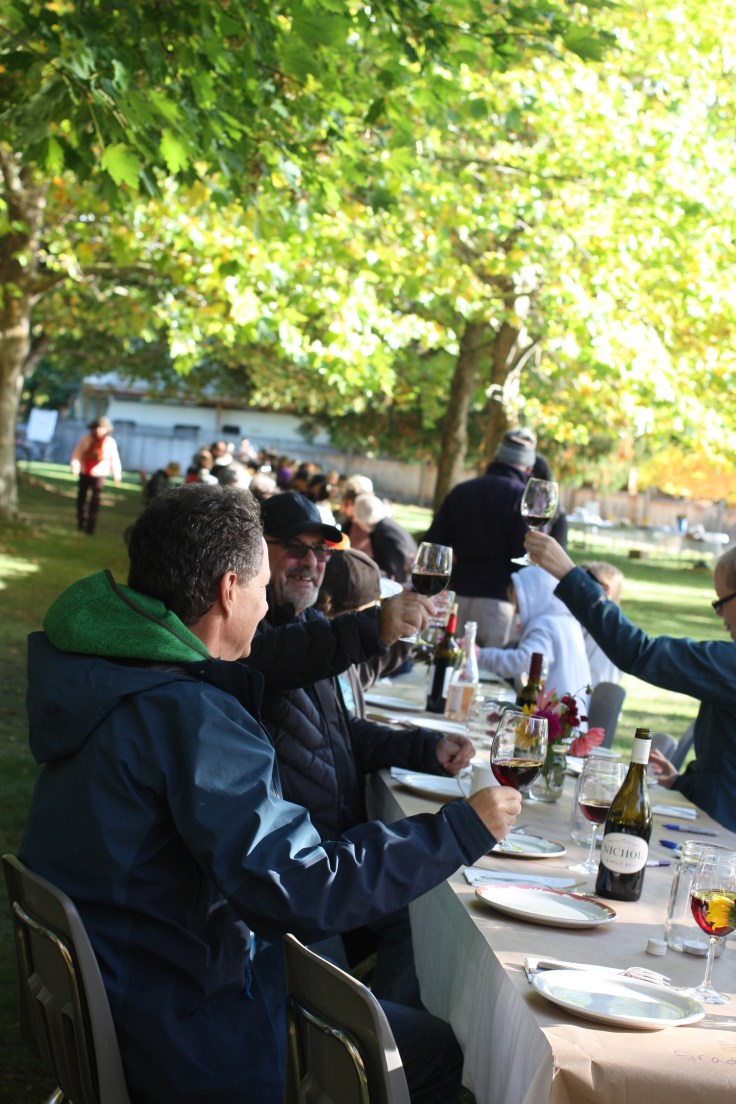
Slow food or local food of high quality with connection to the local land made into traditional recipes where the community comes together is what it’s all about and this year we are marking Terra Madre day by hosting the first of a series of cooking class. The Naramata-Blend classes bring together Okanagan Valley chefs, local ingredients and people passionate about food who will cook together and eat together.

The Terra Madre Day inaugural class lead by Chef Dana, will focus on brioche in its many wonderful forms including the unveiling of a new Naramata Loaf recipe (recipe will be shared in an upcoming post) featuring local dried fruits and nuts. Mulled wine made from Cliffhanger Red from Naramata Bench Winery Association featured member Moraine Winery and warm spiced apple and cherry juice from orchardists Amanda Perez and CC Orchards will keep the slow food convivia fuelled as we learn to bake this special buttery egg bread.
“Ten years ago fewer restaurants in the Valley were using local produce in their restaurants,” says Dana. Now a lot of us are using are only using pretty much everything produced here. It takes a lot more effort but the quality of what we have here is amazing and the caliber of the producers and chefs is incredible.”
She says she has made it her mission to spread the word about the Terra Madre principals that were first ingrained at the Stratford Chef School where she learned her craft and to let other young people know that the Okanagan Valley is a great place to set up shop to produce and prepare amazing food.
“We (Dana and her partner Cam Smith and their business Joy Road Catering) have shown that its possible to have a successful business. Our community here is very supportive. We are a product of this great community coupled with our hard work.”
Dana is also passionate about trying to expand our way of thinking about the importance of food and those who produce and prepare it for us.
“Professionals with special skills are appreciated. For example, we hold our doctors, accountants and lawyers in regard and pay them well for our occasional visit or meeting. How often do we eat? Why not offer our farmers that same high regard?”
She has a point.
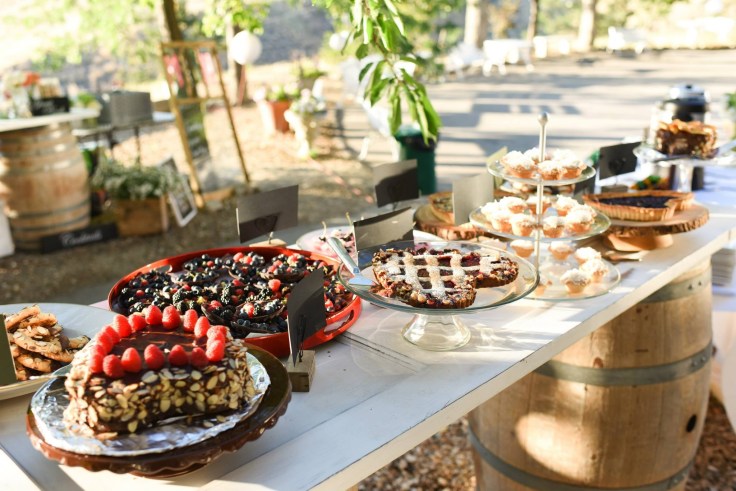
Thoughts over dessert
Some final thoughts about Terra Madre, slow food, Cittaslow…
Alice Waters, the famous Californian slow foodie, gives us this sweet slow food manifesto:

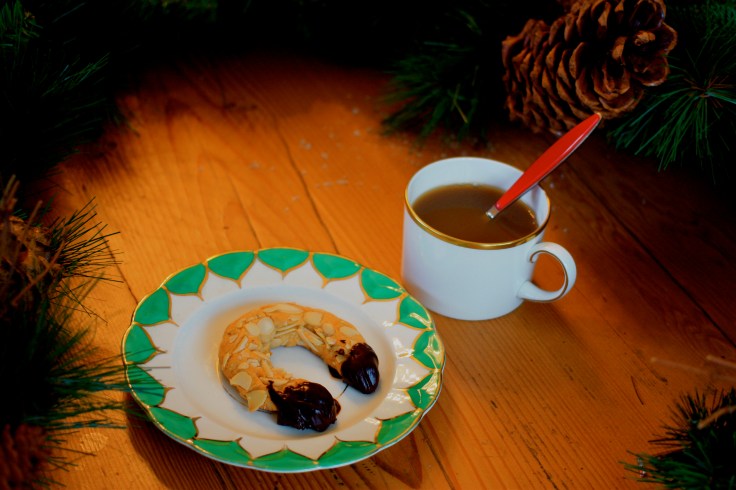
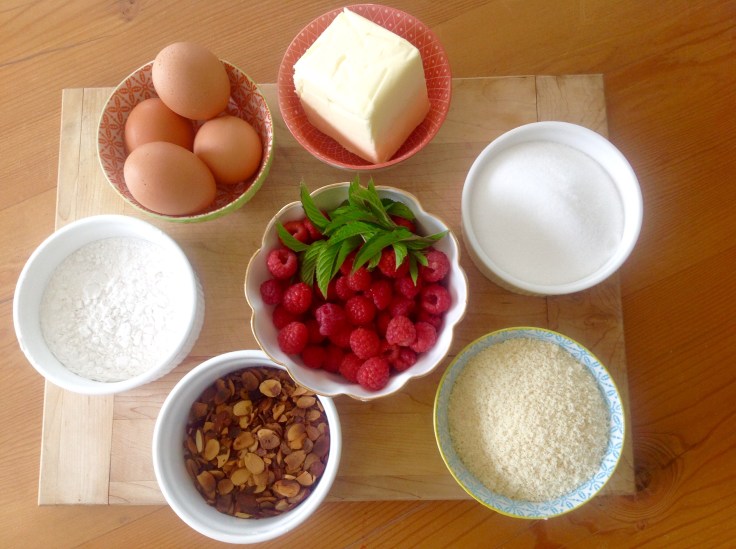
These German delicacies contain a hat trick of almonds – marzipan, ground almonds and sliced almonds and the horseshoe is then dipped in dark chocolate. Also call almond horseshoes or almond horns they are very easy to make. The key is to buy good quality marzipan. I bought mine at La Cucina European Market. Another tip is to work clean, as my pastry chef instructor drilled into us. By this I mean, make sure to clean out your bowl and beaters well using every scrap of your expensive ingredients in your cookies.

Ingredients

Directions
Adjust oven rack to middle position and preheat oven to 375°F. Line rimmed baking sheet with parchment paper. In bowl of standing mixer fitted with paddle attachment, mix marzipan, almonds and sugar on low speed until well combined (mixture may appear a bit dry at this point). Mix in egg white and almond extract until combined.
Toast sliced almonds in your preheated oven for 5 to 10 minutes until lightly browned. Divide dough into 12 equal portions (about 1 rounded tablespoon each). Working one at time, roll each ball into almonds as you shape it into 4 1/2-inch ropes with blunt ends. Shape rope into U shape and place on prepared baking sheet. Continue with remaining balls of dough, evenly spacing apart from each other.

Bake cookies until just beginning to turn golden, about 15 minutes. Let cool on pan 10 minutes, then transfer to cooling rack to cool completely, about 30 minutes.
In a medium bowl over pan of barely simmering water, melt half of chocolate, stirring gently, then add remaining chocolate and stir to melt. Dip ends of almond horns in chocolate and place back on parchment paper lined baking sheet. Chill cookies in fridge until set. Serve cookies at room temperature.