“And the secret garden bloomed and bloomed and every morning revealed new miracles.” Frances Hodgson Burnett, The Secret Garden
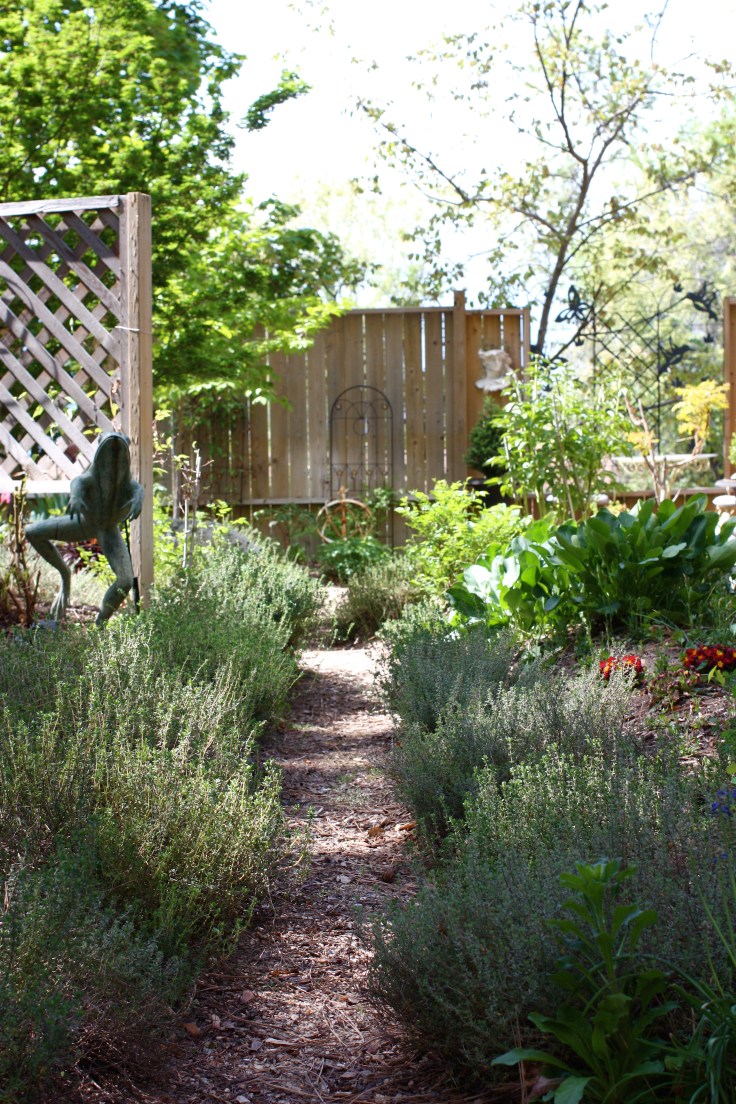
Just like Mary in her Secret Garden, I like the name and the still more the feeling that when its walls shut me in no one knows where I am. The Handyman built my walls five years ago and I’ve been planting and revising ever since. This sheltered spot is maturing nicely and is being discovered by others who see the merit of a trickling brook, pond and shelter from the wind. It’s becoming a mini bird, bee and frog sanctuary. A family of racoons and another of skunks also make frequent visits to the pond, mostly at night luckily.
Here are a few of the plants blooming today:
Highly-scented iris, unknown variety
Gentiana acaulis
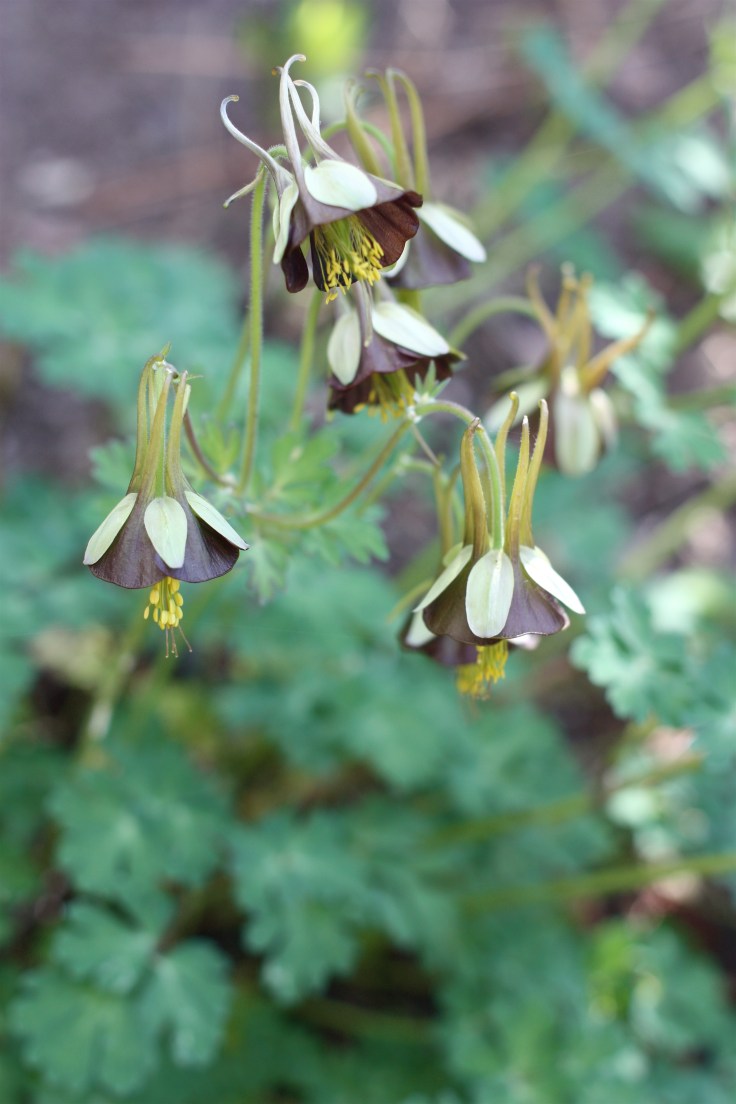
Aquilegia which I grow from seed in my greenhouse, I no longer can call them Columbines…too sad, reminds me of the poor school kids
Aquilegia viridiflora ‘Chocolate Soldier’, a rare collector’s item with seeds from Thompson & Morgan. It’s very fragrant.Leopard’s Bane, the earliest-blooming of the daisies brings some colour to my pond.Two new pink azaleas are planted outside the secret garden round gate. They will be more spectacular next year. This little guy was was one of the first things we planted. The next photo is what it looks like today.Shishigashira Japanese Maple has heavily curved green leaves giving an interesting texture to this compact, shrubby tree. It is spectacular in fall and its highly sculptural form will only improve with age. It will slowly reach about 15 feet tall.Close-up of the Lion’s Head leaves
Another ideal small tree, Japanese stewartia, frames the lady’s head. It gives you lovely peeling bark all season, hot fall colour and it blooms with white June-into-July flowers. It’s a distant relative of the tea family.
Another “before and after”…here is The Handyman installing the edging that will eventually form the garden paths.Here is the same path lined with orange-scented thyme which will soon be in bloom. I grew all these thyme from seed in the greenhouse. A lot of wins here. It’s extremely fragrant with a delicious scent of balsam and oranges. The flowers are long-lasting and very pretty. It’s drought tolerant and easy to care for. On top of that it is one of the most useful herbs for the kitchen. I ordered my seeds from seedaholic.
Like any good secret, my garden is best revealed in instalments. I’ll post more when new blooms arrive.
“If you look the right way, you can see that the whole world is a garden.” Frances Hodgson Burnett, The Secret Garden.
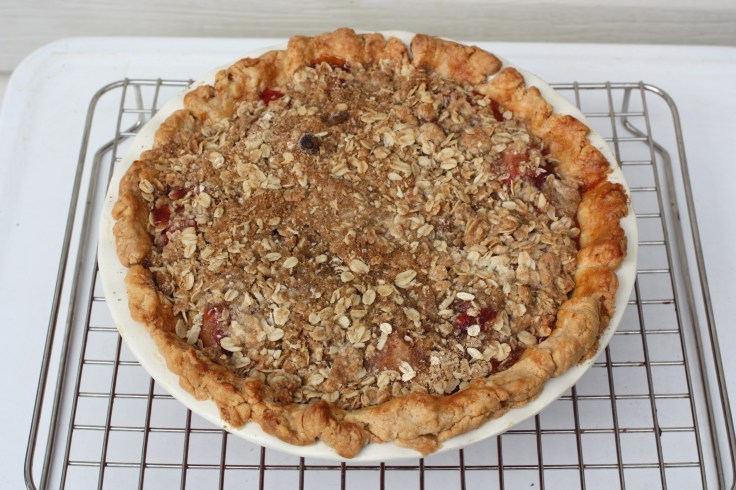
Now I know it’s spring. Time to whip up a pie for The Handyman to celebrate.I’m not the type to read the last chapter of a book first but it’s good to make an informed decision about recipes. This amazingly tart, sweet and beautifully spiced pie recipe comes from Edmonton’s the Duchess Bake Shop cookbook (with some minor modifications).
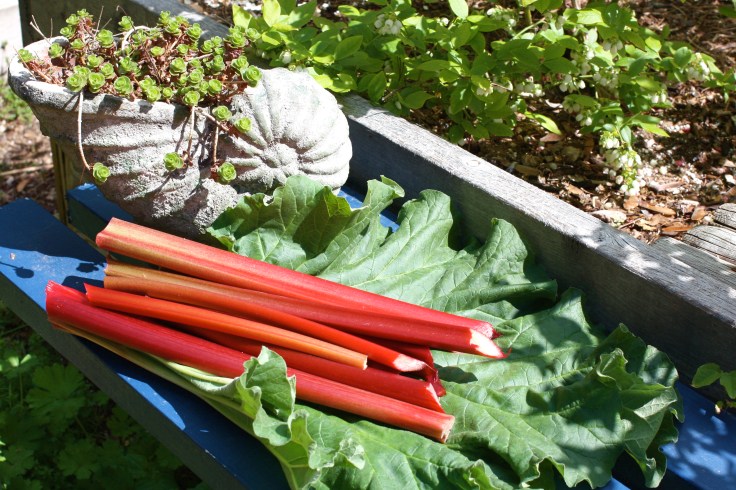
My rhubarb plant, like most of the rhubarb in Naramata, is an unknown heritage variety. Almost every garden has a plant that’s likely been there for years and years. I imagine mine has supplied a lot of rhubarb pies in its lifetime. I hope it’s honoured to be blogged about.
Blind-baked pie shell
For pies that have juicy fillings like rhubarb strawberry, you will need to fully bake the shell before filling it.
In my opinion the best pie crust has half butter and half shortening.
4 cups all-purpose flour
1 cup cubed cold unsalted butter
1 cup cubed cold vegetable shortening
1 tsp. salt
1 cup ice water
Either using a stand mixer fitted with a paddle attachment or a food processor mix or pulse the flour, butter, shortening and salt for 10 or 15 seconds. Add the ice water and mix on medium or pulse until the dough just comes together.
Don’t overmix. You want some small lumps of fat to remain to make the dough flaky.
Shape the dough into three balls. You will only need one ball for this pie so freeze the other two for future pie baking. Wrap the dough in plastic and place in the refrigerator (and the other two in the freezer) for at least a half hour.
Roll the dough out and place in the pie shell.
Freeze the shell for at least 15 minutes at this point.
Brush the pie shell with an egg wash (1 egg white whisked with 1 tbsp cream (or milk).
Cut a circle out of parchment and fill the lined shell with dried beans, rice or pie weights.
Save the rice for your next blind baking session.
Bake the shell at 375F for 30 to 35 minutes until the edges are light golden brown. Take it out of the oven, remove the parchment and rice and poke the shell a few times with a fork. Put it back in the oven for an additional 5 minutes.
Crumble
1/2 cup rolled oats
1/3 cup all-purpose flour
1/3 cup brown sugar
1/4 tsp cinnamon
1/4 cup unsalted butter at room temperature
Combine all the above in a bowl and using your hands work it all together until clumps form. Set it aside.
Filling
Cut the rhubarb into 1/2 inch pieces. De-stem and quarter the strawberries.
3 cups rhubarb
3 cups strawberries
1 cup sugar
3 Tbsp cornstarch
1/2 tsp ground cinnamon
1/4 tsp ground nutmeg
1/4 tsp ground cardamom
1 tbsp fresh lemon juice
1/4 tsp orange blossom water
Use fresh nutmeg if you have it…grating it.
To make the filling, in a saucepan, place the rhubarb, sugar, cornstarch, cinnamon, nutmeg, cardamom and lemon juice. Cook over medium heat for about 15 minutes stirring often so it doesn’t burn. Remove from the heat and stir in the strawberries and orange blossom water.
Fill the shell to the rim and top with the crumb topping. Bake the pie at 375F for 40 to 45 minutes, until the crumb is golden brown and filling is bubbling. I like this pie warm out of the oven but it’s good cold too.
The six best words in the English language: Pie is out of the oven. The Duchess Bake Shop cookbook is the bomb. Everything I’ve tried from it has turned out beautifully and it’s fun just to browse and drool over the photos.
It’s summer. The Penticton Farmer’s Market opened two weeks early this year and I hope it closes two weeks later. It was named “2015 Market of the Year” by the British Columbia Association of Farmers’ Markets for a reason, lots of reasons really. Here is a look at opening day of its 26th season.
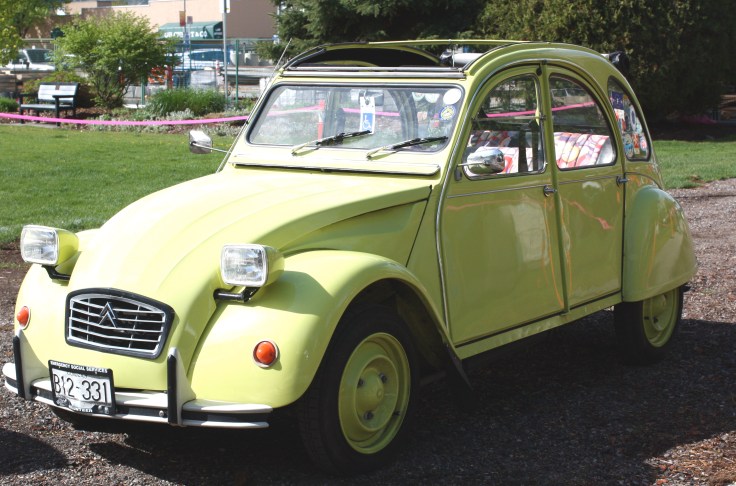
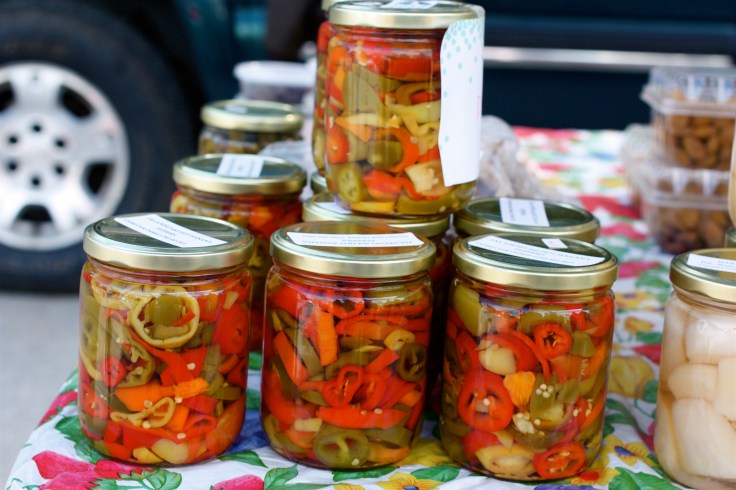
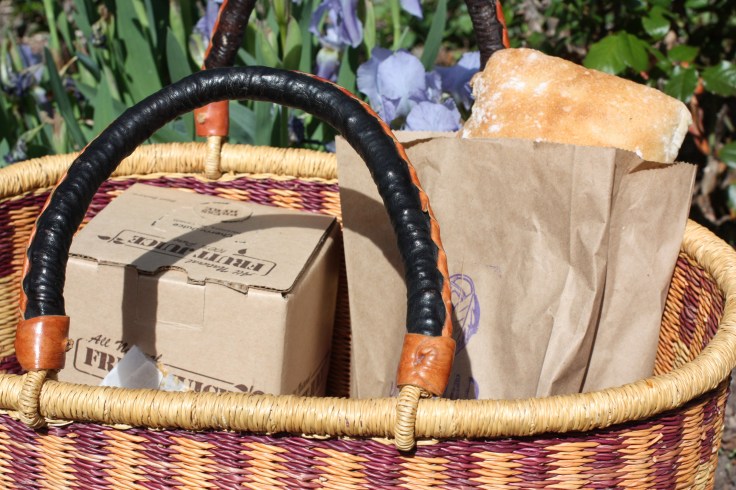
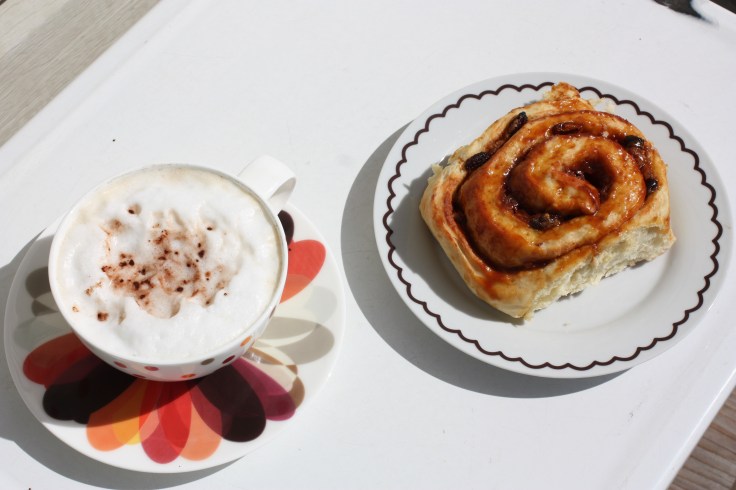
ShroomsTunesPupsFaces in the crowdArriving in styleI’ll take two pleaseHundreds of peeps shopped for kale, tomato plants, asparagus and picklesWine tasting…and buyingStumped?In a pickle?Sunshine and carbs at Joy RoadThe market is up and running from 8:30 a.m. to 1 p.m. on SaturdaysHome again, home againJiggety-jig
With every shovel of dirt came rocks and my future pints of raspberries went up another 10 cents. “That will be $50 please…” My revelation for the week was a reminder of just how hard farming is and how much it should really be worth.
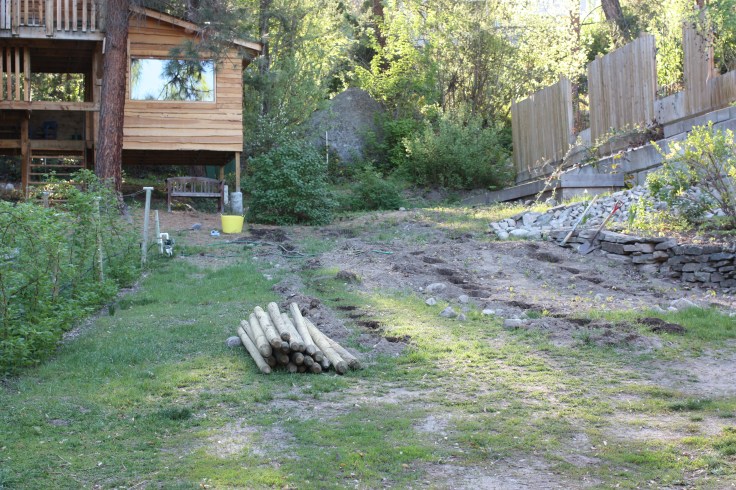
It’s not that big a box right. How hard will this be? All planted in an hour right? It turned out to be 10 hours with two more days to add additional compost and mulch. The box contains 100 Prelude raspberry canes from an Ontario grower. In behind, in the early morning rays, are some of our blueberry bushes in raised beds.
In a backwards fashion we are adding to our symphony with a second 100 raspberry canes for our Carpe Diem berry farm. Last year we planted Encore raspberries, this year Prelude. Our Encores are doing great and establishing well. We will get a medium-sized harvest this year and a much bigger one next year as they mature.
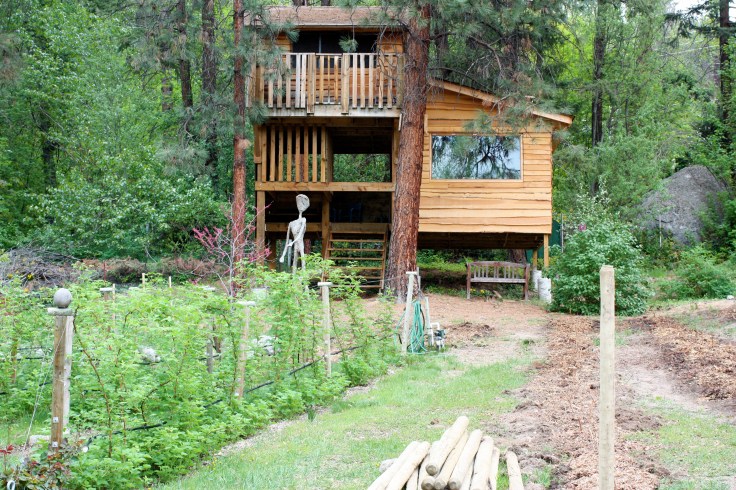
The berries on the Encore raspberries planted last year are forming up nicely.Taken from the tree fort balcony, here is a look at part of last year’s planting.
We chose Prelude and Encore raspberries to offer our customers early and late season berries while our competitors have the more commonly harvested supply. Prelude and Encore were developed by Cornell University at the New York State Experiment Station in Geneva, New York.Prelude matures a high percentage of its fruit in late June and early July while Encore is harvested from late July to early August. Like picking paint colours, I have to admit I was also swayed by the musical names.
Raspberry cane planting primer
Site selection is key. Pick a sunny and sheltered location with well-drained soil with no chance of waterlogging or flooding, as on a slope or in raised rows. Our location is on gentle slope. Raspberries don’t like wet feet but they also have a shallow root system so must not be allowed to dry out either.
Prepare your planting holes about two feet apart in rows about six feet apart.
75 of our 100 will be planted here. Each of those 75 holes were dug by The Handyman with a pick-axe and shovel. Because we are a small operation we aren’t too mechanized.
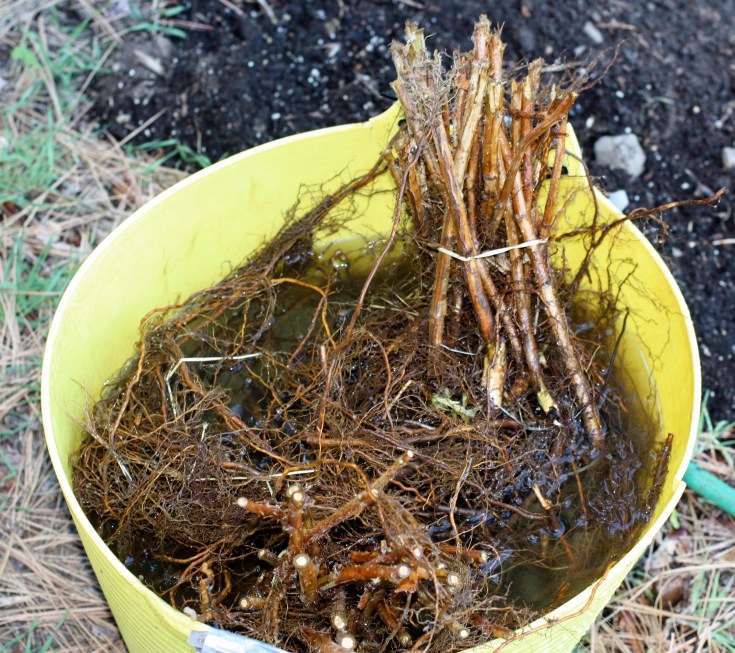
Plant certified disease-free stock in early spring. Ours came from Strawberry Thyme Farmin Ontario and was sent to us by refrigerated courier. I tried to find a British Columbia source that could beat their price but was unable to. Prelude came early. Last year Strawberry Thyme had let us know that they were shipping the Encores but being Prelude I guess they had to come before we were ready. We had hoped to have the posts, cross bracing, wires and drip irrigation installed but…they will have to follow as the plants must go in the ground as soon as possible after they arrive as their dormancy will break and the roots could dry out.
I popped the canes into a bucket of water while I worked.
Add a shovel-full of compost to the planting hole and water in well.
Compost is king in our nutrient-poor sandy soil. I will top-dress the planting every spring as well.
Plant the crowns at the same depth as in the nursery.
Add more compost mixed in with the soil you have dug out of the hole and water in very well.
The Handyman supplies me with lots of mulch from his chipper.
Add a layer of mulch to keep the weeds at bay and to help conserve moisture. I watered again once the mulch was in place.
In a week or so I will add some Alaska Fish Fertilizerandwill continue hand-watering until the canes are well established and showing signs of life or The Handyman has had time to install all the posts, wires and drip irrigation. This should wait until he runs his marathon next week as post pounding does not equal taper.
Rocks and more rocks…how much can we charge for a pint?View of the tree fort with the last year’s Encore planting and this year’s PreludeI will plant a drought-tolerant grass seed in between the rows to help keep the canes in their rows. The lawnmower will trim off the suckers in the grassy strips.
Prelude produces attractive, high quality, firm fruit that will taste amazing. I can’t wait although now that all the canes are in I’m starting to think about the hours of picking ahead and price of those pints.
Next up is the addition of 50 more blueberry bushes and a netting structure to protect the blueberries from the birds.
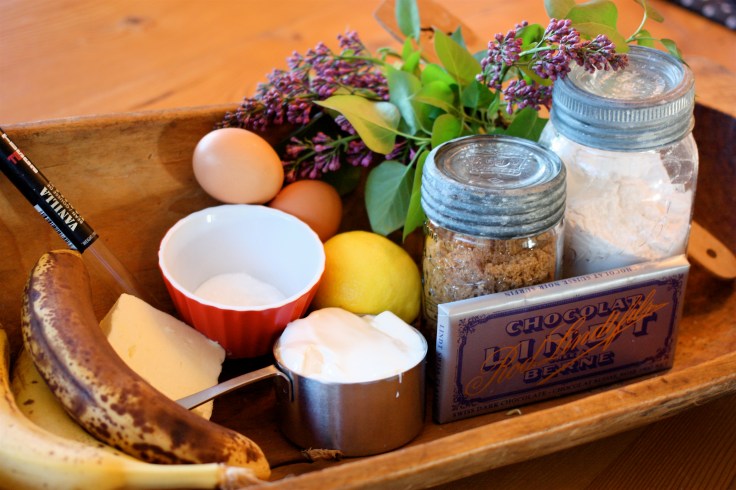
Five things make this gourmet banana bread the best ever. 1. Chocolate chunks from a high quality chocolate bar…I used Lindt. 2. Moistness in the form of sour cream or yoghurt. 3. Real butter. 4. The embedded lemony, sugary half banana slices. 5. The recipe makes two of them.
This recipe for chocolate banana bread makes the best banana bread I’ve ever tasted. It’s not bragging if it’s true. Often gourmet means hard-to-find ingredients, multiple complex steps and lots of dishes to deal with. Not so here. It’s easy to make and you won’t be sorry the recipe makes two loaves. I gave my second loaf to our coffee date pals to take home but you could easily freeze the other loaf (peel off the banana half topping first though as it won’t freeze well). If you don’t eat the other whole loaf in one day…almost impossible but…peel off the banana topping slices (and eat them) before wrapping up the leftovers for the following day.
1 cup very ripe bananas mashed with a fork (about two bananas)
1 cup sour cream or plain yogurt (you could get away with vanilla yogurt if that’s all you have)
2 cups all-purpose flour
1 tsp. baking soda
1/4 tsp. salt
2 eggs (I got mine from Lucy down the road…choose free-range if you can…caged chickens have a terrible life)
1 1/2 cups lightly packed brown sugar
1/2 tsp vanilla extract (use the real stuff if you can)
1/2 cup softened unsalted butter
6 oz. dark chocolate chopped
2 bananas, cut in half lengthwise
2 tbsp lemon juice
2 tbsp sugar
Butter two loaf pans and line each with parchment paper, letting it hang over the sides.
Preheat your oven to 350F.
In a bowl, mash your bananas and combine with the sour cream or yogurt.
In another bowl, sift the flour, baking soda and salt and set aside.
In a third bowl with an electric mixer (or a whisk and a lot of elbow grease), beat the butter until soft and fluffy and add the eggs one at a time until well combined and light. Then add in the brown sugar and vanilla and beat a few more minutes. Stir in the flour mixture alternating with the banana cream mixture. Do not overbeat at this point just mix until combined. With a spatula, stir in the chocolate and spread batter into the pans.
I left the chocolate quite chunky as it gives a nice chocolate surprise effect.
Place the banana halves on a plate and sprinkle with the lemon juice and sugar.
Place the banana halves on top of the batter and push them in lightly.
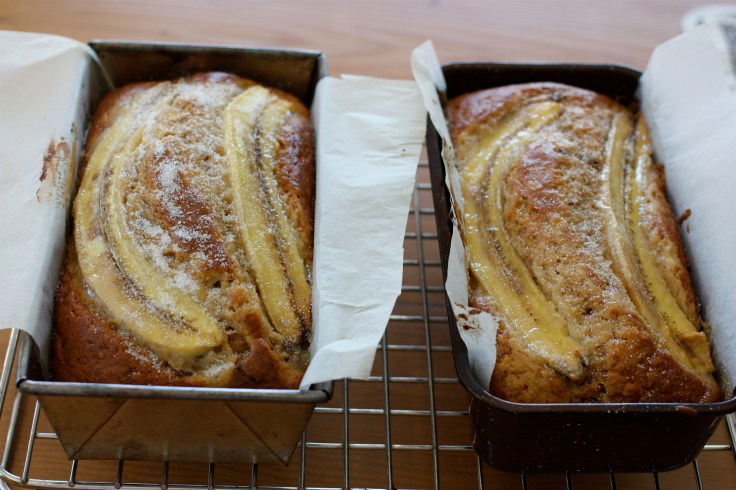
Bake in the 350F oven with the rack in the middle position for 45 to 50 minutes. They are done when the tops are a light golden brown and a toothpick or knife inserted in the centre of the loaf comes out clean.
Remove from pan after a few minutes of cooling. I like my banana bread warm so I don’t wait for it to cool completely. Sprinkle a bit more sugar on the top.
Et voila. My French bread plate says, “Give us our daily bread.” Should have added in the word “banana”.
The painter needs all the talent of the poet, plus hand-eye coordination. — Robert Brault
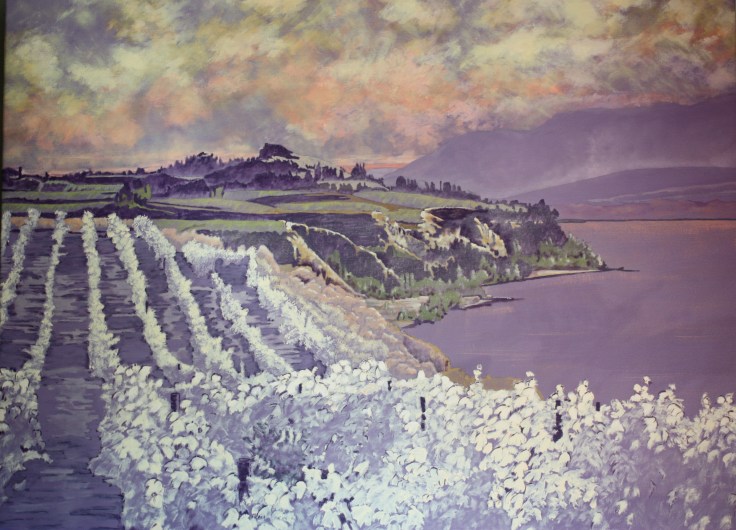
This scene is familiar to anyone taking a drive on North Naramata Road, only “betterfied”by artist Dennis Evans.
The best description of Naramata landscape artist and potter Dennis Evans‘ painting style comes from his wife, poet and writer Patricia Evans: “The landscape has a soul and it comes right out from the canvas, to touch the viewer. Dennis uses colour, usually pastel, sometimes monochrome and at other times, complementary, sometimes large format, or sometimes small, always trying to capture the essence of the landscape. He takes a pastoral image and transforms it into a heroic one through his choice of colour. Images come easily; their sources are all around him.”
Unlike many local painters who choose bold colours, Dennis chooses to interpret “the haze of an August day feeling” using gentler pastel colours.
I paint for myself. I don’t know how to do anything else anyway. Also I have to earn my living, and occupy myself. — Francis Bacon
A life-long artist, Dennis has the good fortune or as he would interpret it, fate, to end up in a place that speaks to him. Having moved from Calgary to Naramata a decade ago, he says,” I am much more connected to the landscape here. Pretty much all my landscapes are within walking distance of the studio. I have enough inspiration in Naramata to last a lifetime.”
What’s special about Naramata? “We didn’t really know how amazing it really is until we landed here,” says Dennis. “It has an aura about it. I don’t know if it is because it’s isolated being at the end of the road as it is. It was also special to the First Nations people. They didn’t live here but came to the area for their ceremonies. It’s also home to a proportionally large number of artists, which must be for a reason, and home to an incredible concentration of unique individuals.”
“When you drive out here along Naramata Road, there is a point on the road just past Apple D’Or (lodge) where you look down toward the lake and I think it is unlike anywhere else in the world. We have done a lot of travelling and it’s the most beautiful place we have ever seen. The landscape is so varied. I see a spirit in the landscape. I now work on bringing that spirit out in my paintings,” says Dennis. I think he has succeeded brilliantly.
Born in Viking, Alberta, Dennis began his art career at the Alberta College of Art (now the Alberta College of Art and Design) in the 1960s and graduated with a major in pottery and ceramics. His first love is still a key part of his artistic life. He was firing pottery out in the garden on the day I visited the studio. “It’s still like Christmas when I open the kiln after the final firing and see what I’ve created.”
He added a Bachelors degree in Fine Arts from the University of Calgary and went onto to complete a Master’s degree from the University of Houston. Dennis turned his love of pottery into a career, becoming the production manager for a major pottery manufacturing company and later opening his own production studio called Nant Mill Pottery.
“Retiring” to Naramata in 2006, he and Patricia built a studio-workshop on Naramata’s main drag, Ronbison Avenue and loving renovated and customized their house and extensive gardens. “Artists never retire and that’s OK with me. There is no other thing I want to do. I would be a bum in the street if I hadn’t found my passion,” Dennis says.
This photo taken yesterday in early spring doesn’t do the studio and neighbouring house any justice. The garden will soon again be fully in bloom and be a welcoming, beautiful introduction to the Dennis Evans Art Studio.Dennis pointing out some grass that stuck to the paints on his Tenth Street Bridge (Calgary) painting completed as a student in 1966. “It was so cold the day I painted this that the paint literally froze on the canvass.” This painting represents his “ah ha” moment when he and his instructors at the art college realized that painting landscapes outside was his calling versus the closeted still life work that didn’t hold his interest or showcase his blooming talents.
Dennis says he paint for himself and that means painting mainly in large formats to capture the large, sweeping views. “These larger paintings take up to four months to complete so they are relatively expensive for the clients,” he adds.
Clients don’t seem to mind. His art is gracing walls in England, Japan, the United States, Ontario, Alberta and British Columbia.
The smaller canvases are better sellers, Dennis says, like this one featuring Arrowleaf wildflowers from the Sunflower family which are blooming all over the Valley’s hillsides at the moment. I love the contrast of the yellow with the muted greys and pastel colours.Self-portrait of the artist, Dennis Evans
Studio Art Tour
The Dennis Evans Art Studios (680 Robinson Avenue) is part of a self-guided driving tour of seven Naramata artists called the Naramata Bench Studio Tour. Other stops on the tour include Cormier’s Studio (art gallery, sculpture garden and B&B at 495 Vancouver Avenue, Penticton), Terry Isaac Studio (gallery of internationally-renowned wildlife artist at 475 Upper Bench Road, Penticton), Wade Works Studio (Original art made with wine, prints and art cards, jewellery at 940 Aikens Loop), James Hibbert Pottery, (handcrafted pottery at 3015 Naramata Road), Shades of Linen, (see my blog post…50 shades of linen…natural fibre clothing designed by the store’s owner, 156 Robinson Avenue) and Forest Green Man Lavender Farm Shop (see my blog post…Sights and scents that will knock you sideways…Karolina’s vibrant colourful paintings and hand-crafted lavender products at 620 Boothe Road).
When one door closes, another opens; but we often look so long and so regretfully upon the closed door that we do not see the one which has opened for us. You have to think there’s a reason for everything. Alexander Graham Bell
Here is a photo essay on doors and more doors. I’ve taken so many door photos in my travels that I’ve lost track of where some of them are.
The French town of Vaison la RomainThis metal door is in Stockholm with its amazing rivets
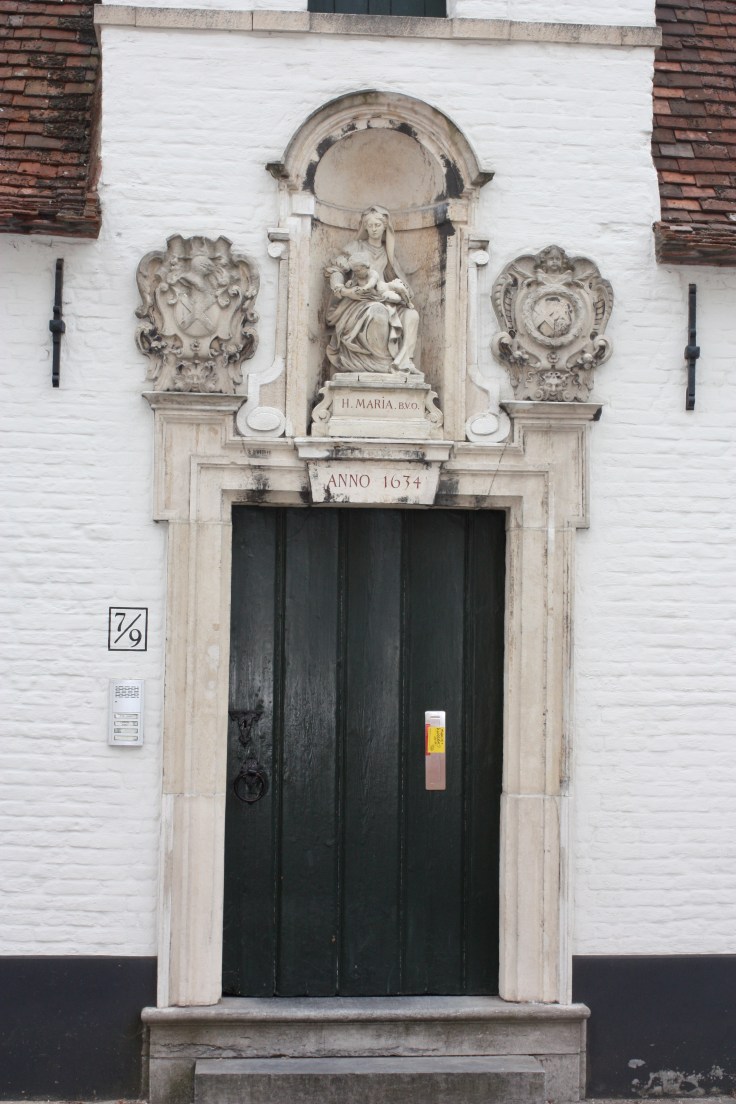
Love the door-within-a-door, wherever this one is
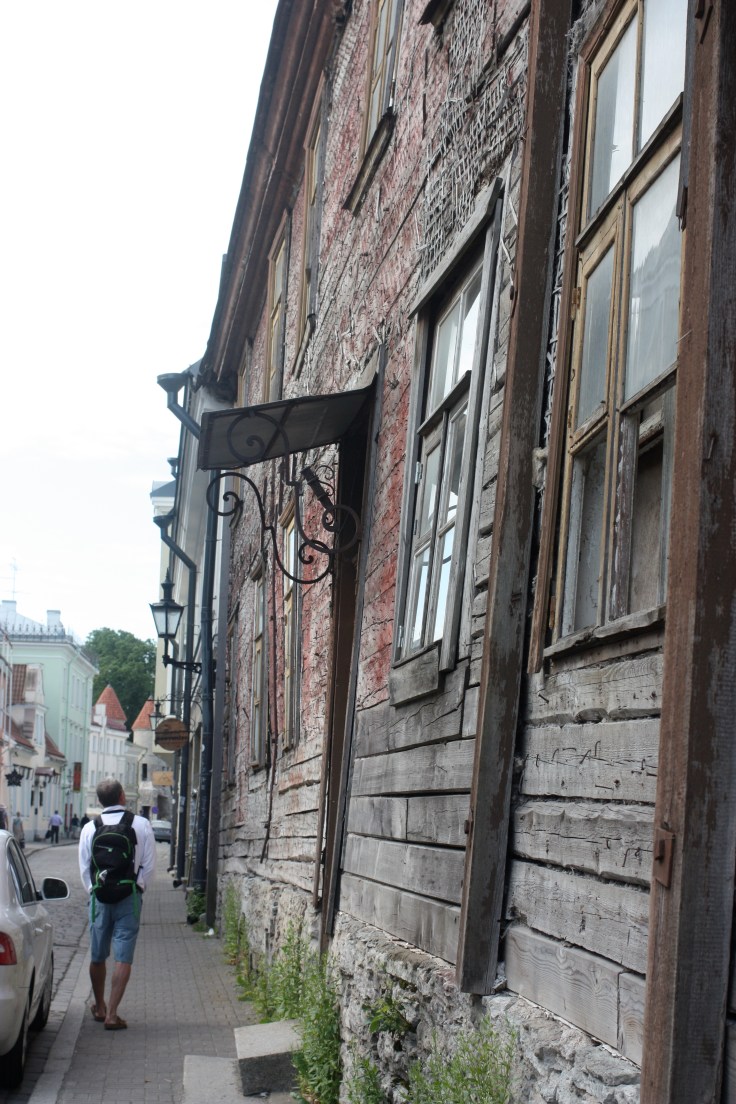
Tallinn
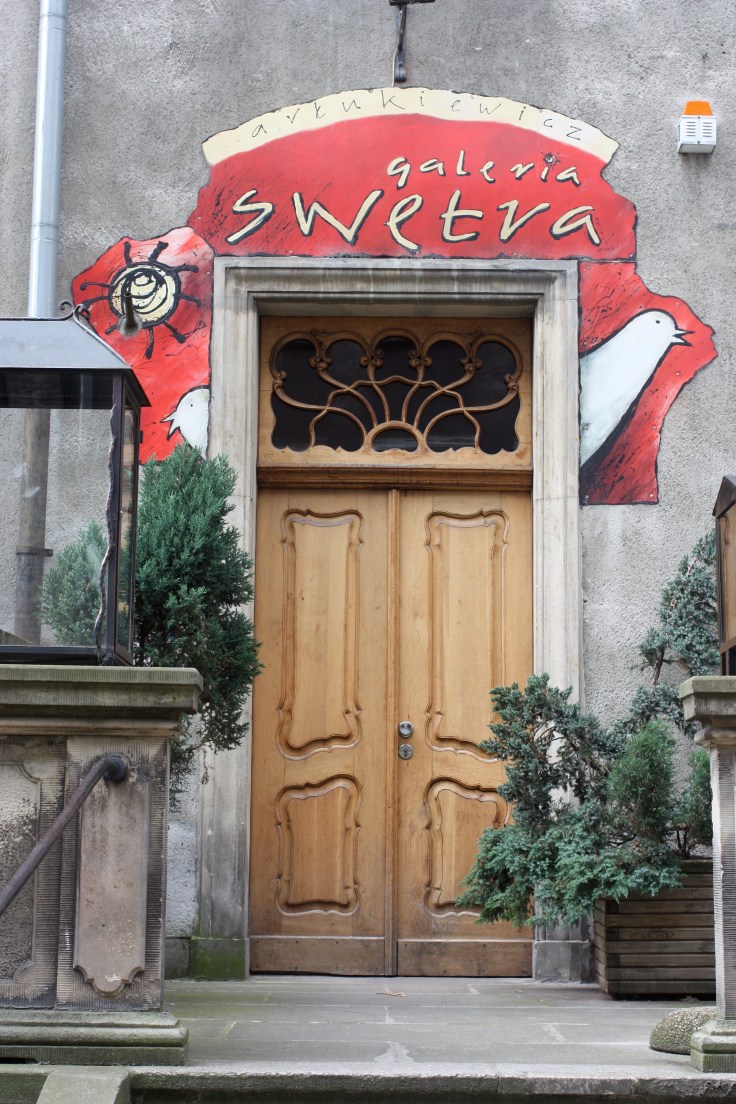
I love the colour of this modern door
We keep moving forward, opening new doors, and doing new things, because we’re curious and curiosity keeps leading us down new paths. Walt Disney
Bognor Regis, England
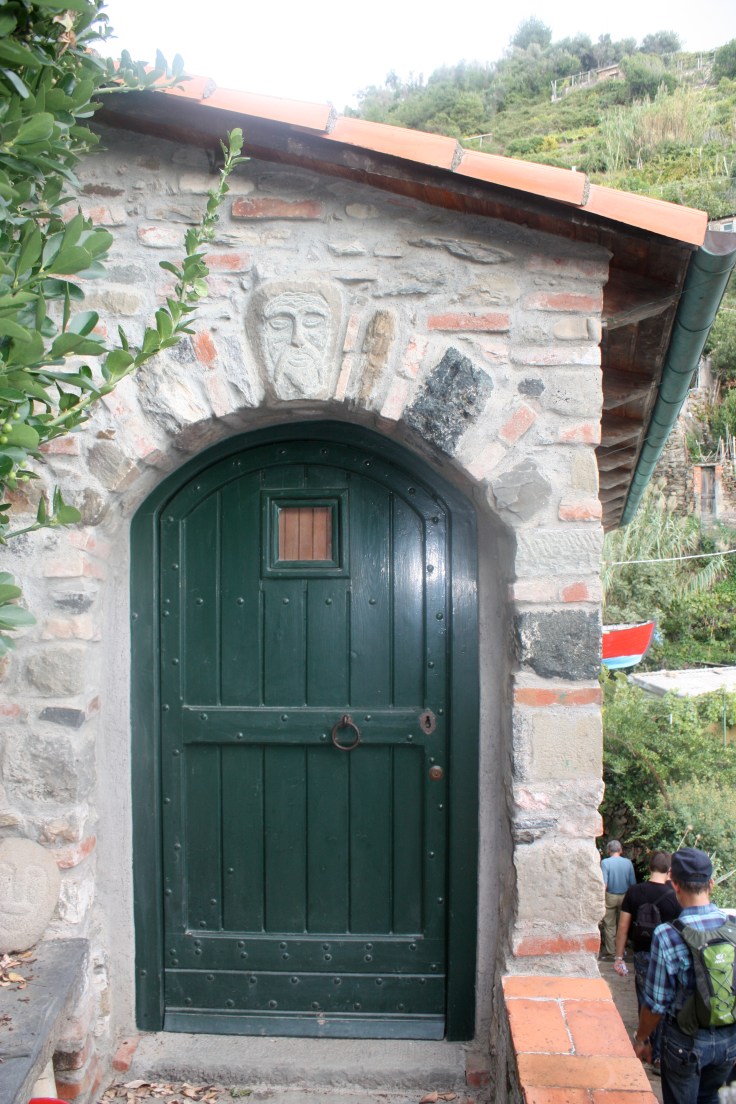
One of the villages of Cinque Terre, Italy…You can just see the boat poking out from the house on the right…it was built into this houseLove how this grey reads lavender
I’ve always wanted a red door
“I’m a door-to-door salesman. I sell doors. If I can’t knock on yours, because you don’t have a door to knock on, I know you’ll be interested in what I’m selling.”
― Jarod Kintz,
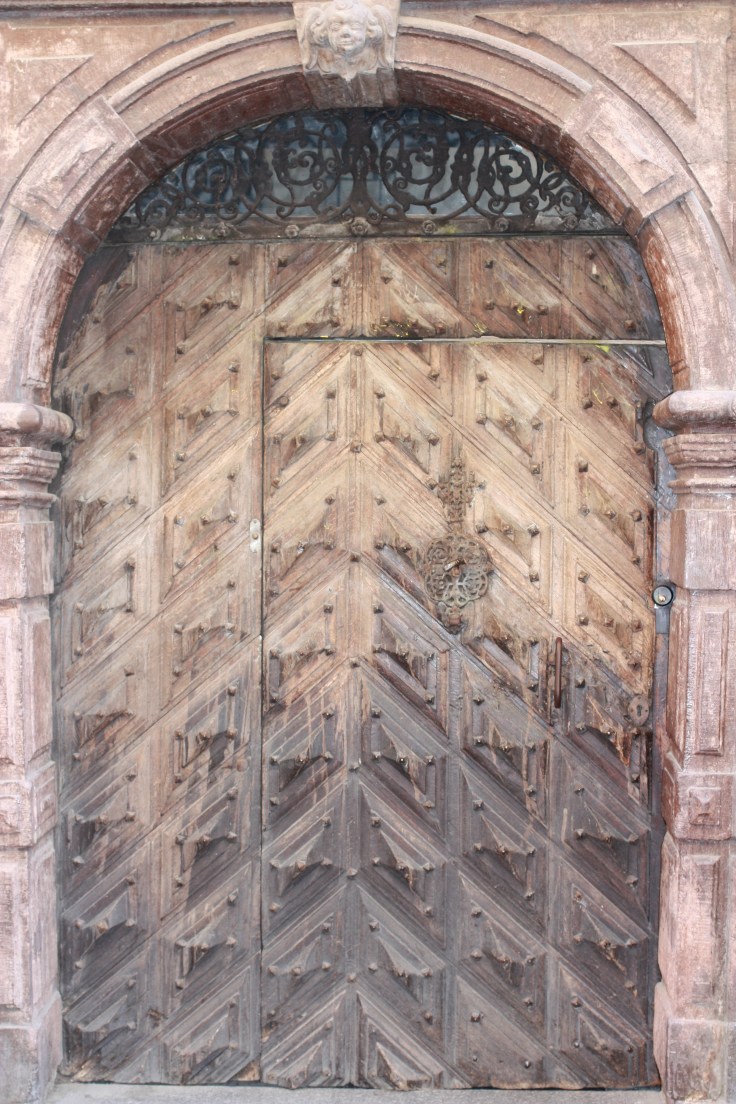
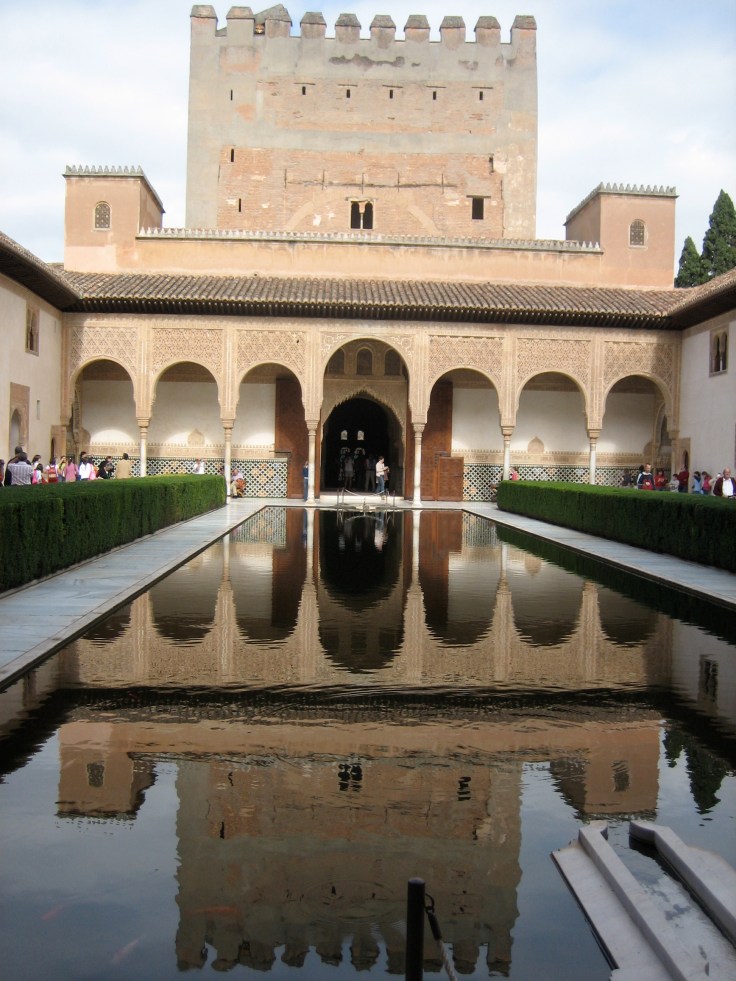
Castle door at Amberley Castle, England with a view into the inner courtyardNo mystery where this Venice canal doorway is locatedBruges…looks like this door is pretty oldThis Alhambra doorway is pretty distinctive as well
Home sweet home. Beautiful round door to my secret garden designed, engineered and built by the Handyman. Contemplating painting it so its roundness stands out more. It’s awaiting cast-iron metalwork latch
Secret garden’s back entrance…The superman door is also a Handyman invention
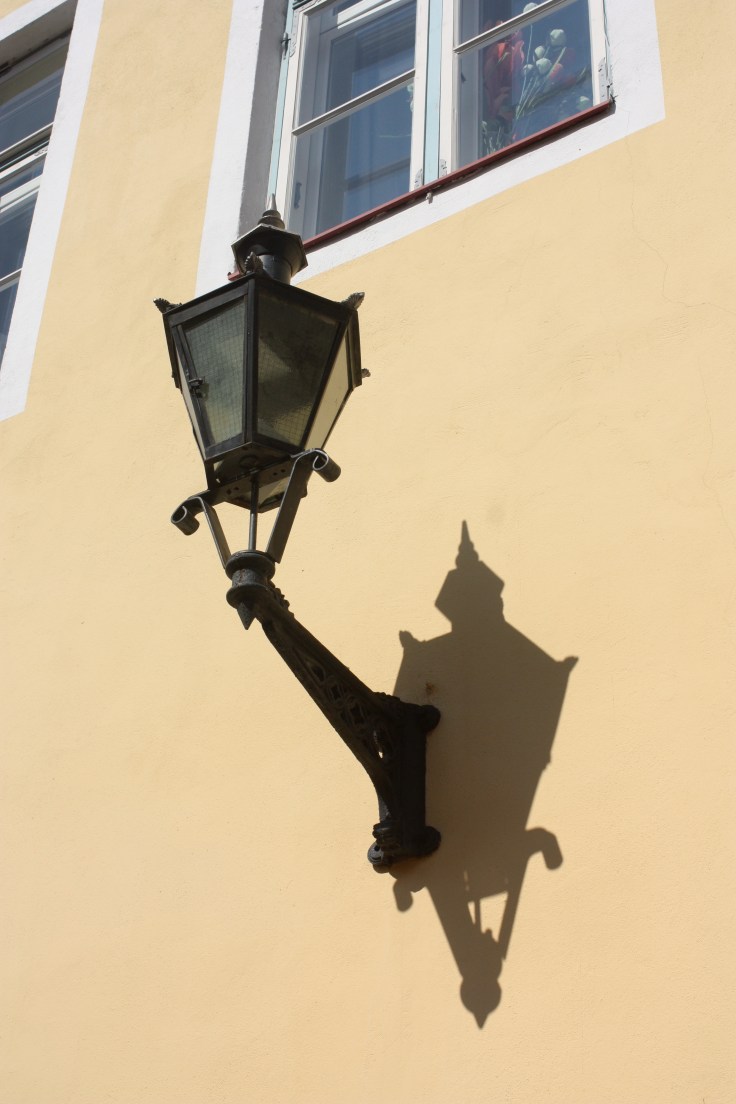
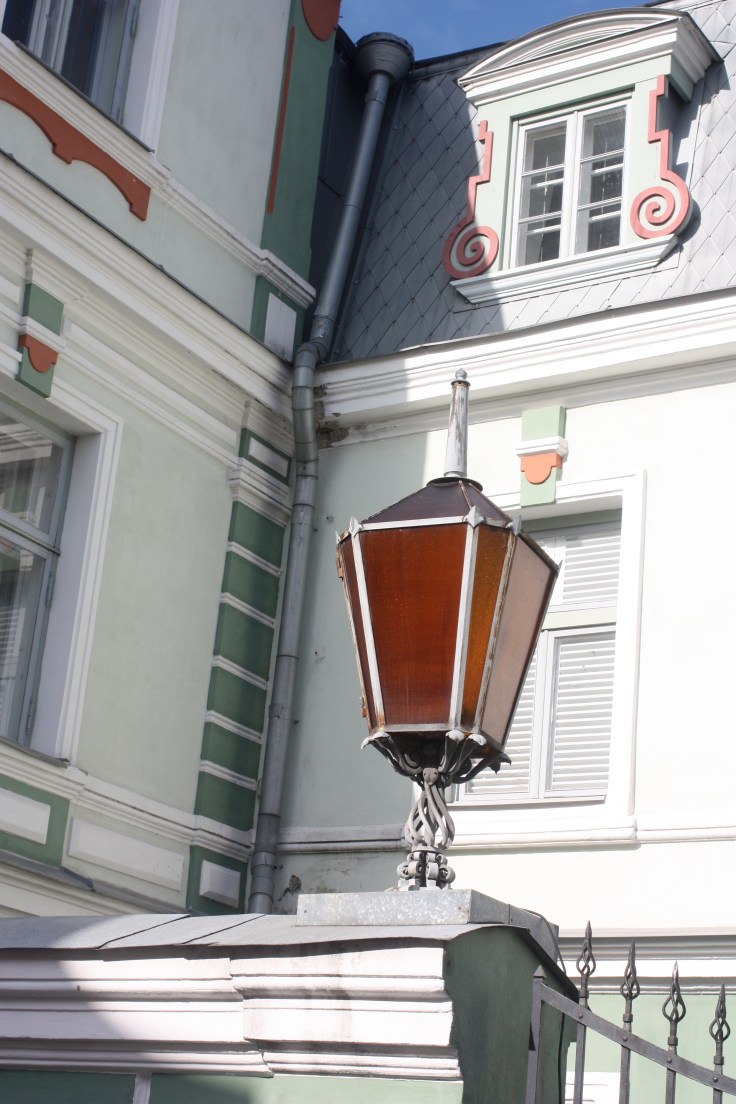
This is why Canadians go to Europe. Full stop. It’s a place where there is absolutely nothing utilitarian about pretty much anything. Here is a photo essay of lampposts in the Baltic’s that started with this photo in Stockholm. From then on I spotted the most beautiful photogenic lampposts and lanterns everywhere.
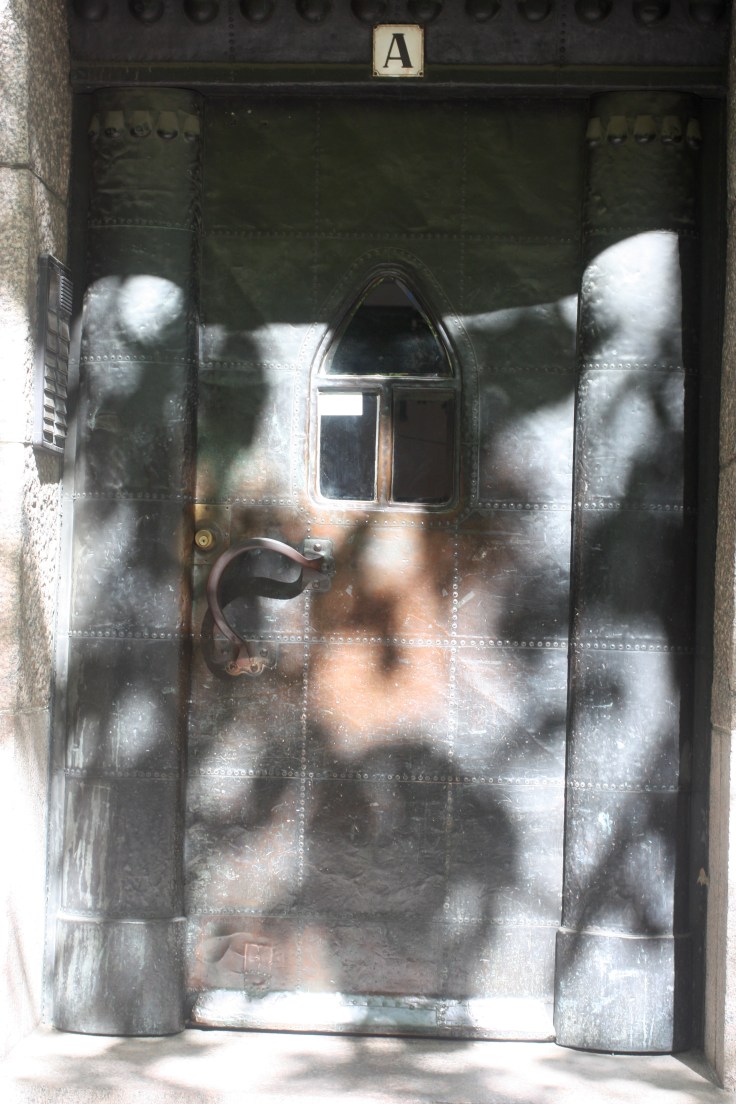
Even modern lighting looks pretty cool with this tower backdrop in TallinnI wonder if the maker knew about the shadows it would cast?
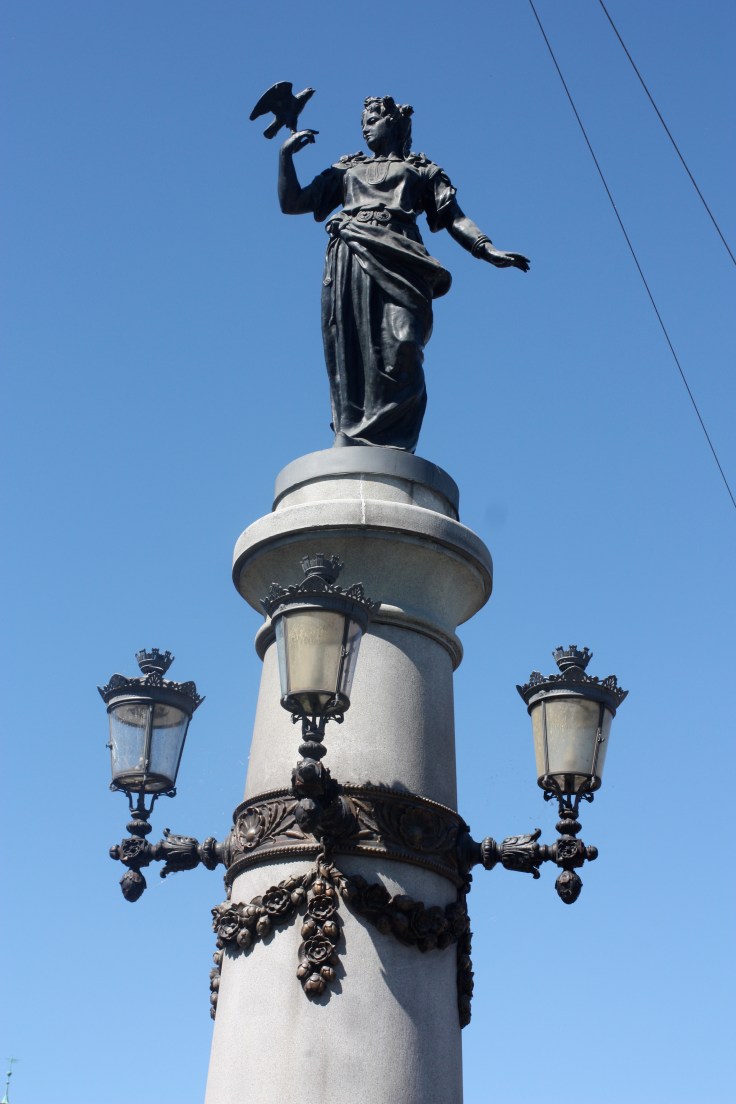
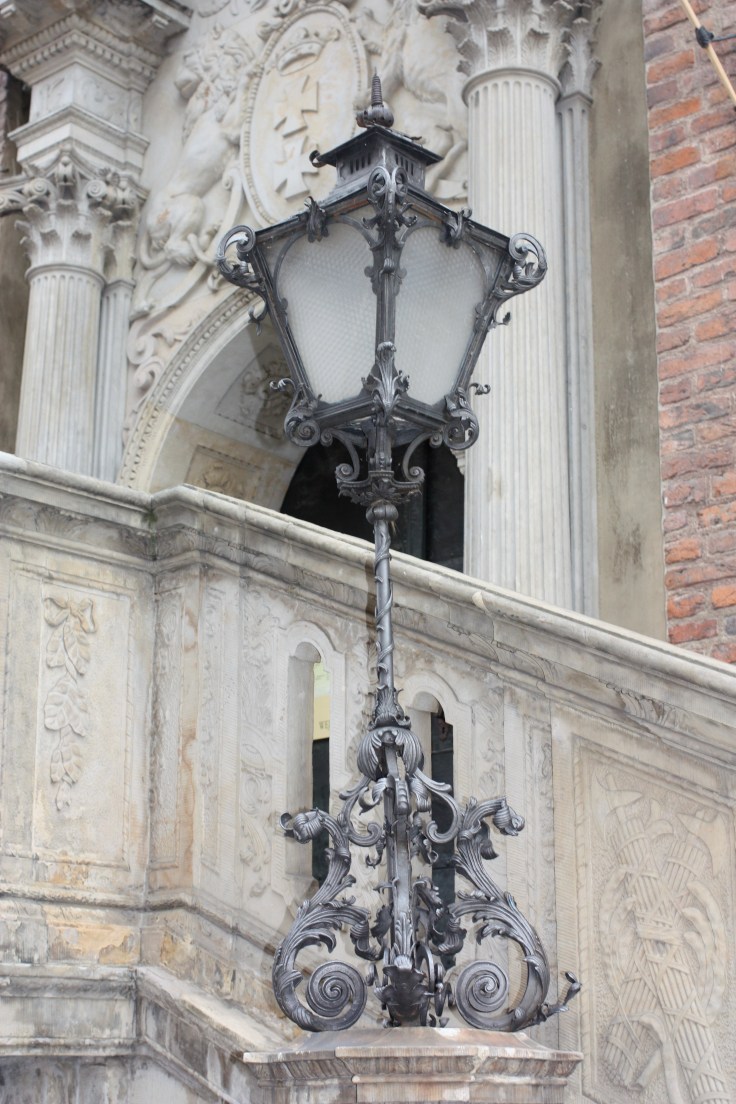
This beauty was in GdanskOver-the-top like everything else in St. Petersburg’s HermitageI wonder how long this Gdansk lamp took to make?
Bruges
TallinnOne thing leads to another when you start collecting…windows were next. This one is from an English pub.Copenhagen windowThen I started in on doors…I have many more for a future photo essay
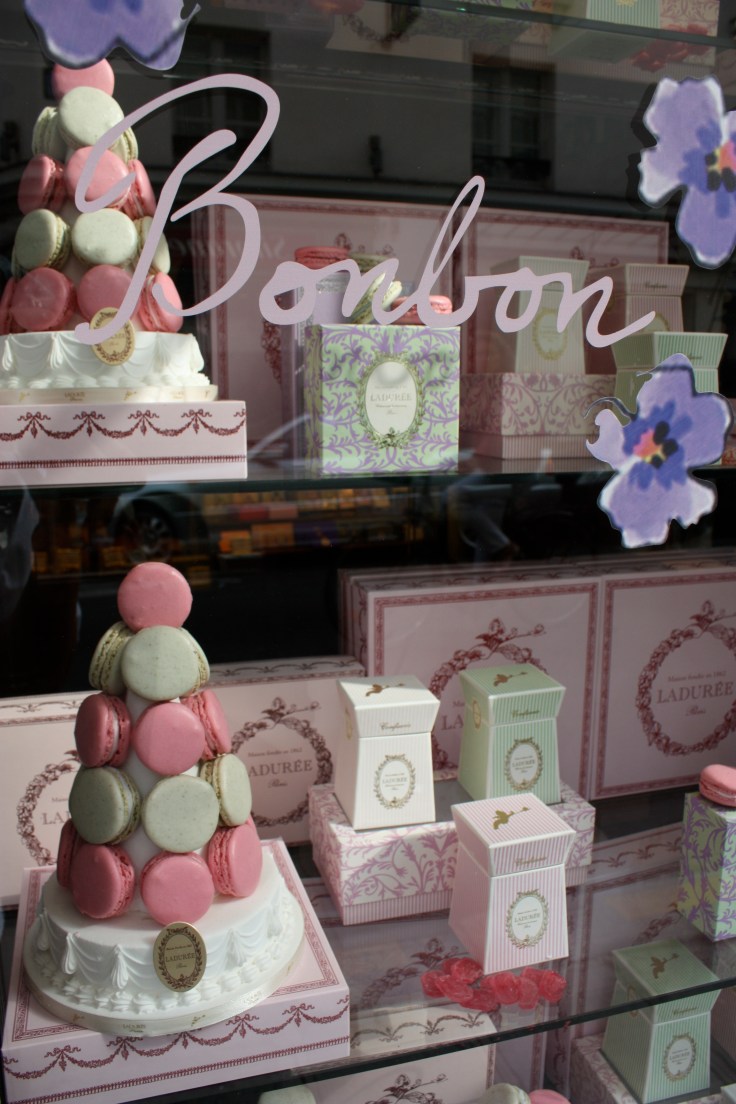
Paris’ famous Laduree’s first Canadian store recently opened in Vancouver and sparked this nostalgic post. Their Paris store window is one of the most beautiful I’ve ever seen. Can’t wait to see Vancouver’s this month.
With the idea that I’d rather spend my travel bucks on chocolate than a tour guide, which I’m not great at tolerating in any case, we found an online self-guidedwalking tour through Saint-Germain-des-Prés’ (6th arr.) most famous chocolate and pastry shops.
Stop one was Ladurée (21, rue Bonaparte). Get this…they invented the double-sided macaron — two almond meringue biscuits joined with various smooth ganache fillings. (This location on Bonaparte now houses their Secrets and Beauty store. Ladurée’s chocolate is now at 14, rue de Castiglione (1st. are.)). They have been in business since 1862.
The person that created this window display at Arnaud Larher at 57 Rue Damremont, must be a master at Jenga. I will help if I can eat all the broken ones.
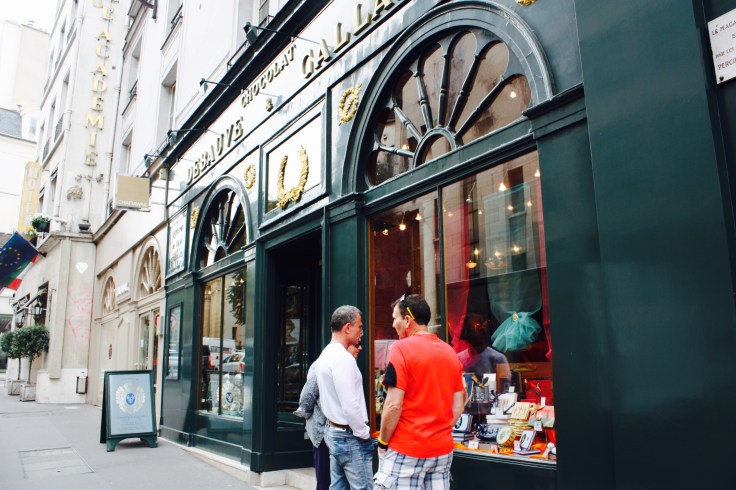
In case you’ve never tried a macaron, which kind of puts you in the category of never having heard of the Eiffel Tower, they come in an amazing array of melt-in-your-mouth flavours, including bitter chocolate, orange blossom, coffee, rose and my favourite, carmel with salted butter. After purchasing a beautifully boxed selection at Arnaud Larher, next up was Debauve & Gallais.
One more peak at the Laduree window…
A small conference regarding how many chocolates our suitcases will hold at the Debauve & Gallais window.
In operation at the same location (30, rue des Saints Pères) for more than 200 years, the boutique’s wood-panelled interior and semicircular chocolate counter momentarily distracted us from the chocolates. How chocolatey does this chocolate shop smell? Who says scent memory is strong?
One of each please. Signature items include chocolate pistoles, small discs of chocolate flavoured with yummy things like almond oil, bitter coffee, Bourbon vanilla and orange blossom.
How ironic. Debauve & Gallais started out as an 1800s health food store. The chocolate was used to make bitter medicines taste better and the chocolate was marketed as promoting vigour and health. Ok.
We also stopped in at Pierre Hermé at 72, rue Bonaparte, but by this time my camera was sticky with chocolate I had to focus solely on the pastries made by a fourth-generation pastry chef.
What? You guys eating chocolate? Street art on our walk in Saint-GermainAll that chocolate required some cafe.
After our four stops we got distracted by the street life and shopping and will have to go back to visit Gerard Mulot, Pierre Marcolini, and Chocolate de Neuville another time.
Lucky us, Ladurée has opened its first Canadian location on Robson Street in Vancouver. We are heading there in three weeks to run the marathon (Handyman) and the half (me) and plan to get a macaron fix after our run.
If you can’t make it to Paris or Vancouver, here is Ladurée’s recipe for Cake au Citron (lemon cake) which is flavoured with lemon…four ways…and a tiny bit of rum. It’s easy to make despite its fancy French heritage although be sure to poach your lemon slices the night before so they can soften nicely.
A “secret” Laduree lemon cake recipe
Poached lemon slices:
3 lemons
1 cup water
1/2 cup + 2 tbsp granulated sugar
Lemon cake batter:
5 tbsp + 1 tbsp unsalted butter
1 2/3 cups + 1 tbsp all-purpose flour
1 tsp active dry yeast
1 lemon
1 1/4 cups granulated sugar
3 eggs
1/2 cup minus 1 tbsp cream
1 pinch coarse sea salt
1 2/3 tbsp rum
Lemon syrup:
1/2 cup water
1/2 cup + 2tbsp granulated sugar
1/4 cup real lemon juice
Lemon glaze:
2 oz. lemon jelly (or apricot jelly if you can’t find lemon)
1 tbsp water
The night before baking, cut lemons into thin (2 mm) slices. Bring water and sugar to a simmer and add the slices. Poach over very low heat for 20 minutes. Don’t boil. Cool and then refrigerate for at least 12 hours.
Set aside six of the poached lemon slices for decoration. Drain the remaining slices and measure a 1/2 cup and cut each slice in half.
Butter a loaf pan, dust with flour and line with a rectangle of parchment paper to make the unmoulding easier.
Place the 5 tbsp of butter in a saucepan and melt over low heat.
Sift the flour and yeast into a small bowl. Grate the zest from the lemon and toss with the sugar in a large bowl. Add the eggs one at a time, while whisking. Continue to whisk and add the cream, salt and rum. Fold in the flour and yeast mixture, halved lemon slices and lukewarm melted butter.
Preheat oven to 410F. Fill the loaf pan with the batter to 2 cm below the rim. Place in the oven and bake for 10 minutes. Remove from the oven, and using a knife, make a slit lengthwise in the crust that has formed on top. You will use this slit to soak the cake in the lemon syrup later. Return the cake to the oven and then lower the oven temperature to 350F an bake for 45 minutes. When ready, a knife inserted in the cake should come out clean, dry and free of crumbs.
While the cake is baking, make the lemon syrup by bringing the water, sugar and lemon juice to a boil. Remove from heat.
Placing a cooling rack on a rimmed baking sheet. When the cake is done, remove from the mould and place on the rack. Bring the syrup to a simmer. Using a ladle, pour syrup over the cake and allow to soak in. Gather syrup from baking sheet and pour over cake. Repeat twice. Cool and then decorate with the reserved poached lemon slices.
To make the lemon glaze, stir together jelly and water. Lightly heat without boiling until the mixture is thick enough to coat the back of a spoon. Coat cake with glaze.


 Next up is the addition of 50 more blueberry bushes and a netting structure to protect the blueberries from the birds.
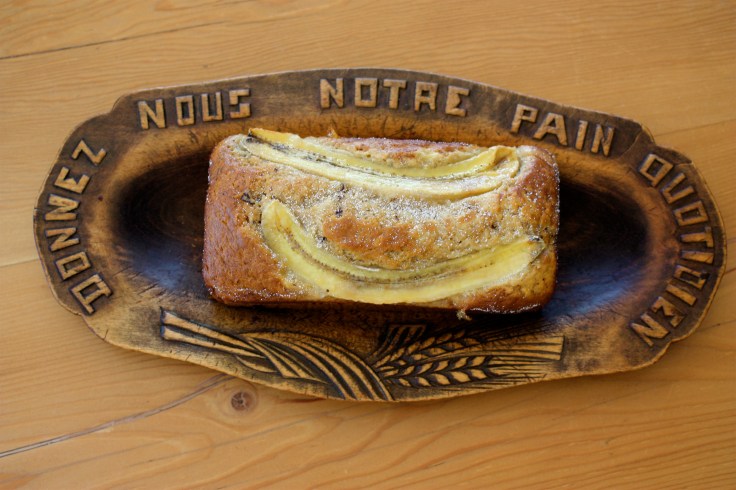
 Butter two loaf pans and line each with parchment paper, letting it hang over the sides.
 Place the banana halves on top of the batter and push them in lightly.
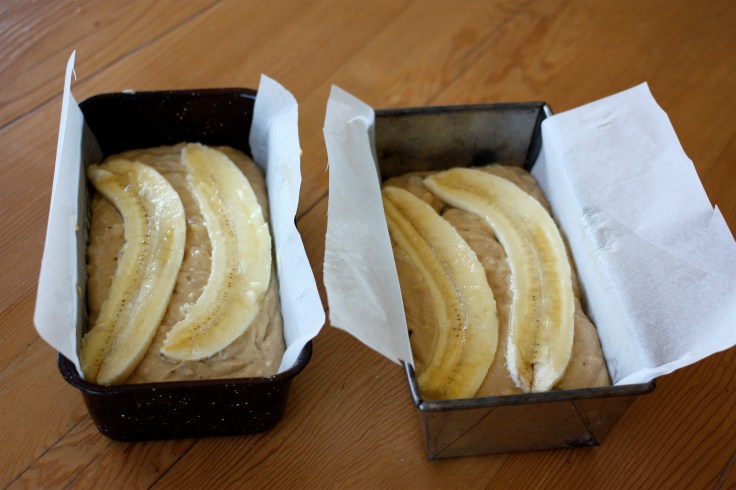
 Et voila. My French bread plate says, “Give us our daily bread.” Should have added in the word “banana”.


 Clients don’t seem to mind. His art is gracing walls in England, Japan, the United States, Ontario, Alberta and British Columbia.
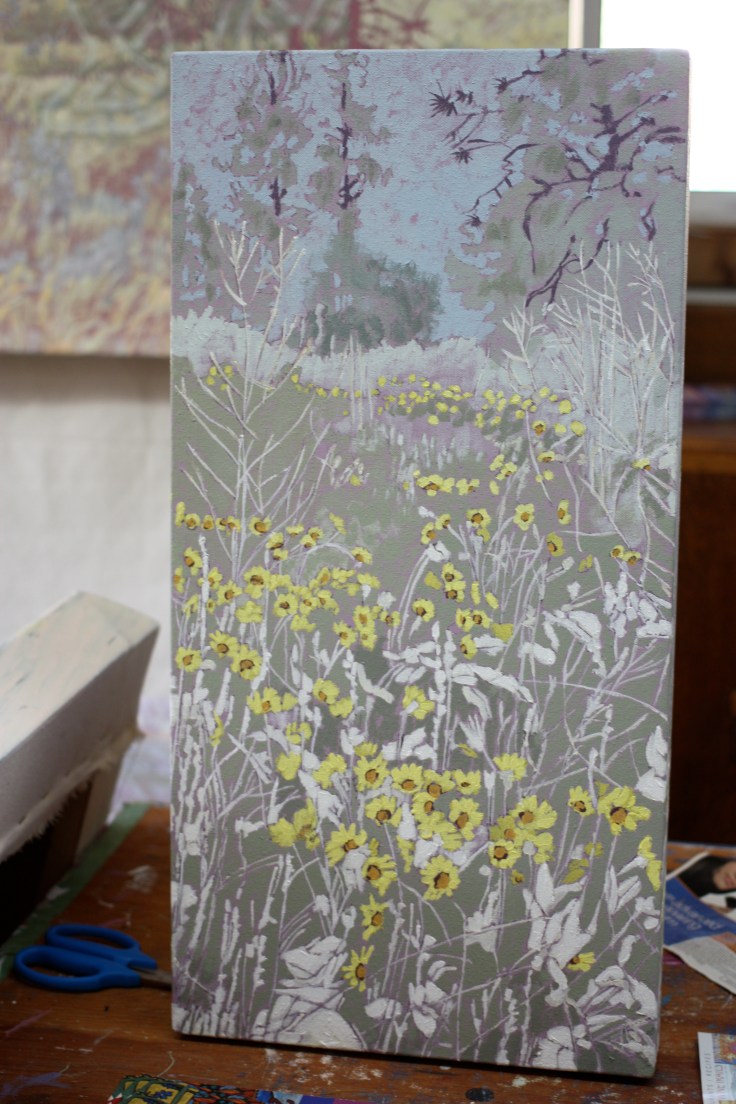


 This is why Canadians go to Europe. Full stop. It’s a place where there is absolutely nothing utilitarian about pretty much anything. Here is a photo essay of lampposts in the Baltic’s that started with this photo in Stockholm. From then on I spotted the most beautiful photogenic lampposts and lanterns everywhere.